This article explains removing library folder locations in the Windows Media Player app on Windows 11.
The Windows Media Player app is a built-in application that allows you to play various media files, such as videos, music, and images. It is a useful tool for managing and playing your media collection in Windows. It supports various file formats and offers basic playback controls such as play, pause, stop, rewind, and fast-forward.
By default, Windows will store video files in the Videos folder of your home directory and music files in the music folder of your home directory.
You can add folders containing your music and video files for the app to discover all your media. You can refresh and re-index your libraries if you are not seeing all your media from your library locations.
Library locations you add can be removed if you don’t want to play media from those locations.
There could be various reasons why someone would want to remove a library location from the Windows Media Player app. For instance, you might have added a folder containing media files you no longer want to play.
Alternatively, you may have accidentally added a folder and want to remove it to avoid clutter. Whatever the reason, removing a library location is straightforward and can be easily done within the app’s settings.
Remove library location in Media Player
As mentioned, if you add a library location and want to remove it, use the steps below.
First, open the Windows Media Player app.
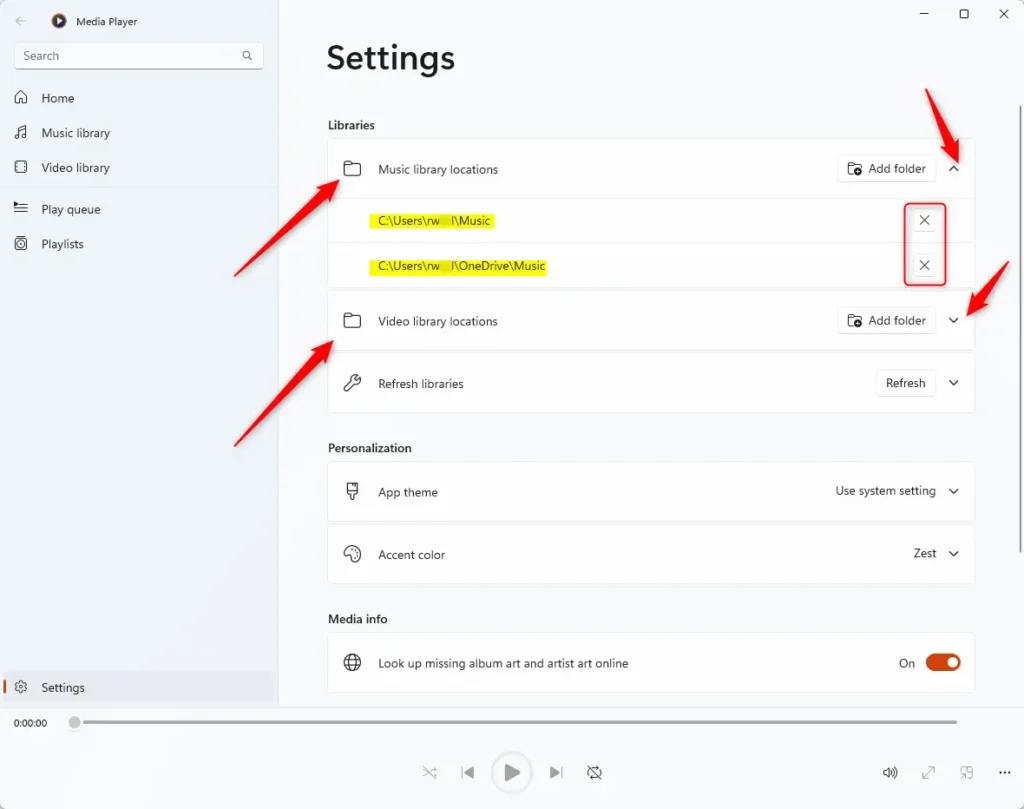
Then, click the Settings button on the left sidebar of the app.

Next, select the Music or Video library tile. Then, using the drop-down caret, expand the tile.
On the expanded tile, click the X button to remove a library location.

Exit the Settings page when you’re done.
That should do it!
Conclusion:
- The Windows Media Player app is a versatile tool for managing and playing media files on Windows 11.
- Users can easily customize their media collections by adding and removing library locations for music and video files.
- Following the simple steps outlined in this article, users can efficiently remove library locations from the Windows Media Player app, thus enhancing their media playback experience.

Leave a Reply