How to Use the Run as Command in Windows 11
You use the “Run as” command in Windows 11 to run a program or task using the permissions of another user, often an administrator.
This feature is really important for making system-wide changes or fixing problems that need special permissions, letting you bypass your current user’s limits.
For instance, you can use “Run as” to open a command prompt as an administrator. This is essential for running commands like `sfc /scannow` or managing network settings.
To access this feature, you typically right-click an executable file or shortcut and select “Run as administrator,” or choose a specific user account from the available options.
To run a program as a different user in Windows 11, right-click the file, select “Show more options,” then choose “Run as different user” or “Run as administrator.” Enter the required username and password to proceed. This lets you execute tasks with elevated privileges.
What is Run as?
The Run as command in Windows lets you open programs or files using a different user account, which is handy if you need to perform a task that requires special permissions.
You can use Run as with many file types. This includes programs (.exe), scripts (.bat or .cmd), management tools (.msc), and installers (.msi).
How to Use Run as in File Explorer
You can easily use the Run as command from File Explorer by holding the SHIFT key, right-clicking the file, and choosing ‘Run as different user’ or ‘Run as administrator’.
- Open File Explorer by pressing
Win + E. Open File Explorer - Find the program or file you want to run (like a
.exeor.batfile). - Hold down the
SHIFTkey on your keyboard. - Right-click the file. Then click Show more options.
- Choose Run as different user or Run as administrator from the menu. FLAG: Running as administrator requires admin privileges.
- Enter the username and password of the account you want to use. Then click OK.
Right-click menu to run as different user or administrator
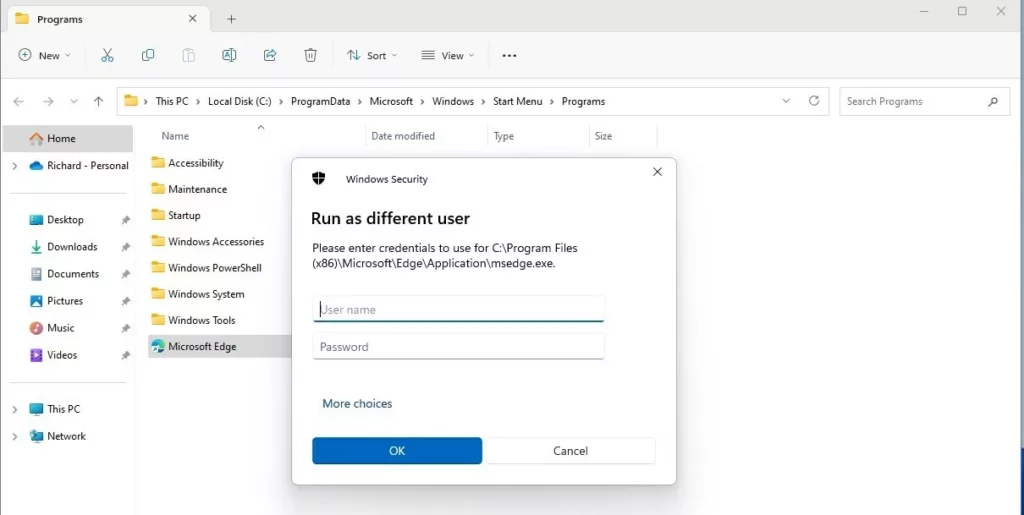
Enter username and password to run as different user
How to Use Run as from the Taskbar
Using the Run as command from the Taskbar is simple: just hold down SHIFT, right-click the app icon, and select ‘Run as different user’ or ‘Run as administrator’.
- Hold the
SHIFTkey. - Right-click the app’s icon on the Taskbar.
- Click Run as different user or Run as administrator. FLAG: Running as administrator requires admin privileges.
- Type the username and password. Then click OK.
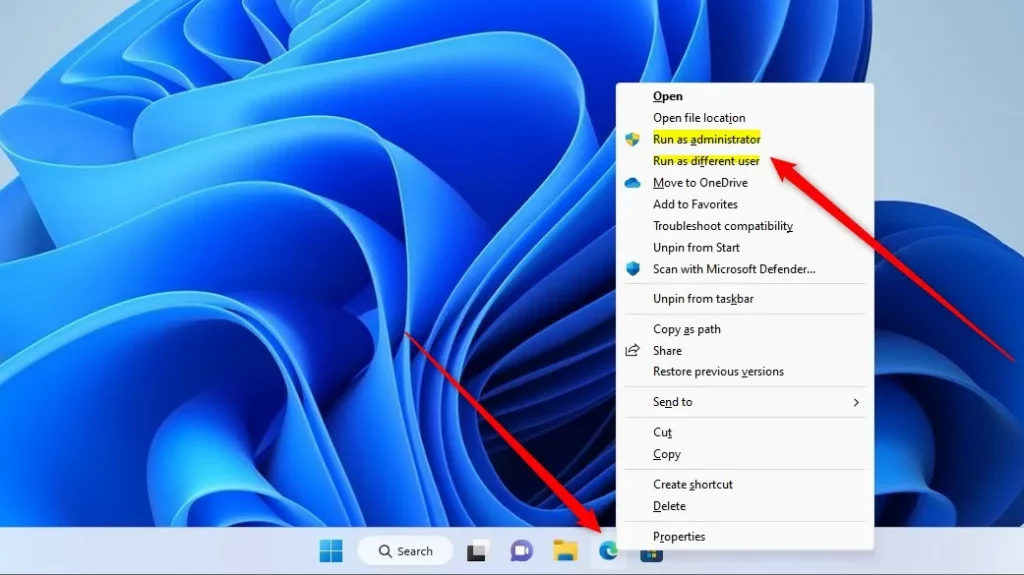
Run as different user or administrator from the Taskbar
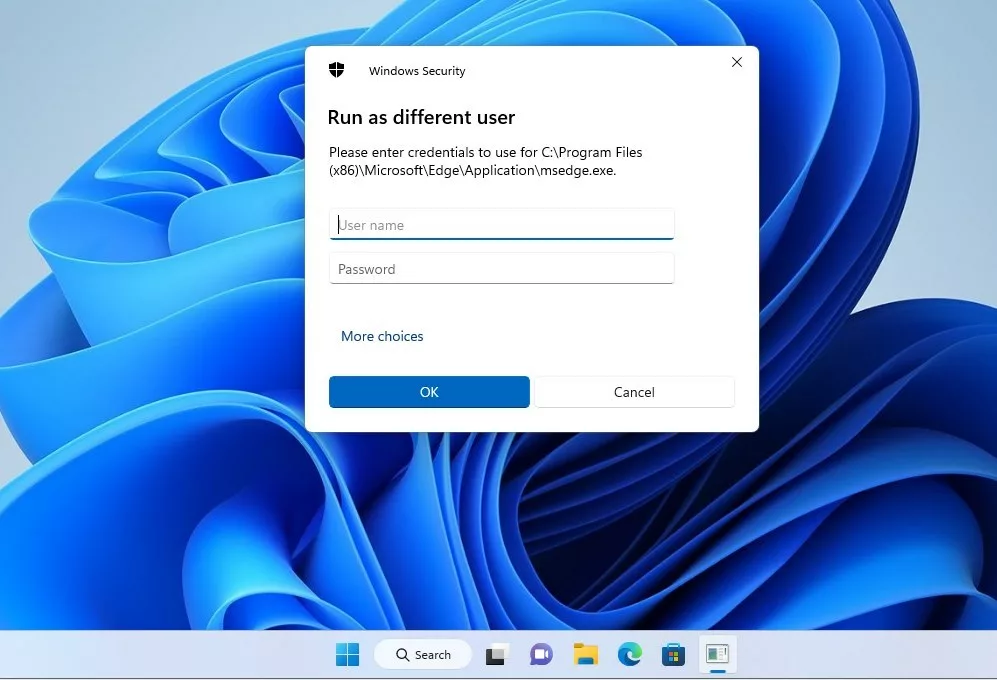
Enter credentials to run program as different user
How to Use Run as from Command Prompt or PowerShell
To use the Run as command in Command Prompt or PowerShell, type ‘runas /user:”username” “Full path to the program or file”‘ and press Enter.
- Open Command Prompt or PowerShell. Command Prompt or PowerShell
- Type the following command:
runas /user:"<username>" "Full path to the program or file"Example:
runas /user:"user123" "C:\Users\user123\Documents\file.txt"If you are on a work or school network (domain), use this format instead:
runas /user:"domain\user123" "C:\Users\user123\Documents\file.txt"Other Notes
You can also try this from the Start menu. Right-click apps in the All Apps list. However, some apps (like the Windows Store) won’t let you run as a different user.
Summary
The Run as command in Windows lets you run programs or files as a different user, like an administrator, and you can use it from File Explorer, the Taskbar, or the command line.- Run as lets you open programs or files as another user or administrator.
- You can use it in File Explorer, the Taskbar, Command Prompt, or PowerShell.
- This is useful when you need admin rights but are logged in as a regular user.
- The Windows Store app does not support running as a different user.
Learn More
For more details, check out the official Microsoft guide: Microsoft.com – Use Run as to start an app as admin
What's the difference between sudo and runas?
The Run as command in Windows lets you run programs or files as any user, including an administrator, and it always asks for the target user’s password, unlike sudo which is for Linux/macOS.
Was this guide helpful?

About the Author
Richard
Tech Writer, IT Professional
Richard, a writer for Geek Rewind, is a tech enthusiast who loves breaking down complex IT topics into simple, easy-to-understand ideas. With years of hands-on experience in system administration and enterprise IT operations, he’s developed a knack for offering practical tips and solutions. Richard aims to make technology more accessible and actionable. He's deeply committed to the Geek Rewind community, always ready to answer questions and engage in discussions.

No comments yet — be the first to share your thoughts!