How to Use the Pen to Erase Ink in Windows 11
If you use a digital pen with your Windows 11 device, you can set it up so that the eraser end of the pen erases ink or drawings on your screen. This guide will show you simple steps to turn that feature on or off.
Before You Start: Pair Your Pen with 🪟 Windows 11
Make sure your pen is paired with your Windows 11 device via Bluetooth. If you haven’t done this yet, you can follow this easy guide to pair your pen: How to Pair Pen with Windows 11.
Step 1Open Windows Settings
You can open the Settings app in two ways:
- Click the Start menu button (Windows icon at the bottom left), then click Settings.
- Or press Windows key + I on your keyboard at the same time.
Here’s what the Settings icon looks like:
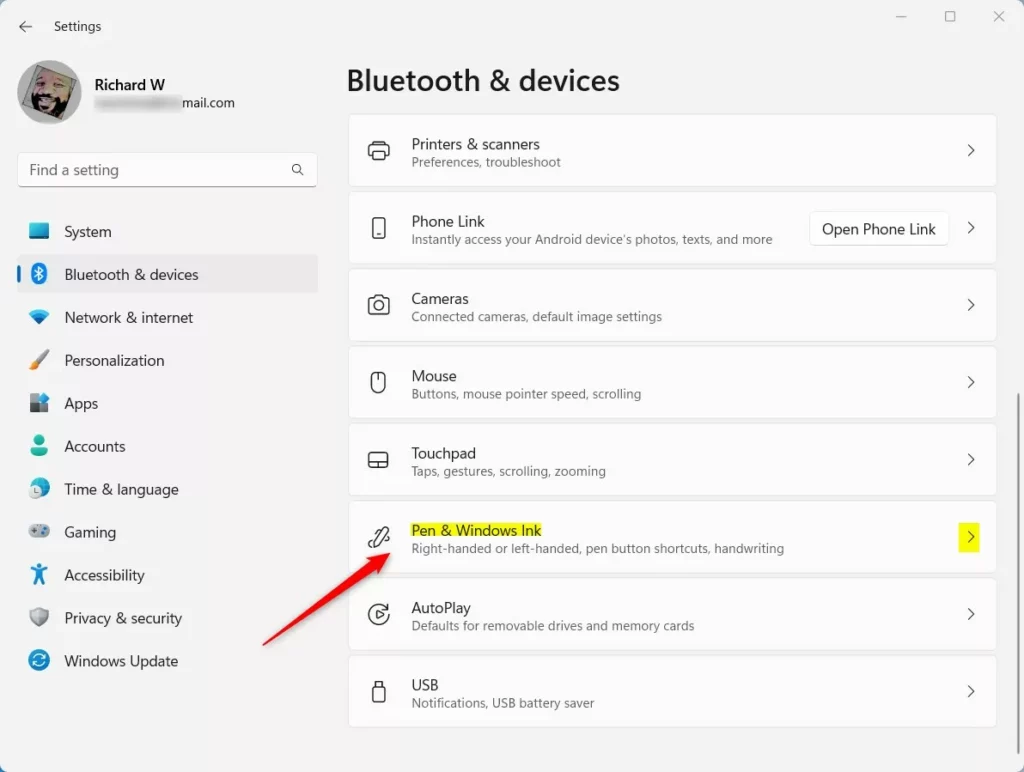
Step 2Go to Pen & Windows Ink Settings
Once inside Settings, do the following:
- On the left menu, click Bluetooth & devices.
- On the right side, find and click Pen & Windows Ink.
Step 3Enable “Use the top of the pen to erase ink”
Scroll down and click on Additional pen settings to open more options.
Look for the option that says Use the top of the pen to erase ink when it’s available.
Check the box next to it to turn it ON.
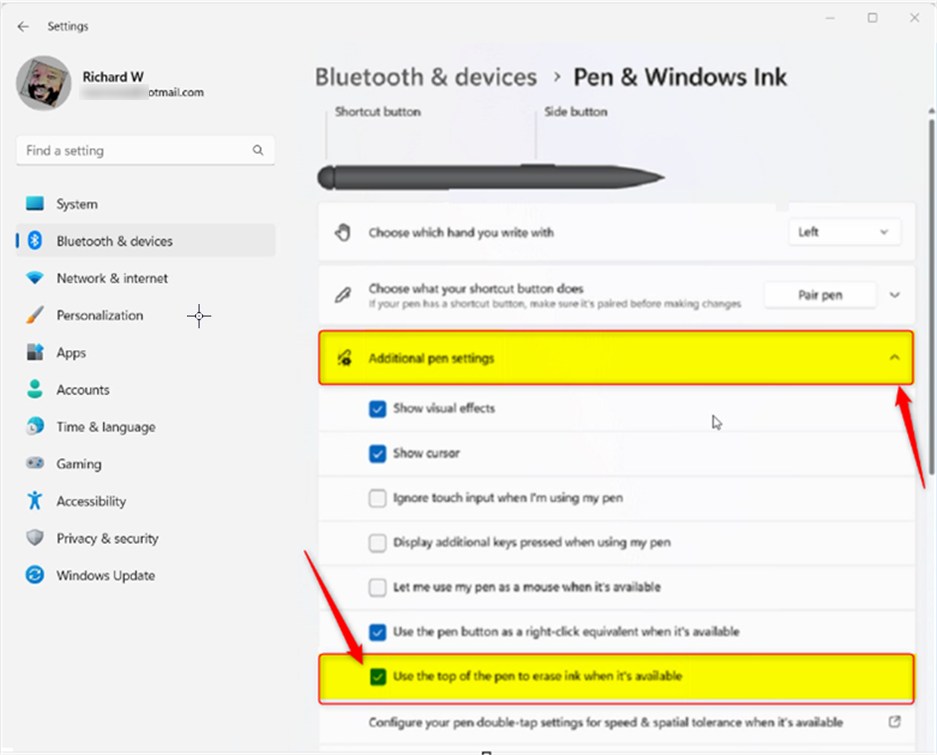
If you want to turn off this feature later, just uncheck the box .
When you’re done, you can close the Settings app.
Optional: Use Windows Registry Editor to Turn This Feature On or Off
If you like, you can also change this setting using a tool called the Windows Registry Editor. This is a bit more advanced, so follow carefully.
How to Open Registry Editor
⚠️ Admin privileges required for this section.
Press Windows key + R, type regedit, and press Enter.
Navigate to this folder (called a “key”):
HKEY_CURRENT_USER\Software\Microsoft\Wisp\Pen\SysEventParametersIf you don’t see the SysEventParameters folder, here’s how to create it:
- Right-click on the Pen folder.
- Select New > Key.
- Name the new key SysEventParameters.
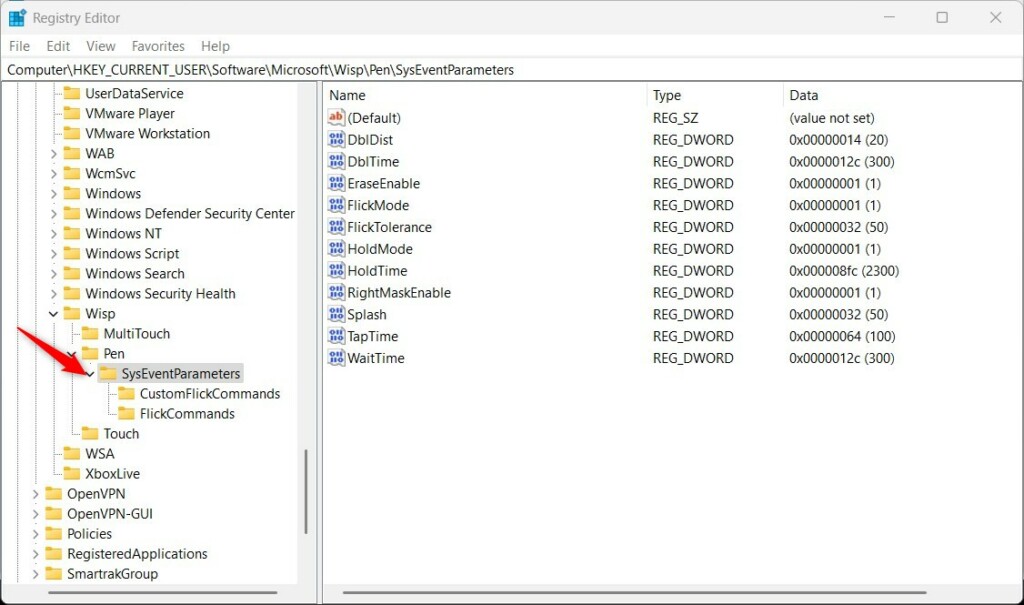
Next, inside the SysEventParameters folder:
- Right-click on the right side area.
- Choose New > DWORD (32-bit) Value.
- Name it EraseEnable.
- Double-click EraseEnable, set the Base to Decimal, and enter:
1to turn ON the erase feature.0to turn OFF the erase feature.

After changing this, close Registry Editor and restart your computer for the change to take effect.
Summary
Windows 11 lets you customize your pen for a better experience. You can easily turn on the feature to erase ink by flipping your pen around (using the eraser end). Use the Settings app for a simple way, or the Registry Editor if you prefer a more hands-on method. Visit the official Microsoft guide here: Change Pen Settings in Windows 11.
Was this guide helpful?

About the Author
Richard
Tech Writer, IT Professional
Richard, a writer for Geek Rewind, is a tech enthusiast who loves breaking down complex IT topics into simple, easy-to-understand ideas. With years of hands-on experience in system administration and enterprise IT operations, he’s developed a knack for offering practical tips and solutions. Richard aims to make technology more accessible and actionable. He's deeply committed to the Geek Rewind community, always ready to answer questions and engage in discussions.


No comments yet — be the first to share your thoughts!