

This article explains how to update Windows 11 to the latest updates to keep your devices running smoothly and securely.
When you update Windows 11, you’ll get the latest fixes and security improvements, helping your device run efficiently and stay protected.
Windows 11 comes with Windows Updates enabled and will update your computer automatically when connected to the internet. In most cases, you don’t do anything to get updates for your computer. You can also decide when and how to get the latest updates to keep your device running smoothly and securely.
Select the Start button to manage your options and see available updates, and then go to Settings > Windows Update. You can check for updates and install the latest update, or choose the best time to download the update.
To get started with updating Windows 11, follow the steps below:
How to manually update Windows 11
Windows 11 is designed and built to update itself automatically out of the box. When Windows Updates work, new updates will be downloaded in the background and prompt you to install when ready.
However, some updates are known as future updates that are not automatically downloaded and installed. You must go to the Windows Updates settings pane and manually download and install them.
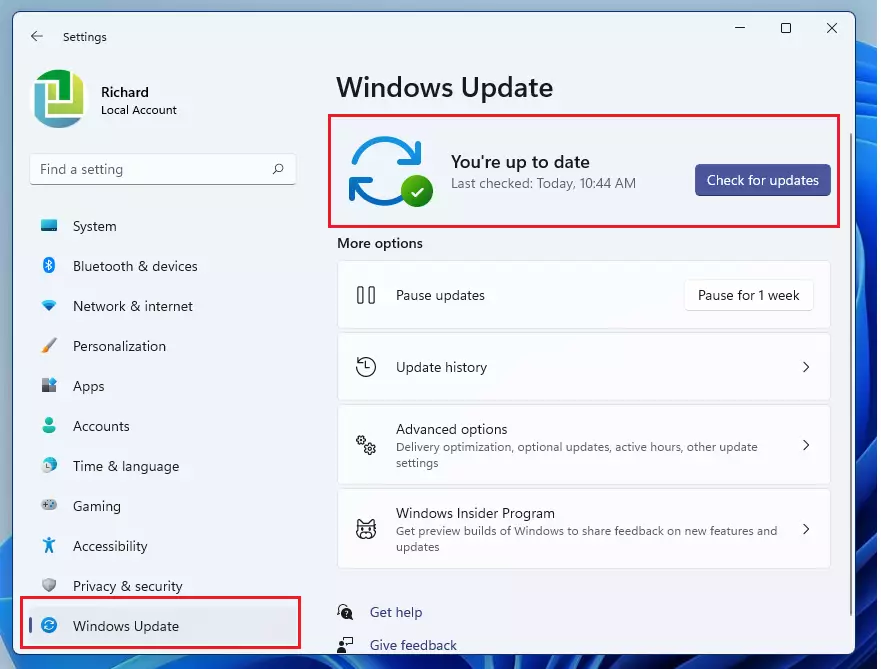
To install the new release, click the Start menu and select Settings as highlighted below.

On the Settings pane, select Windows Updates on the left menu item, then make sure you don’t have pending updates. Clicking the Check for Updates button ensures that all installed updates are done automatically.
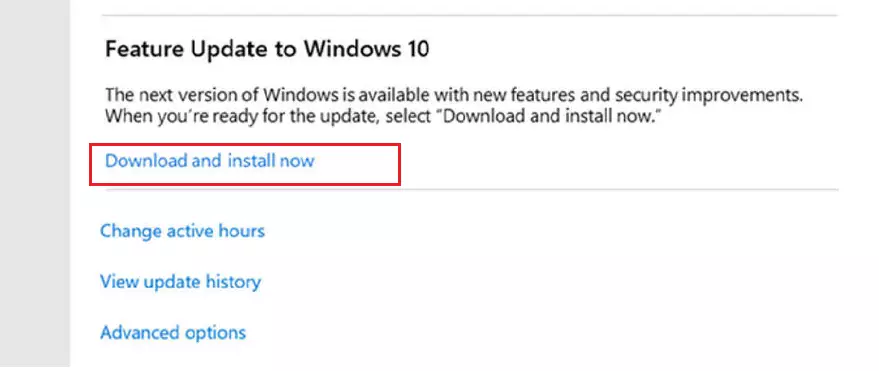
If a feature update appears, select Download and Install to get started.
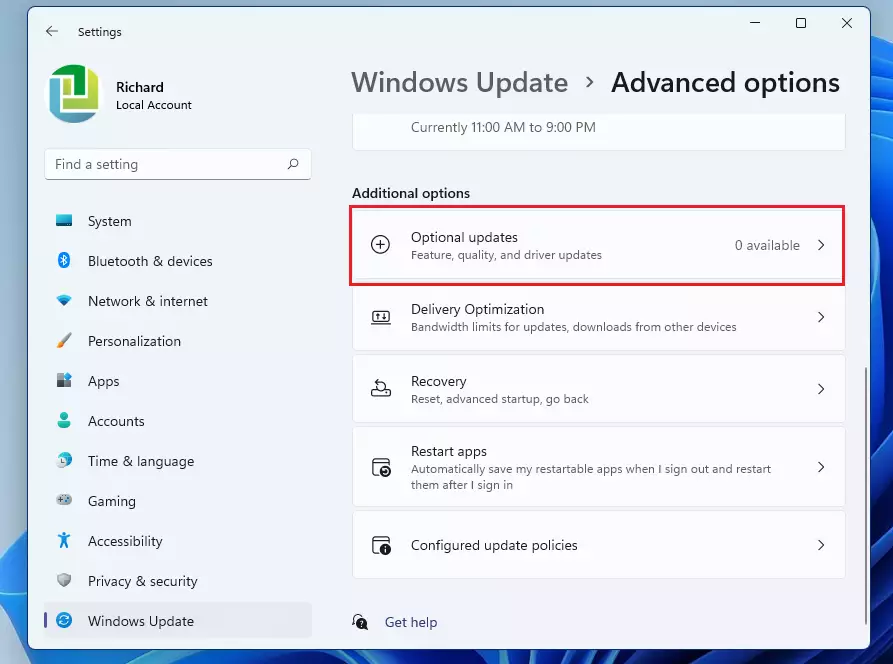
Optional updates are also available for download. In the Windows Updates settings pane, click the Advanced option. From there, select Optional Updates to view updates that were not automatically downloaded and installed.
Once the download is complete and the update is ready to install, we’ll notify you so that you can pick the right time to finish the installation and reboot your device, ensuring that the update does not disrupt your activities.
That should do it!
Conclusion:
- Regularly updating Windows 11 is essential for maintaining device performance and security.
- Automatic updates help simplify the process, ensuring you receive important fixes without manual effort.
- Manual checks for updates can catch any releases that do not install automatically.
- The option to manage update timings allows for flexibility, minimizing disruptions during your workflow.
- Staying up-to-date enhances security and improves system stability and access to new features.

Leave a Reply