

This post describes steps to turn On or Off “Set time automatically” in Windows 11.
The “Set time automatically” feature in Windows allows your PC to synchronize its clock automatically with an internet time server. This feature ensures that your computer’s clock is always accurate and up-to-date.
When this feature is turned on, your PC will automatically adjust its clock based on your selected time zone and the time server. This can be convenient, especially if traveling or frequently switching time zones.
When you create or modify files, your Windows clock records events and Time with those events. Time helps you record events from the past through the present and future and compare the events’ duration or the intervals between them.
So, having the correct time is essential for the machine’s operation.
How to turn on or off “Set the Time automatically” in Windows 11
As mentioned above, you can automatically turn On or Off Set Time in Windows. If you don’t allow Windows to set the system time automatically, you must set it manually.
Below is how to enable or disable it.
Windows 11 has a centralized location for the majority of its settings. As a result, everything can be done, from system configurations to creating new users and updating Windows from its System Settings pane.
To get to System Settings, you can use the Windows key + I shortcut or click on Start ==> Settings, as shown in the image below:

Alternatively, you can use the search box on the taskbar and search for Settings. Then select to open it.
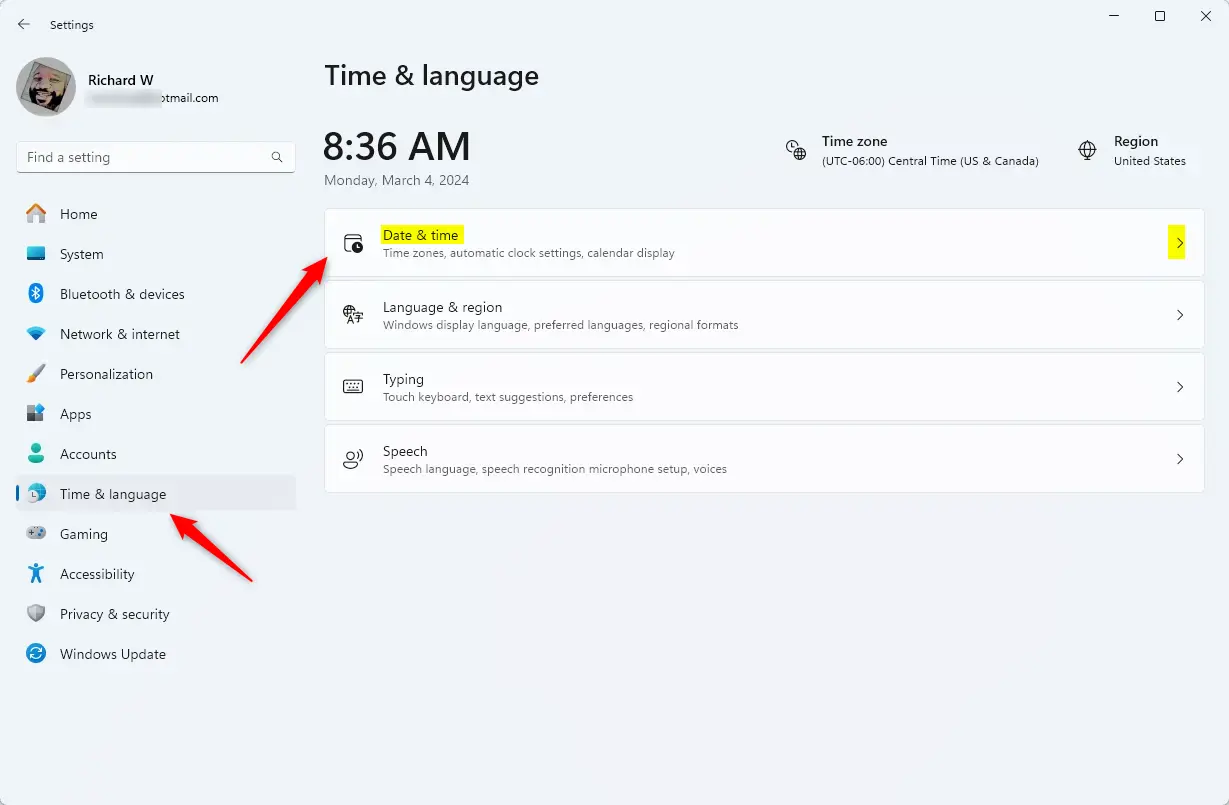
On the Windows Settings app, click the Time &Timeguage on the left, then select the Date & time tile on the right pane to expand it.
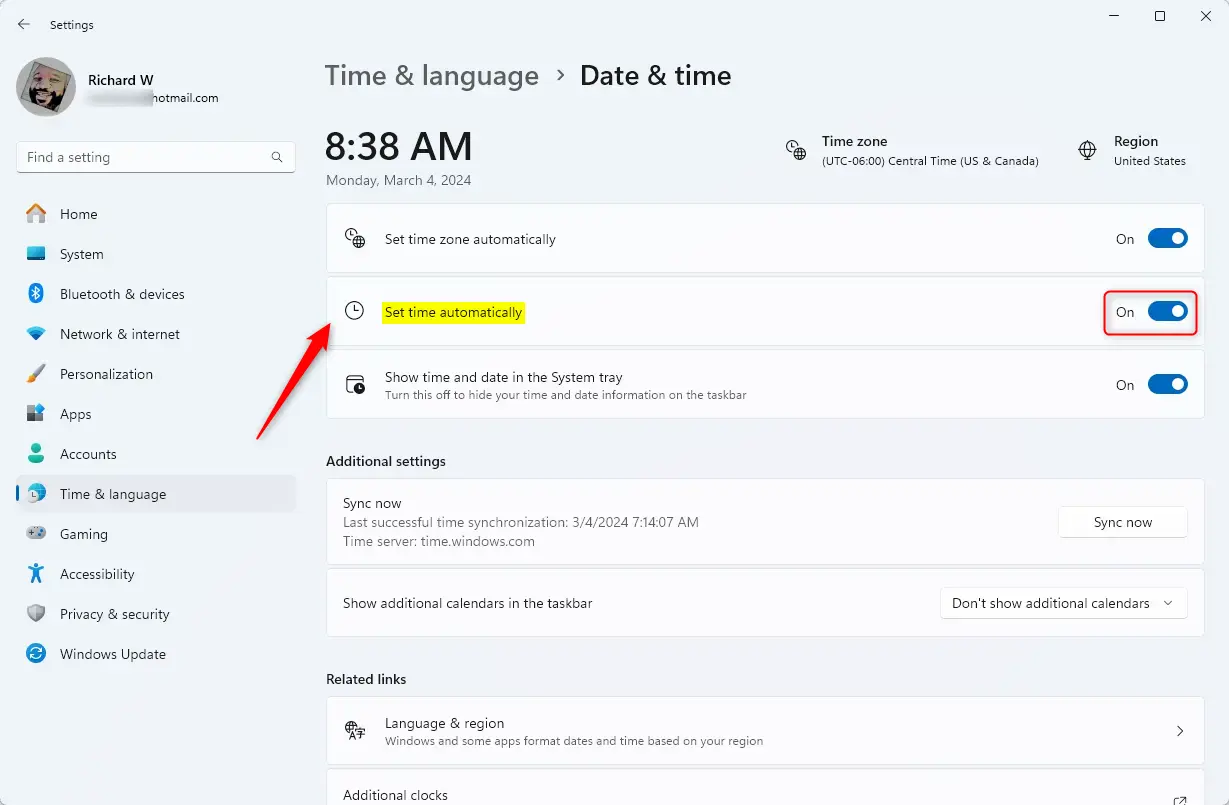
On the System > Time & language > Date & time settings pane, select the “Set time automatically” tile. Then, toggle the switch button to the On position to allow Windows to set the Time automatically.
To turn it off, toggle the switch button to the Off position.
That should do it! You can now close the Windows settings app.
Set Time automatically using the Windows Registry
Another way to allow Windows to set the Time automatically is to use the Windows Registry editor.
First, open the Windows Registry and navigate to the folder key path below.
Computer\HKEY_LOCAL_MACHINE\SYSTEM\CurrentControlSet\Services\W32Time\Parameters
Next, double-click the Type (REG_SZ) name on the Parameters key’s right pane to open it.
Then, use the values below to adjust the time settings in Windows
- NTP – allows Windows to set the Time automatically.
- NoSync – allows you to set the Time.
If you do not see the “Type” item, right-click a blank area and create a new String registry item.
Then, enter the name “Type” and the value you want.
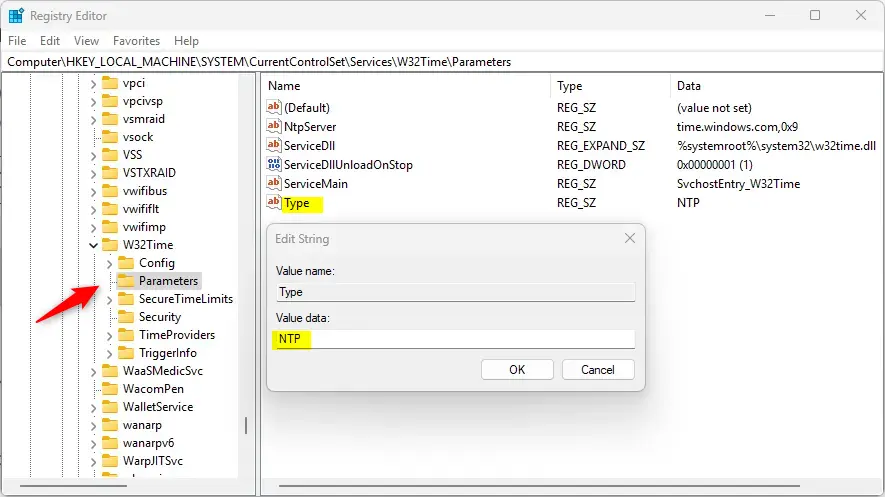
Save your changes and restart your computer.
Conclusion:
- Enabling or disabling the “Set time automatically” feature in Windows 11 is crucial for ensuring your computer’s clock is accurate and up-to-date.
- You can easily manage this setting through the Windows Settings app by navigating to System > Time & language > Date & time, and toggling the “Set time automatically” switch.
- Alternatively, the Windows Registry editor provides another method for adjusting the time settings, offering more control over the process.
- Whichever method you choose, ensuring the correct time on your machine is essential for its seamless operation and accurate event recording.

Leave a Reply Cancel reply