How to Enable or Disable Mouse Pointer Shadow in Windows 11
You can enable or disable the mouse pointer shadow in Windows 11 to improve visibility on your screen.
The mouse pointer shadow is a subtle visual effect that adds a dark outline beneath your cursor, making it easier to track, especially on high-resolution or multiple monitors.
This simple setting can significantly improve your user experience if you find the standard Windows 11 pointer difficult to locate.
By default, Windows 11 uses a small, white mouse pointer, which can blend into backgrounds. Adding a shadow provides a much-needed contrast.
Enable the mouse pointer shadow in Windows 11 by opening Settings, navigating to Bluetooth & devices > Mouse > Additional mouse settings, and checking “Enable pointer shadow” on the Pointers tab. This makes the cursor easier to see, especially on large displays.
Steps to Turn On Mouse Pointer Shadow
Turning on the mouse pointer shadow in Windows 11 is simple and can make your cursor easier to see.
- Open Windows Settings:
- Press Windows key + I on your keyboard.
- Or click the Start button, then click Settings.
windows 11 start menu settings updated - Go to Mouse Settings:
- In the Settings window, click Bluetooth & devices on the left side.
- Then click Mouse on the right.
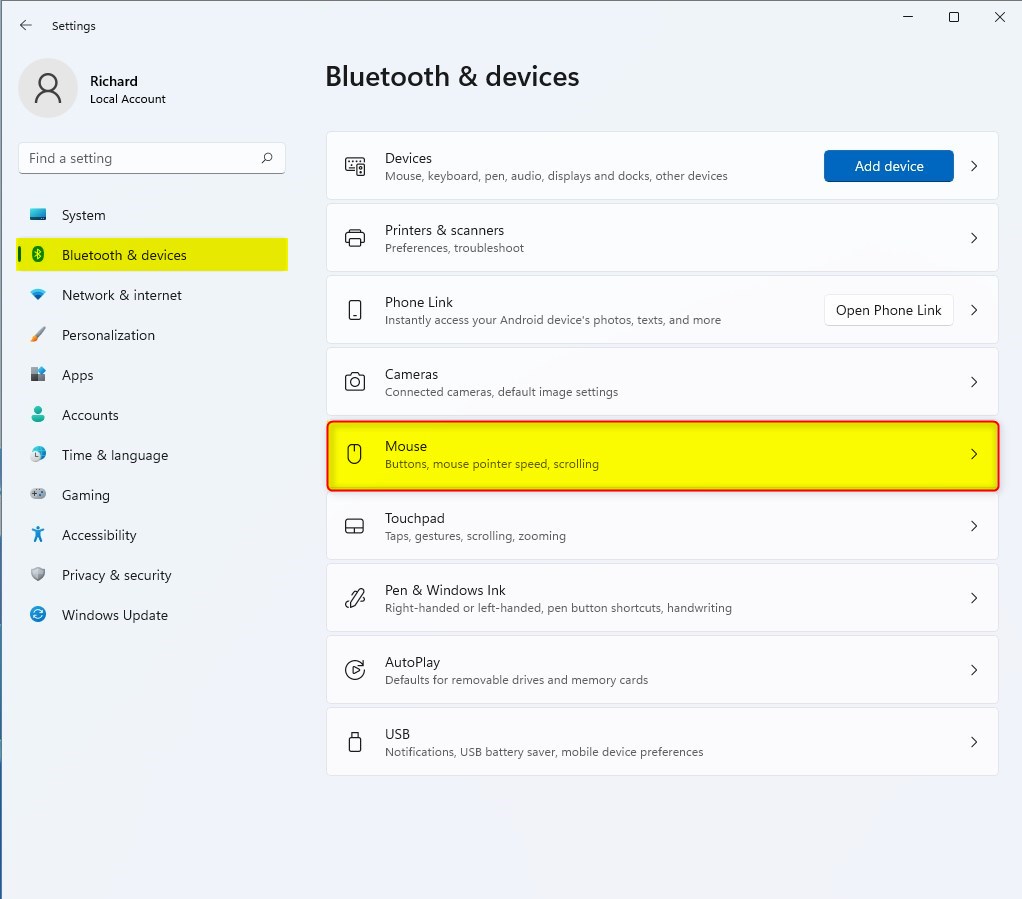
windows 11 mouse tile - Open Additional Mouse Settings:
- Scroll down and click Additional mouse settings under Related settings.

windows 11 mouse additional settings - Enable Pointer Shadow:
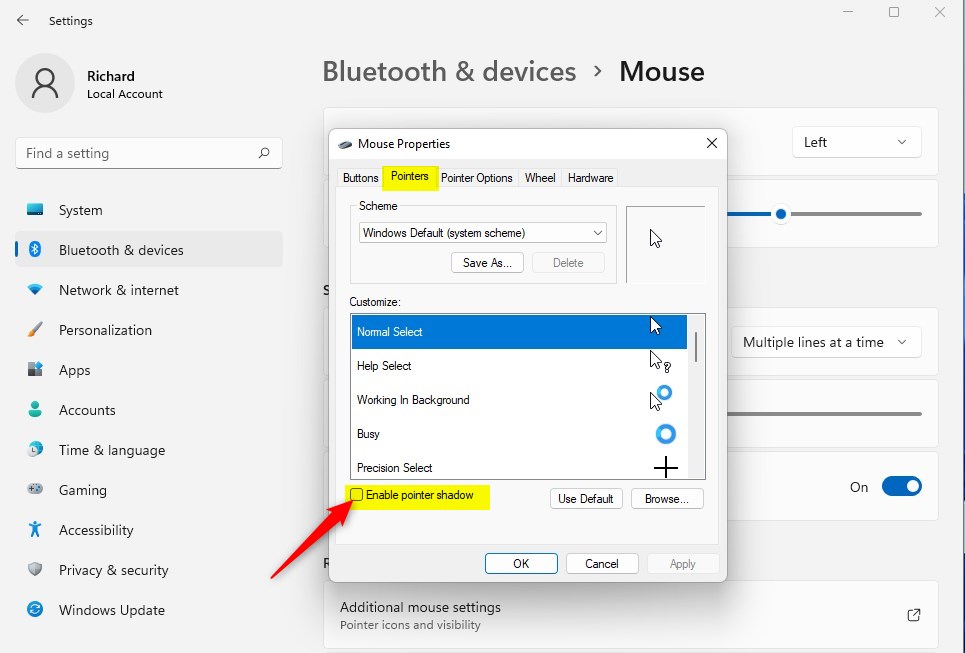
- In the Mouse Properties window, click the Pointers tab.
- Find the box labeled Enable pointer shadow and check it to turn on the shadow.
- Click OK to save.
windows 11 mouse pointer enable pointer shadow
Alternative Way Using Run Command
You can quickly access the mouse pointer shadow settings in Windows 11 using the Run command.
- Click Start, then search for and open Run.
- Type
SystemPropertiesPerformance.exeand press Enter.
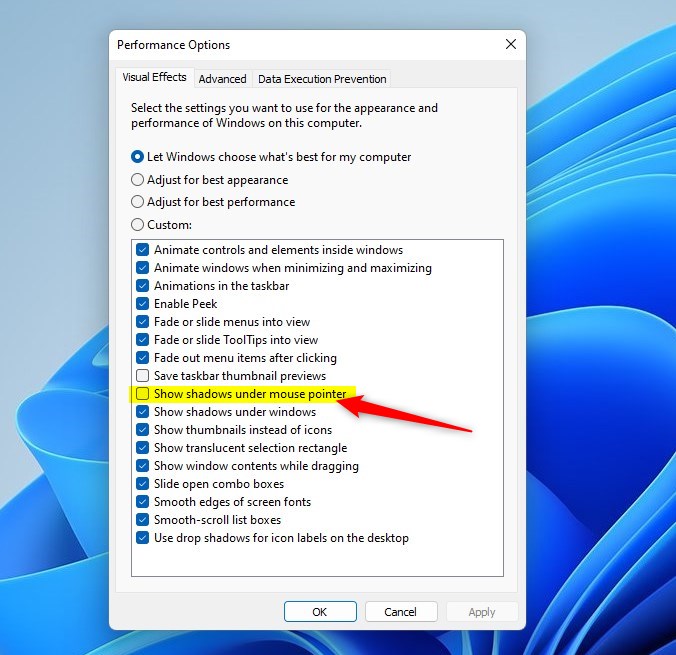
windows 11 run app system properties - In the Performance Options window, under the Visual Effects tab, find and check the box for Show shadows under mouse pointer. Click OK to apply.
windows 11 enable shadow under mouse pointer
And that’s it! Your mouse pointer will now have a shadow, making it easier to see.
Why Use Pointer Shadow?
- It helps make the mouse pointer easier to spot, especially on large or multiple screens.
- Good for people who have trouble seeing small or plain pointers.
- Easy to turn on or off anytime through Settings.
Try it out and enjoy a clearer view of your mouse!
Summary
Adding a mouse pointer shadow in Windows 11 helps make your cursor more visible on screen. You can turn this feature on through the main Settings app or use a quick Run command to access the same option, making your mouse pointer stand out.
How do I turn off mouse shadow in 🪟 Windows 11?
Press ⊞ Win+R to open the Run dialog box. Type SystemPropertiesPerformance and click Enter to open the Performance Options. Under the Visual Effects tab, see Show shadows under mouse pointer toggle. Select or deselect the checkbox based on your preference.
Was this guide helpful?

About the Author
Richard
Tech Writer, IT Professional
Richard, a writer for Geek Rewind, is a tech enthusiast who loves breaking down complex IT topics into simple, easy-to-understand ideas. With years of hands-on experience in system administration and enterprise IT operations, he’s developed a knack for offering practical tips and solutions. Richard aims to make technology more accessible and actionable. He's deeply committed to the Geek Rewind community, always ready to answer questions and engage in discussions.

[…] can manage your mouse pointer settings easily through the Windows 11 Settings app. Follow these steps to configure your […]