How to Enable or Disable ClickLock in Windows 11
You enable or disable ClickLock in Windows 11 via the Control Panel’s Mouse Properties. ClickLock is an accessibility feature that lets you “hold down” your mouse button without physically pressing it continuously, ideal for tasks like dragging and dropping files or selecting text.
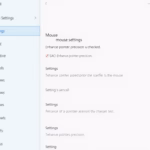
Enable or disable ClickLock in Windows 11 via Settings > Bluetooth & devices > Mouse > Additional mouse settings. Under the Buttons tab, check or uncheck the Turn on ClickLock box.
This handy option benefits users who find sustained mouse button pressure uncomfortable. For example, you can drag a file to a new folder with just a click, move your cursor, and click again to release, all without holding the button.
Finding and configuring ClickLock in Windows 11 is straightforward. You’ll access this setting through the older Control Panel interface, specifically within the Mouse Properties, which remains the primary way to manage it in the latest Windows version.
Was this guide helpful?

About the Author
Richard
Tech Writer, IT Professional
Richard, a writer for Geek Rewind, is a tech enthusiast who loves breaking down complex IT topics into simple, easy-to-understand ideas. With years of hands-on experience in system administration and enterprise IT operations, he’s developed a knack for offering practical tips and solutions. Richard aims to make technology more accessible and actionable. He's deeply committed to the Geek Rewind community, always ready to answer questions and engage in discussions.


No comments yet — be the first to share your thoughts!