
This guide will help you turn on or off a special security feature in Windows 11 called Kernel-mode Hardware-enforced Stack Protection. This feature helps protect your computer’s core system parts from harmful software.
What Is This Feature?
Windows 11 has many security tools to keep your PC safe from viruses and malware. One important tool is called Core Isolation. Core Isolation protects the most important parts of Windows from attacks like ransomware.
A part of Core Isolation is Hardware-enforced Stack Protection. This adds extra protection to the system’s core code by using special hardware features in your computer’s processor.
Note: This only works if your computer’s processor supports special technologies like Intel’s CET or AMD’s Shadow Stacks.
How to Turn It On or Off Using Windows Security App
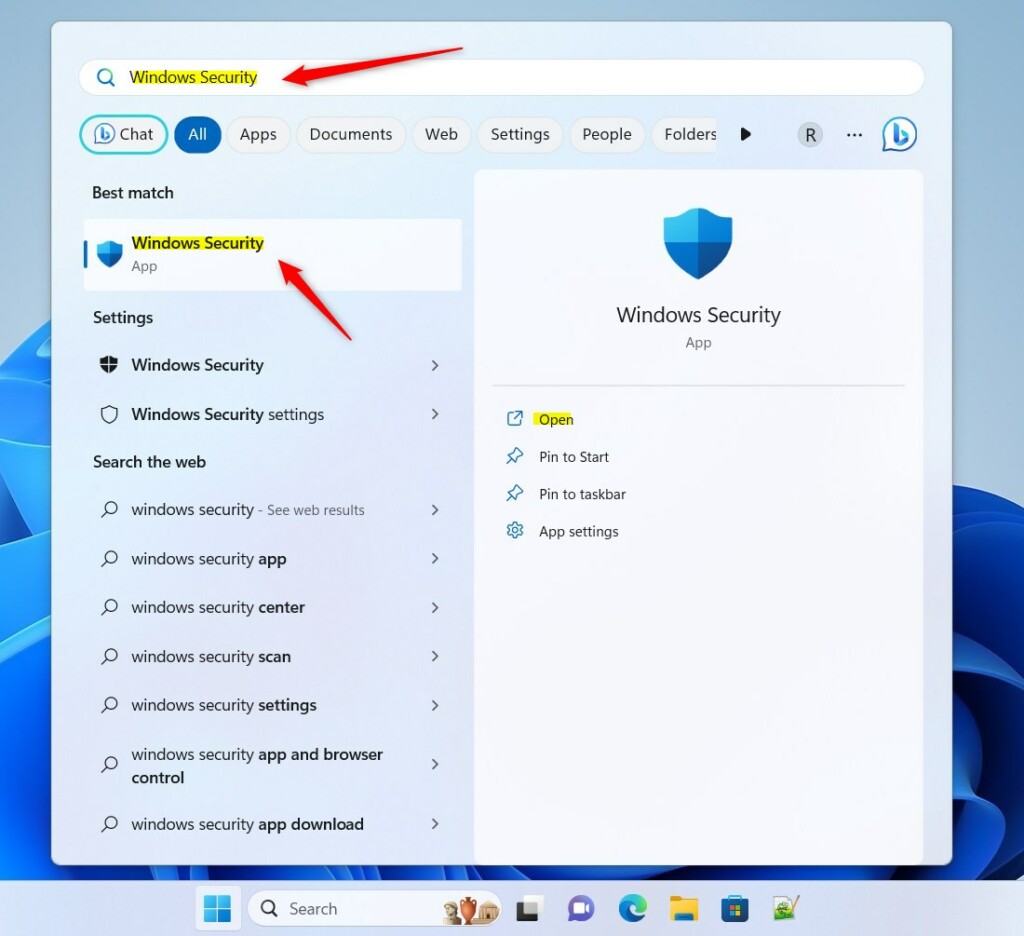
- Open Windows Security:
Click the Start menu, type Windows Security, and select the app from the list.
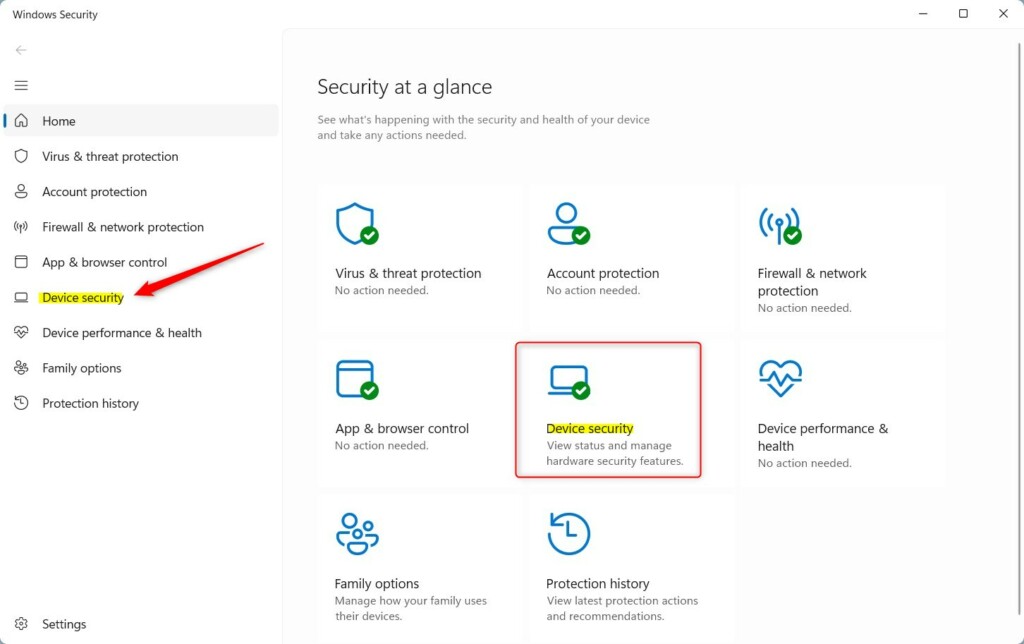
- Go to Device Security:
In Windows Security, find and click on Device security.
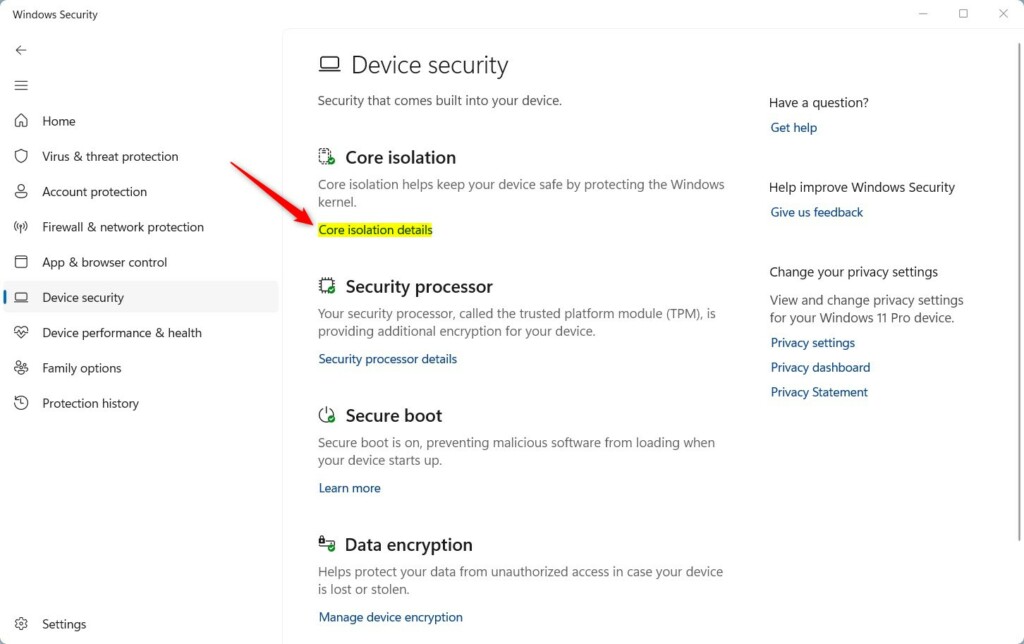
- Open Core Isolation Details:
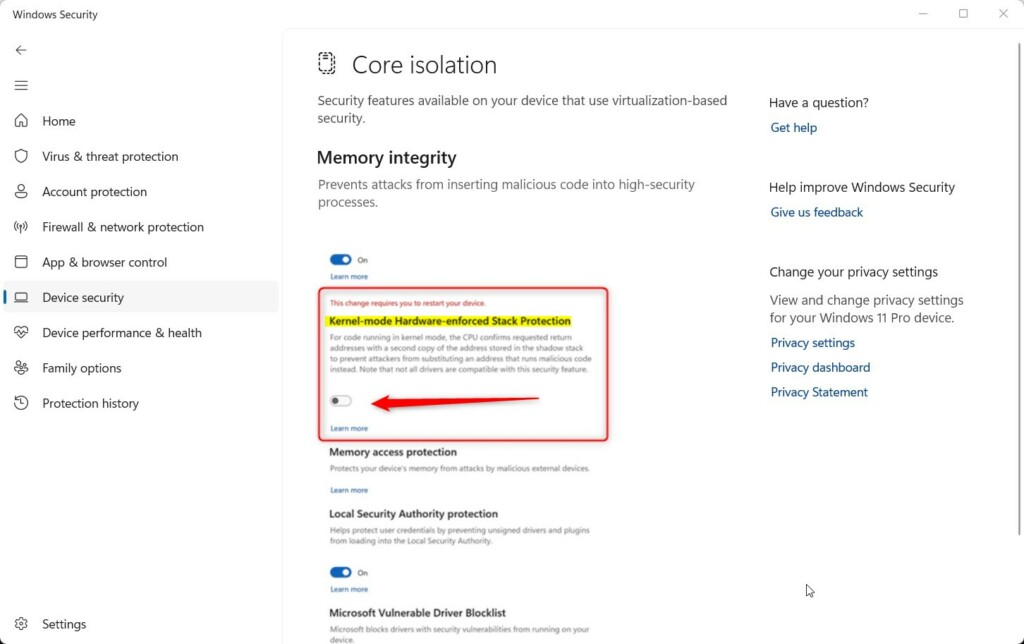
Under the Core Isolation section, click Core Isolation details.
- Turn On Kernel-mode Stack Protection:
Find Kernel-mode Hardware-enforced Stack Protection and toggle the switch to On or Off, depending on what you want.
- Restart Your PC:
After changing this setting, restart your computer to apply the changes.
Extra: How to Turn It On or Off Using Windows Registry (For Advanced Users)
If you are comfortable with advanced settings, you can also enable or disable this feature through the Windows Registry.
Important: Editing the Registry can cause problems if not done correctly. Please follow steps carefully and back up your Registry first.
Step 1: Enable Core Isolation
Open the Registry Editor by pressing Windows + R, typing regedit, and pressing Enter.
Navigate to this folder:
HKEY_LOCAL_MACHINE\SYSTEM\CurrentControlSet\Control\DeviceGuard\Scenarios\HypervisorEnforcedCodeIntegrity
If the HypervisorEnforcedCodeIntegrity folder doesn’t exist, right-click Scenarios, select New > Key, and name it HypervisorEnforcedCodeIntegrity.
In the right pane, right-click and choose New > DWORD (32-bit) Value. Name it Enabled.
Double-click Enabled, choose Decimal as Base, and set Value data to:
- 1 to turn Core Isolation ON
- 0 to turn Core Isolation OFF
Step 2: Turn On Kernel-mode Hardware-enforced Stack Protection
Next, go to:
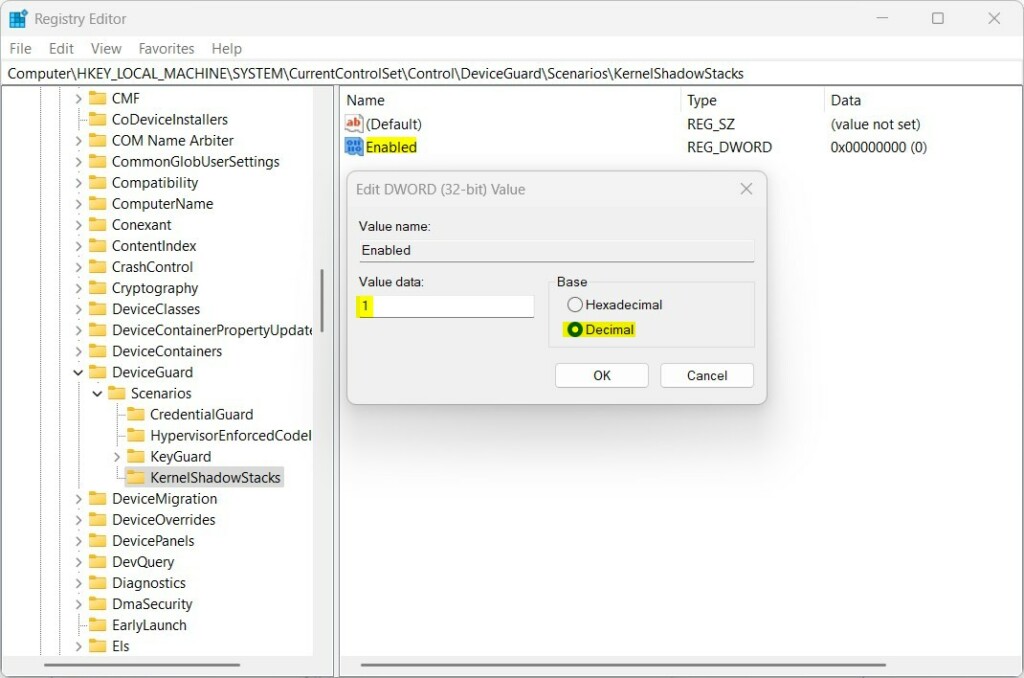
HKEY_LOCAL_MACHINE\SYSTEM\CurrentControlSet\Control\DeviceGuard\Scenarios\KernelShadowStacks
If the KernelShadowStacks folder doesn’t exist, create it the same way as before.
Right-click in the right pane, create a new DWORD (32-bit) Value named Enabled. Set it to:
- 1 to turn Kernel-mode Hardware-enforced protection ON
- 0 to turn it OFF
Also, create another DWORD (32-bit) Value named WasEnabledBy.
Double-click it, set the Base to Decimal, and enter 2 as the Value data. This keeps the Memory Integrity setting working properly.
When done, close Registry Editor and restart your PC.
Summary
- Turning on Kernel-mode Hardware-enforced Stack Protection helps keep your Windows 11 device safer from malware.
- This feature only works if your CPU supports special hardware protections like Intel CET or AMD Shadow Stacks.
- You need to have CPU virtualization and Memory Integrity enabled to use this feature.
- You can enable or disable it easily through the Windows Security app or the Registry Editor if you are comfortable.
- After changing any settings, always restart your computer to apply the changes.
By following these simple steps, you can improve your PC’s security without needing to be an expert!


Leave a Reply