How to Enable or Disable Microphone Access for Apps in Windows 11
You enable or disable microphone access for apps in Windows 11 within the Privacy & security settings. This feature allows you to control which applications have permission to use your computer’s microphone, enhancing your privacy and preventing unwanted recordings.
In Windows 11, you can manage microphone permissions both system-wide and for individual applications. This provides granular control, letting you decide precisely which software can listen through your mic.
For instance, you might choose to block a specific app like Zoom or Cortana from accessing your microphone if you have privacy concerns. This ensures only the apps you explicitly authorize can utilize your microphone for activities like voice calls or audio recording.
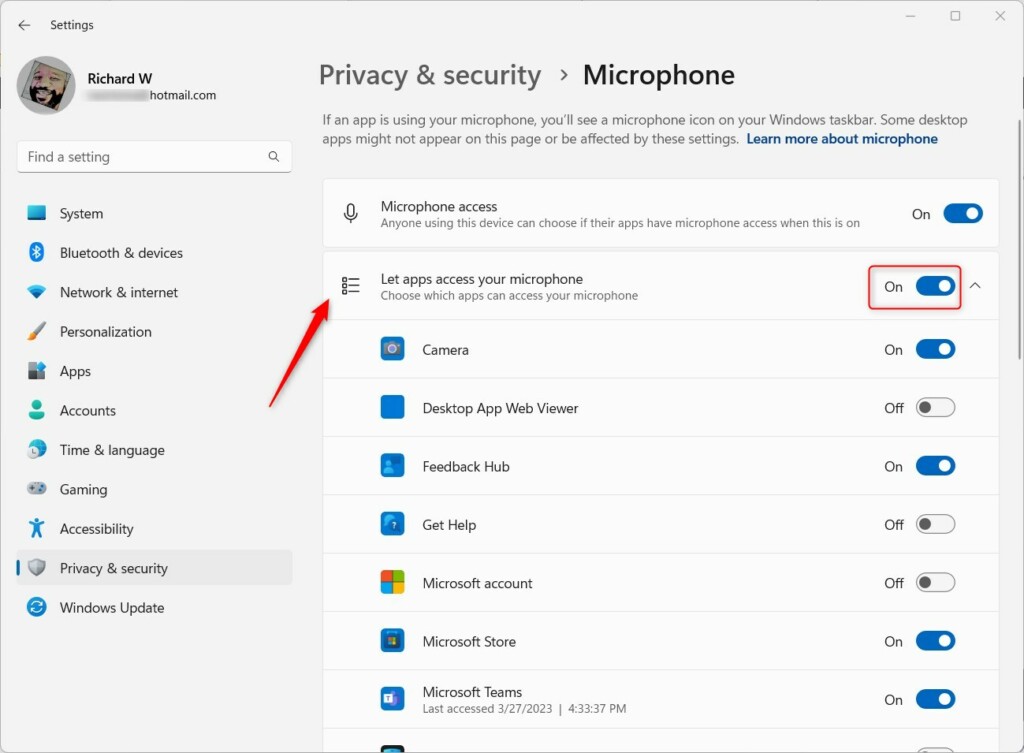
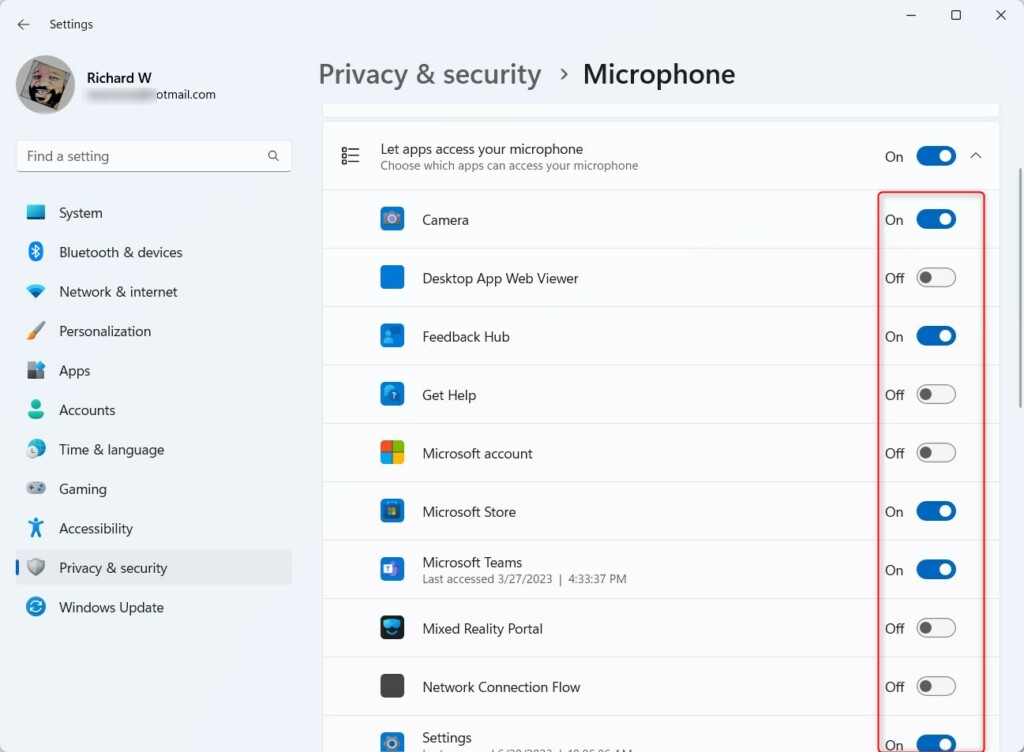
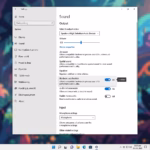
Go to Settings > Privacy & security > Microphone. Toggle “Microphone access” On or Off to control all apps. You can also manage individual app permissions on this screen.
How to Tell if an App is Using Your Microphone
Windows 11 includes a helpful visual indicator to protect your privacy. When an app is actively using your microphone, a small microphone icon shows up in the system tray on your taskbar. Hovering your mouse over this icon reveals which app is currently accessing your hardware.
Restrict or Allow Apps Access to the Microphone
Managing your privacy settings in Windows 11 is designed to be intuitive. Here’s how to control access:
- Open the Windows Settings app. Click the Start menu and select Settings, or press Windows key + I.
- Click on Privacy & security on the left side of the window.
- Select the Microphone tile on the right to see more options.
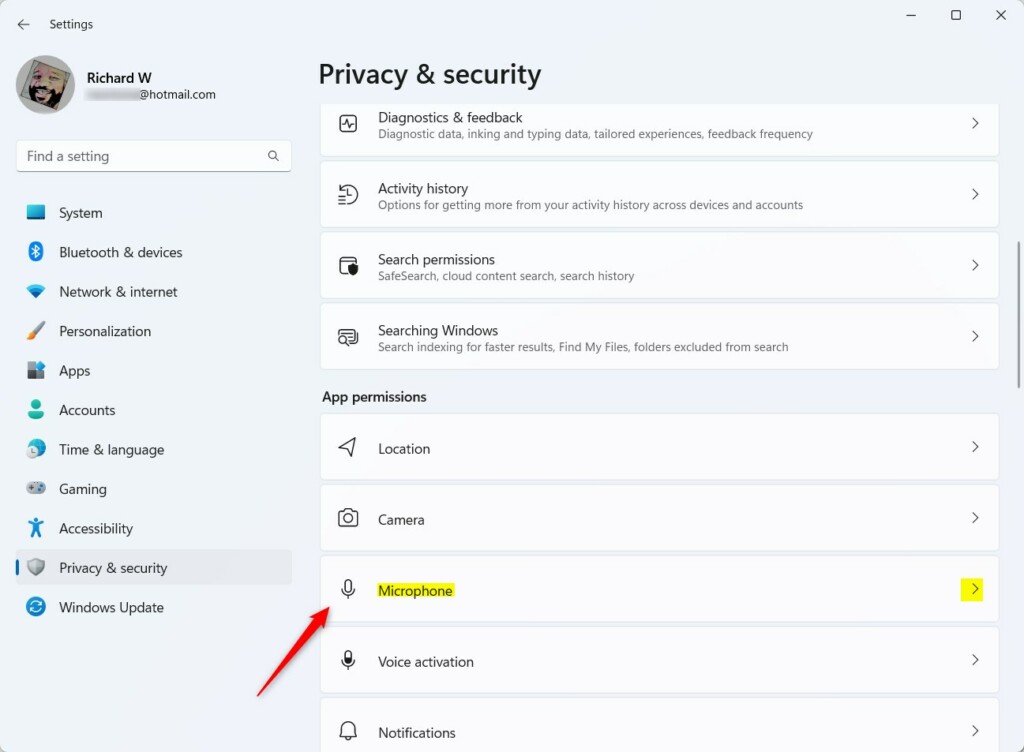
- On the next screen, click the Microphone access tile.
- Toggle the switch to On to enable the microphone or Off to disable it for all apps.
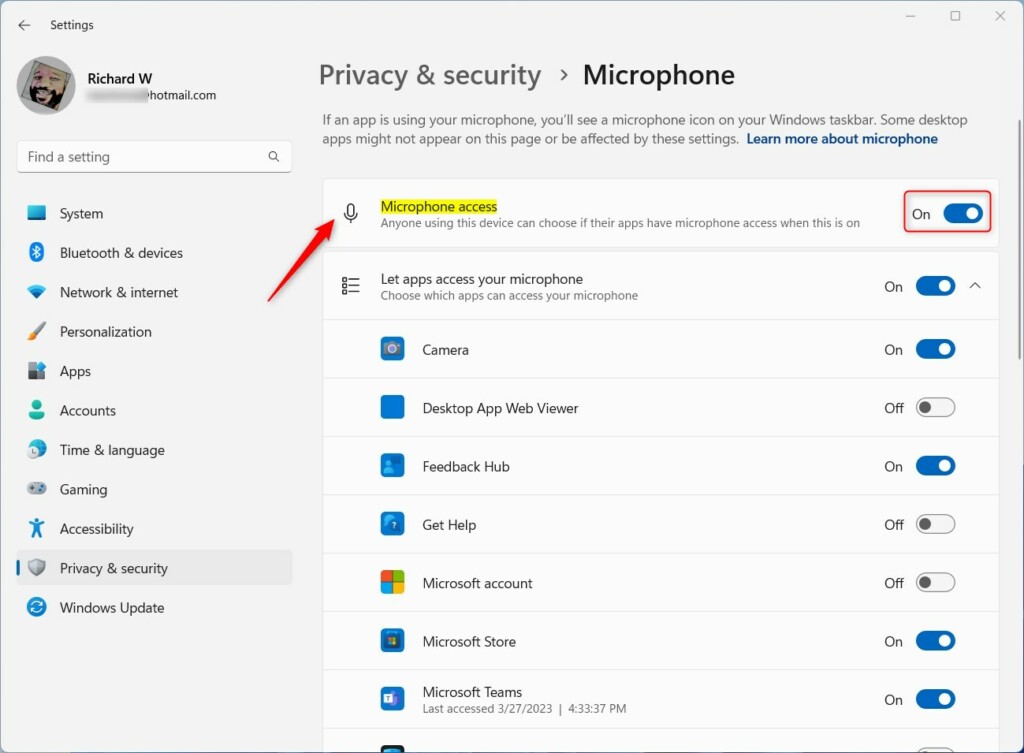
Pro Tip: There is a difference between ‘Global’ and ‘Per-App’ settings. The main ‘Microphone access’ toggle works like a master switch, controlling everything. If this is off, no app can use the microphone, even if individual app permissions are set to ‘On’.
Browser-Specific Permissions
If you use a web browser like Chrome or Edge for calls, you must also grant microphone permissions within the browser settings. Even if Windows gives an app permission, the website you’re on will likely ask you again. Look for a camera or microphone icon in the browser address bar to manage these specific site permissions.
Troubleshooting: Why is Microphone Access Greyed Out?
If your microphone settings are greyed out, it’s often because a system administrator has restricted access via Group Policy. Additionally, check if you have a physical hardware mute switch on your headset or laptop, as some hardware-level mutes prevent software from detecting the microphone entirely.
Allow or Deny Apps Access via the Local Group Policy Editor
Heads up: You’ll need administrator rights for this.
If you’re an advanced user, you can use the Local Group Policy editor app to manage these settings.
- Open the Local Group Policy Editor.
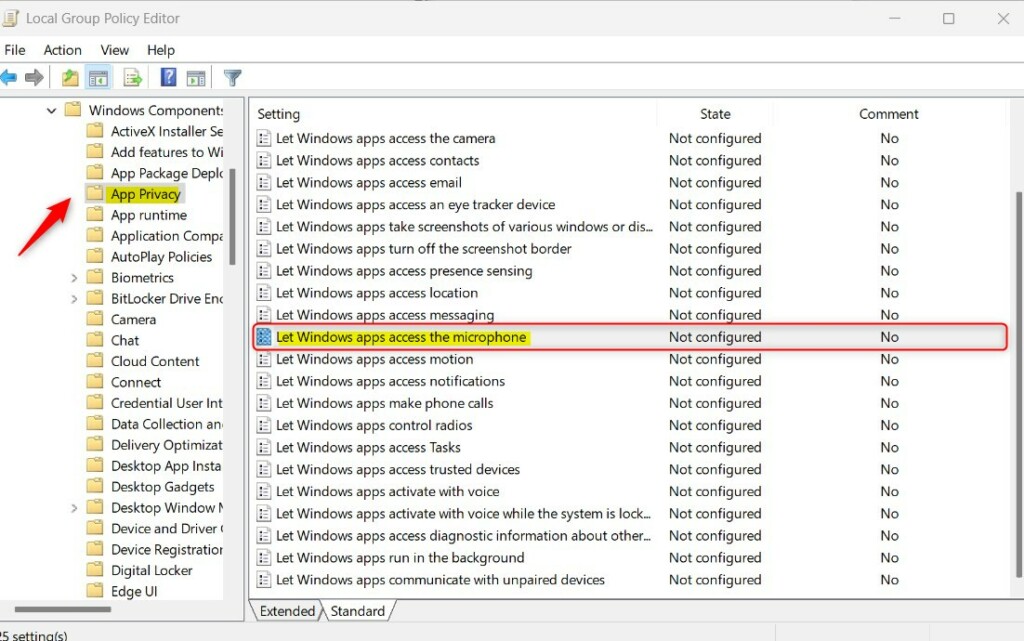
- Go to: Computer Configuration -> Administrative Templates -> Windows Components -> App Privacy.
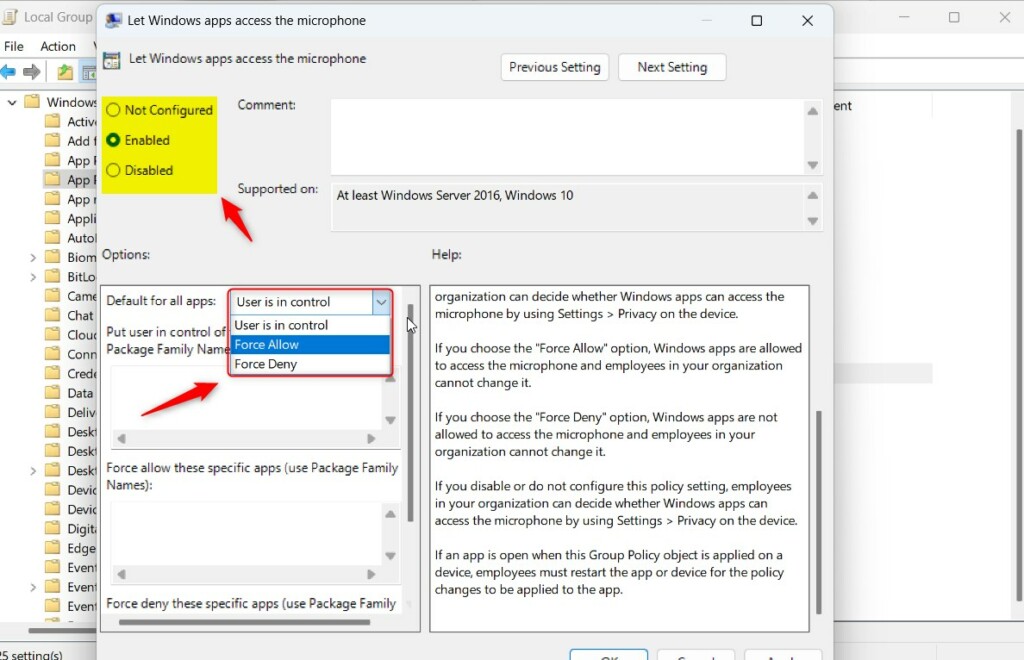
In the right pane, double-click on Let Windows app access the microphone.
Choose Enabled, Disabled, or Not Configured, then click OK.
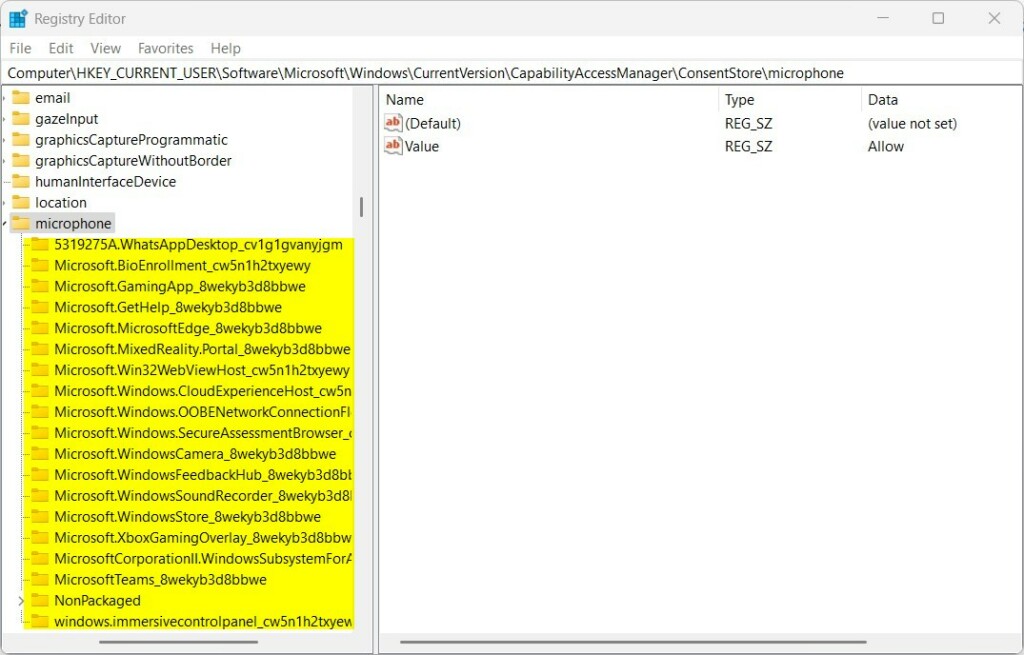
Enable or Disable Microphone Access using the Registry Editor
Heads up: You’ll need administrator rights for this.
You can also change these settings with the Windows Registry editor, but be cautious – messing with registry settings can impact your system.
Navigate to the relevant path for your needs:
HKEY_LOCAL_MACHINE\SOFTWARE\Microsoft\Windows\CurrentVersion\CapabilityAccessManager\ConsentStore\microphone
HKEY_CURRENT_USER\Software\Microsoft\Windows\CurrentVersion\CapabilityAccessManager\ConsentStore\microphone
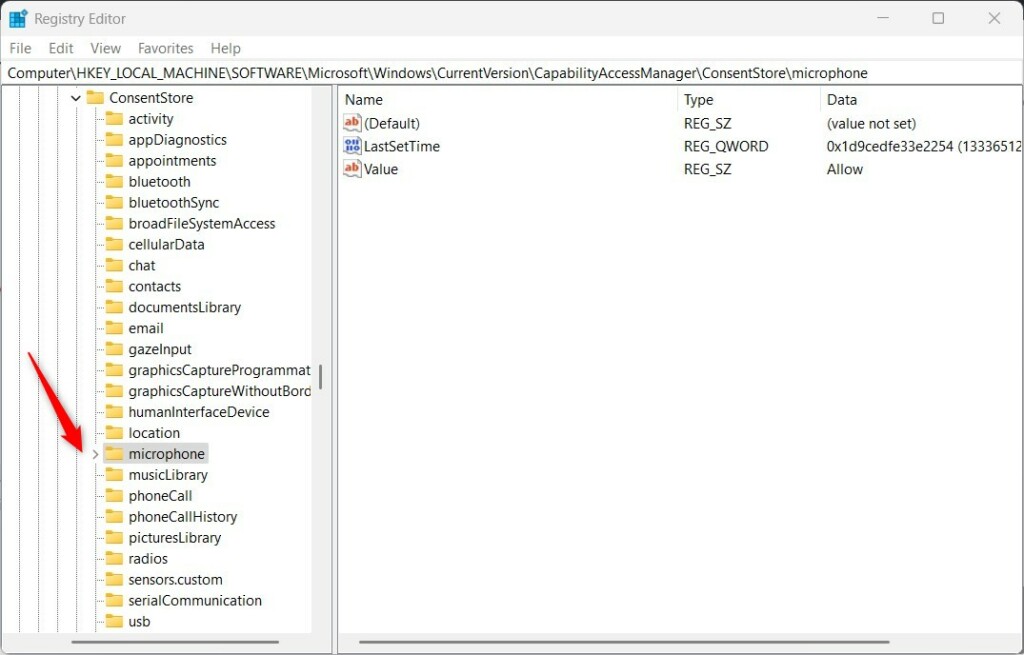
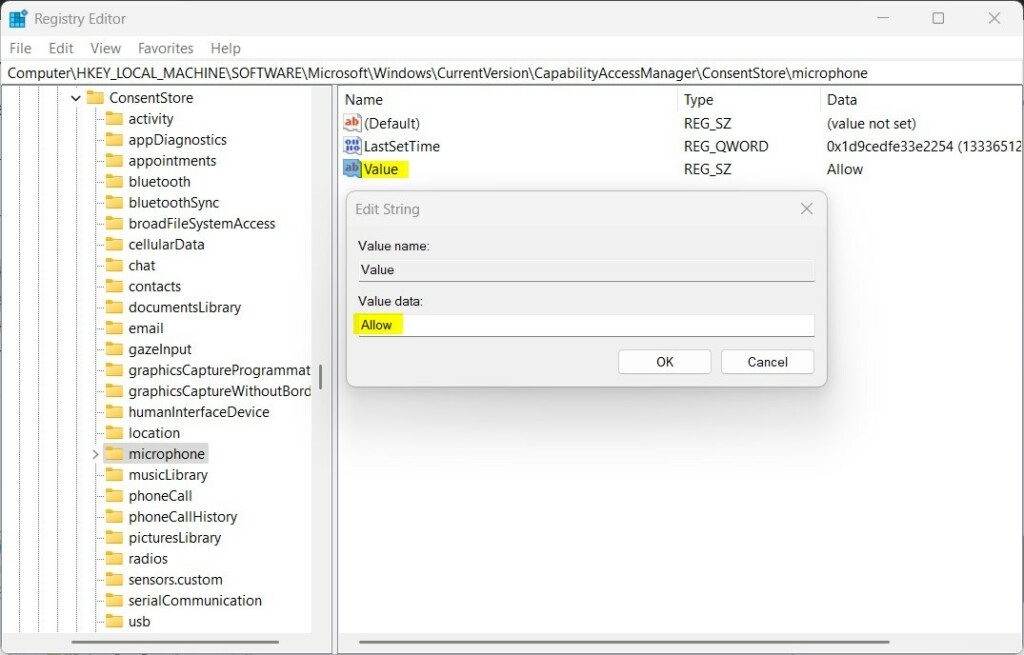
Right-click in the right pane, choose New, then String Value, and name it Value. Double-click this new value and type Allow or Deny.
Let Desktop Apps Access Your Microphone
If you want to manage standard desktop programs separately, make sure the main microphone access is turned on first.
- Go to Start -> Settings -> Privacy & security -> Microphone.
- Toggle the switch for Let desktop apps access your microphone to On or Off.
Manage Desktop App Access via the Registry
Heads up: You’ll need administrator rights for this.
You can use the Windows Registry Editor to control desktop app access specifically by navigating to these paths:
HKEY_LOCAL_MACHINE\Software\Microsoft\Windows\CurrentVersion\CapabilityAccessManager\ConsentStore\microphone\NonPackaged
HKEY_CURRENT_USER\Software\Microsoft\Windows\CurrentVersion\CapabilityAccessManager\ConsentStore\microphone\NonPackaged
Create a new String Value named Value and set it to Allow or Deny. Restart your computer after making these changes.
Reference: Microsoft Support
Summary
Managing your microphone access is a great way to keep your privacy secure in Windows 11. By using the Settings app, you can easily toggle access for all apps or pick and choose which ones are allowed to listen. For more advanced users, the Local Group Policy Editor and Registry Editor offer deeper control over these settings. Always remember to restart your computer if you make changes via the Registry.
Does disabling microphone access affect browser-based calls?
Yes. If you disable microphone access globally in Windows 11 settings, no application, including web browsers, will be able to record audio. You must ensure the master switch is enabled in your privacy settings before a browser can successfully access your microphone for calls or meetings.
How do I reset microphone permissions for all apps at once?
To reset permissions, you can toggle the master ‘Microphone access’ switch to ‘Off’ and then back to ‘On’. This effectively clears the current active state for all applications. For a complete reset, you may need to manually toggle individual app permissions within the Privacy & security settings menu.
Was this guide helpful?

About the Author
Richard
Tech Writer, IT Professional
Richard, a writer for Geek Rewind, is a tech enthusiast who loves breaking down complex IT topics into simple, easy-to-understand ideas. With years of hands-on experience in system administration and enterprise IT operations, he’s developed a knack for offering practical tips and solutions. Richard aims to make technology more accessible and actionable. He's deeply committed to the Geek Rewind community, always ready to answer questions and engage in discussions.


No comments yet — be the first to share your thoughts!