How to Restore Default Settings of Library in Windows 11
You restore Windows 11 library default settings by deleting and recreating the library folders.
Libraries in Windows 11 act as virtual folders that consolidate files from various locations on your PC or network. This process allows you to quickly get back to the original organization of your Documents, Pictures, Music, and Videos libraries.
Restoring defaults is useful if you’ve accidentally removed essential folders or drastically changed your library’s organization. This method effectively resets the library back to its initial state, typically including the default `Documents` and `Pictures` folders.
When you restore your libraries, any custom locations you added will be removed from the library’s view. Your files remain safe in their original locations; they just won’t be displayed within that specific library anymore until you re-add them.
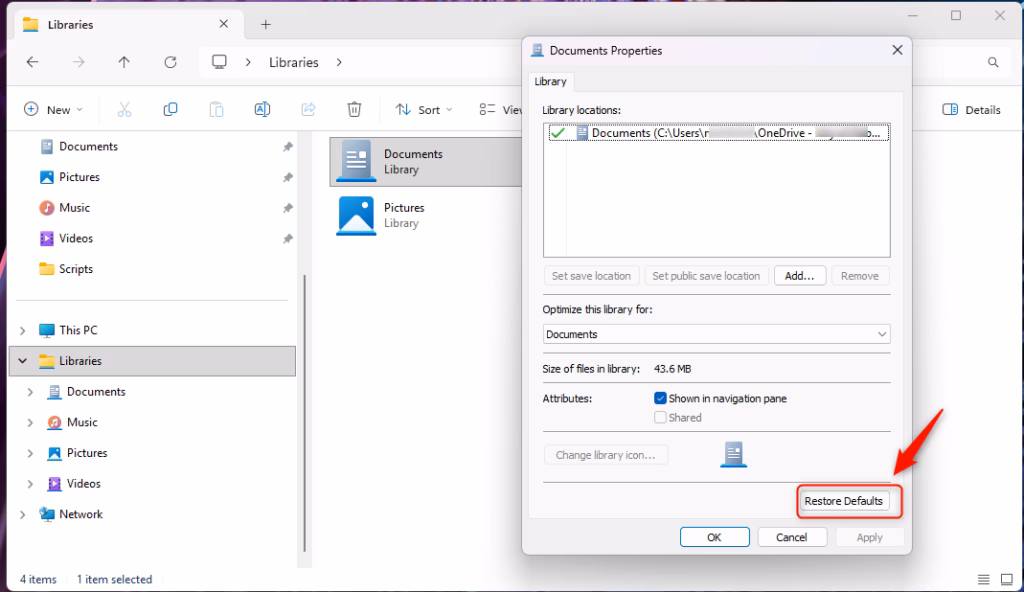
To restore default library settings in Windows 11, open File Explorer, right-click the desired library in the left pane, select Properties, and then click Restore Defaults. This resets the library to its original configuration without affecting your files.
How to Restore Libraries via File Explorer
You can easily restore your Windows libraries to their default settings using File Explorer, fixing any issues by resetting them to how they were when Windows was first installed.
- Open File Explorer by pressing the Windows Key + E.
- In the left sidebar, find the Libraries folder. If you do not see it, right-click the empty space in the sidebar and select Show libraries.
- Right-click the library you want to fix (e.g., Pictures) and choose Properties.
- In the window that pops up, click the Restore Defaults button.
- Click OK to save your changes.
Advanced Fix: Resetting Libraries via Registry Editor
If File Explorer can’t fix your Windows libraries, you can try resetting them using the Registry Editor, which involves carefully deleting specific registry files that define your libraries.
To manually reset library definitions, you can delete the corrupted library files in the registry:
- Press Windows Key + R, type regedit, and press Enter.
- Navigate to:
HKEY_CURRENT_USER\Software\Microsoft\Windows\CurrentVersion\Explorer\ShellFolders. - Locate the specific library key and delete it to force Windows to recreate it upon restart.
Troubleshooting: Libraries Not Appearing
If your libraries are missing from the navigation pane, follow these steps:
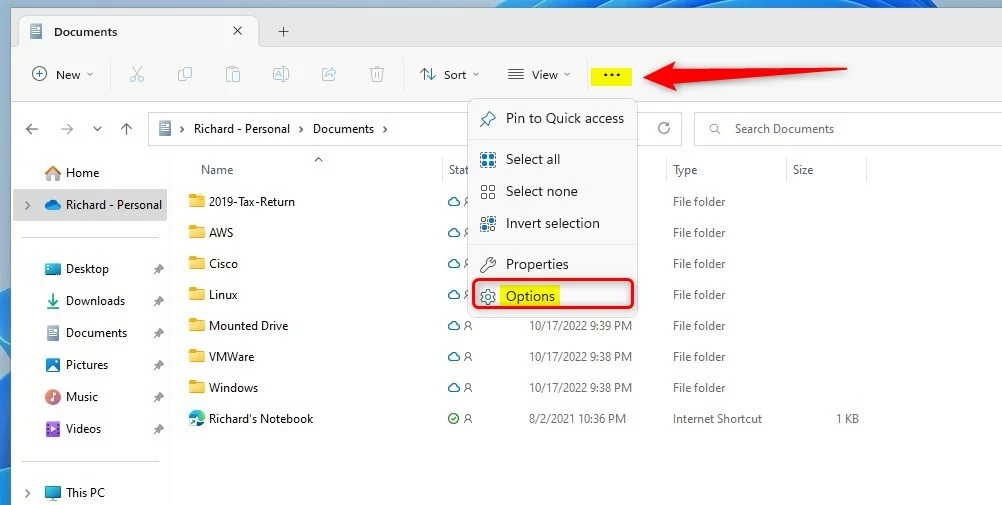
- Open File Explorer.
- Click the See more (three dots) button in the top menu.
- Select Options.
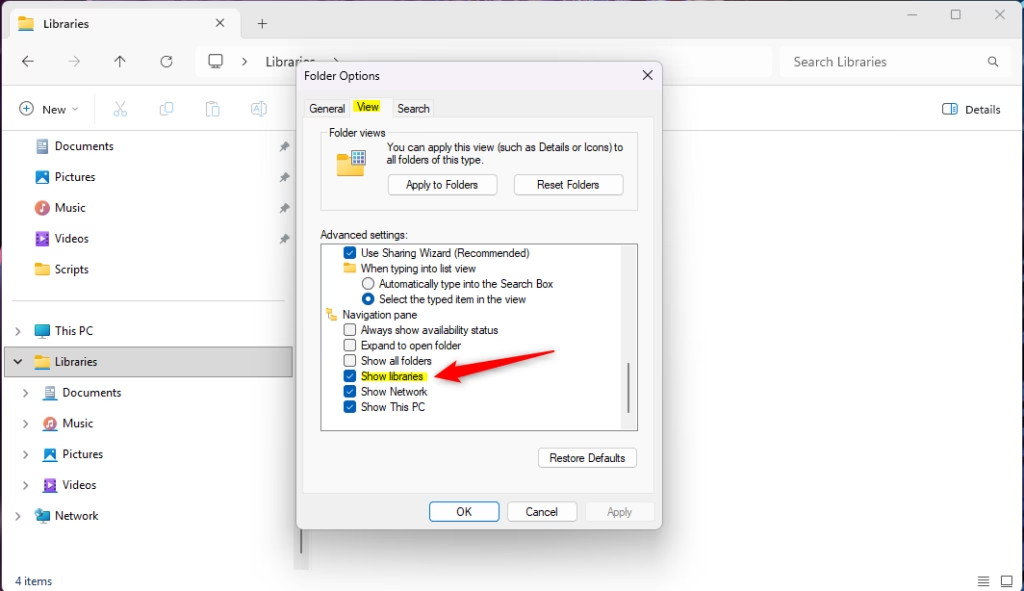
- Under the View tab, ensure Show libraries is checked in the Navigation pane section.
Summary
Resetting your Windows libraries can fix display problems or broken links, getting them back to their original state. The easiest way is through File Explorer, but the Registry Editor offers a more advanced solution if needed.
What happens to my files when I restore default libraries?
Restoring default Windows libraries won’t delete any of your personal files or documents. It only resets which folders are linked to a library, so your important data stays safe on your computer.
Was this guide helpful?

About the Author
Richard
Tech Writer, IT Professional
Richard, a writer for Geek Rewind, is a tech enthusiast who loves breaking down complex IT topics into simple, easy-to-understand ideas. With years of hands-on experience in system administration and enterprise IT operations, he’s developed a knack for offering practical tips and solutions. Richard aims to make technology more accessible and actionable. He's deeply committed to the Geek Rewind community, always ready to answer questions and engage in discussions.

No comments yet — be the first to share your thoughts!