

This article describes the steps to remove DLNA media-sharing devices in Windows 11.
DLNA media streaming in Windows allows you to browse, search, and play the media on your Windows computer using a UPnP or DLNA-enabled device such as a phone, TV, or game console.
When you turn on DLNA media sharing in Windows, your system will begin scanning your network for DLNA-enabled devices. If a device is found, it is added to the list with default settings.
If a device is on the list you don’t want to stream to or allow access to your Windows machine, you can selectively block access to your shared resources.
Also, you can remove a device instead of denying access to your shared resource. Below is how to do that.
How to remove DLNA media sharing devices in Windows 11
As mentioned above, you can remove a DLNA media-sharing device instead of denying access to your shared resource.
Below is how to do that when using Windows 11.
First, open the Control Panel app.
When the Control Panel app opens, navigate to the path described below.
Control Panel -> Network and Internet -> Network and Sharing Center -> Media streaming options
In the Media streaming option settings pane in the Control Panel app, click the button that says “Turn on media streaming,” as highlighted below, to enable DLNA media streaming.

When media streaming is turned on, your network profile and firewall settings will be modified. So, you should only use media streaming on a trusted network such as your home and work.
The default media streaming settings will stream by default all content ratings from your Music, Pictures, Recorded TV, and Videos folders.
Remove DLNA device
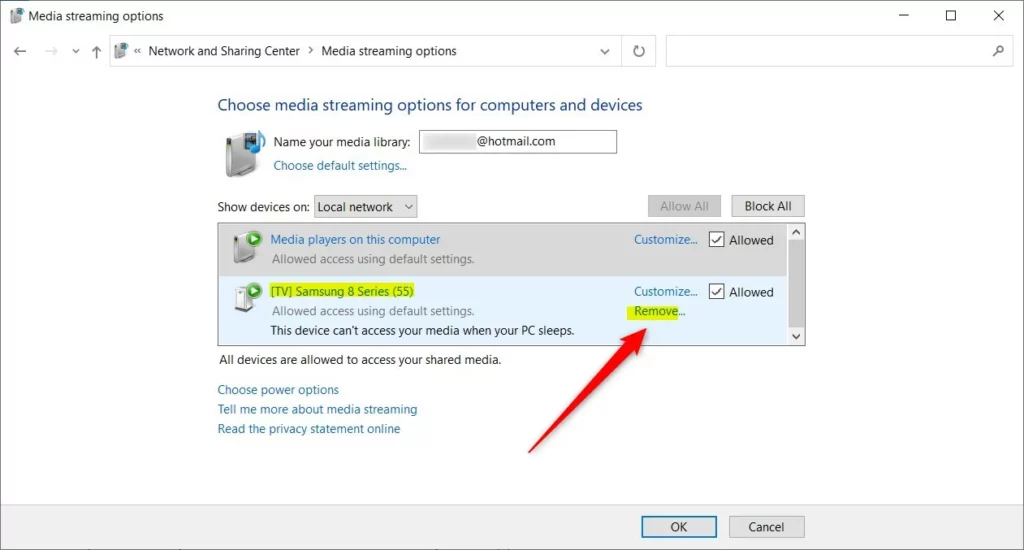
Now that DLNA media streaming is enabled, go down the list and select the device you want to remove from the Allow All / Block All list.
Highlight the device, and select Remove the device.
If the device you want to remove is online, you will get a message similar to the one below. Turn off the device, then retry.
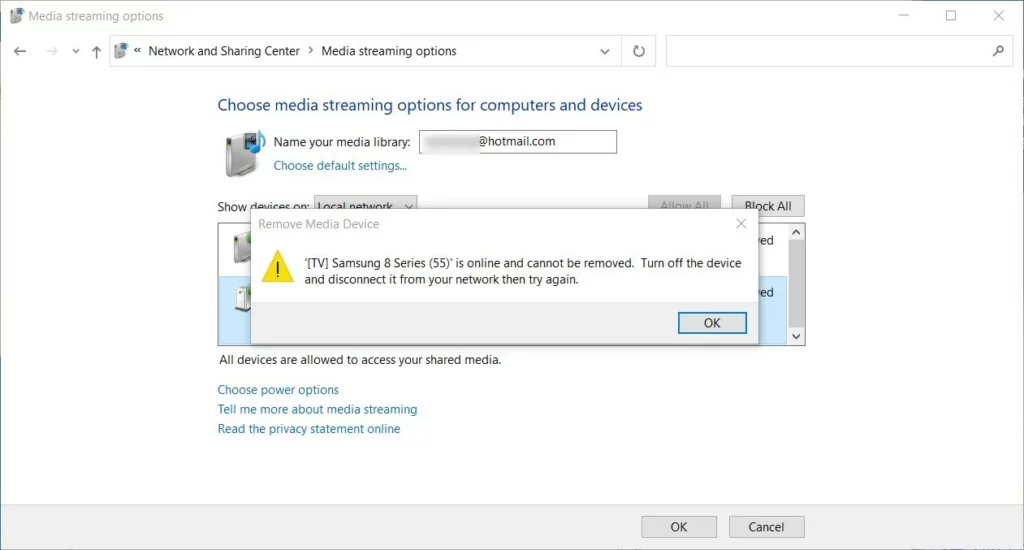
On the next try, while the device is off, you should get a message to confirm that you wish to remove the device.
Confirm it and click Remove the device.
That should do it! You can close the Control Panel app.
Conclusion:
- This article covered the detailed steps to remove DLNA media-sharing devices in Windows 11, ensuring better control over shared resources.
- Following the instructions, you can selectively remove devices from the list, effectively managing access to your shared media.
- It’s important to consider the network profile and firewall settings before enabling DLNA media streaming, ensuring it’s used only on trusted networks.
- Feel free to provide feedback or ask questions in the comments section if you have any additional insights or suggestions.


Leave a Reply