How to Map Network Drives in Windows 11
You map a network drive in Windows 11 to assign a drive letter to a shared folder on another computer or server, making it easily accessible in File Explorer.
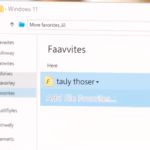
Open File Explorer, click the three-dot menu, and select “Map network drive.” Choose a drive letter, enter the network folder path, and click Finish. Your network folder will then appear as a new drive in “This PC.
This process simplifies file access over your local network, allowing you to treat a remote folder like a local drive, just as if it were a USB stick or internal hard drive.
Mapping a drive provides a shortcut, so instead of typing a UNC path like \\192.1.x.x\ShareName every time, you simply click a designated drive letter, such as ‘Z:’.
This feature is particularly useful for frequent access to shared documents, media, or backups residing on other machines within your network environment.
Was this guide helpful?

About the Author
Richard
Tech Writer, IT Professional
Richard, a writer for Geek Rewind, is a tech enthusiast who loves breaking down complex IT topics into simple, easy-to-understand ideas. With years of hands-on experience in system administration and enterprise IT operations, he’s developed a knack for offering practical tips and solutions. Richard aims to make technology more accessible and actionable. He's deeply committed to the Geek Rewind community, always ready to answer questions and engage in discussions.


[…] You can map network drives: How to map network drivers […]
[…] or map a network drive or folder in Windows Subsystem for Linux (WSL). In Windows 11, users can map network drives and folders with ease. If you know the path to a shared folder and have access to the location, you should be able to map […]
[…] How to map a network drive in Windows 11 […]
[…] allows users to map network folders as a drive. With some tricks, users can mount or map a local folder as a drive in Windows […]
[…] users can map the shares using the ‘Map network drives‘ […]
[…] local Network, Network Discovery, and File sharing must be turned on. The Network icon also shows mapped network locations in File Explorer if there are […]
[…] How to Map a Network Drive in Windows 11 – Website for Students […]
[…] How to map a network drive in Windows 11 […]
[…] How to map a network drive in Windows 11 […]
[…] are multiple ways you can map or unmap network drives in Windows. You can use File Explorer, the Command Prompt, or PowerShell […]