How to Enable Checkboxes in Windows 11 File Explorer
You enable checkboxes in Windows 11 File Explorer to quickly select multiple files and folders for batch operations.
These checkboxes are small squares that appear next to each file and folder name, letting you click to select items individually or in groups.
This feature is particularly useful for touchscreen devices like the Surface Pro 11, offering a faster alternative to Ctrl-clicking multiple items.
Enabling checkboxes streamlines selecting several files at once for actions like deleting, copying, or moving.
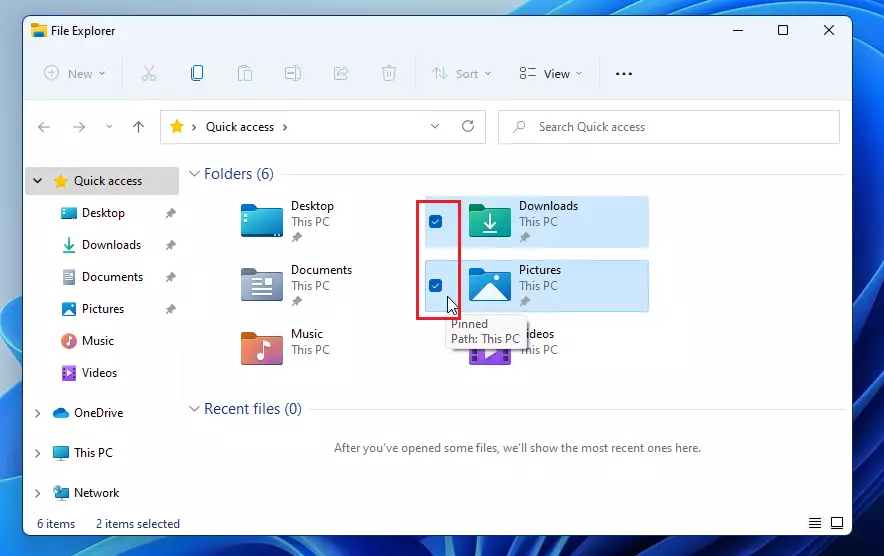
Click View, then Show, and finally Item check boxes in File Explorer to enable checkboxes. This adds small squares next to files and folders, allowing for easy multi-selection. The setting can be toggled on or off anytime without administrator privileges.
How to enable checkboxes in File Explorer
Turning on checkboxes in Windows 11 File Explorer is simple. Just click the ‘View’ button on the top bar, go to ‘Show,’ and then pick ‘Item check boxes.’ This lets you select multiple files easily by just clicking the box next to each one.
- Open File Explorer.
- Click the View button in the top toolbar.
- Hover over Show in the dropdown menu.
- Click Item check boxes to select it.
You’ll see the boxes right away. No admin privileges are needed for this change.
How to disable checkboxes
If you find the boxes distracting, you can hide them. Follow the same steps above. When you click Item check boxes again, the checkmark will disappear, and the boxes will vanish from your view.
Troubleshooting persistent checkboxes
If checkboxes stay visible in Windows 11 even after you turn them off, try restarting the Windows Explorer process through Task Manager.
Advanced Fix: Using the Registry Editor
If you can’t turn on checkboxes using the regular settings in Windows 11, the Registry Editor can help, but you’ll need administrator permission and should proceed with caution. This advanced method involves changing a specific setting to force checkboxes to appear or disappear.
HKEY_CURRENT_USER\Software\Microsoft\Windows\CurrentVersion\Explorer\Advanced
Look for a value called AutoCheckSelect. Double-click it, and then set its value to 0 to turn off checkboxes or 1 to turn them on. Restart your computer to see the changes.
Tablet Mode vs. Desktop Mode
Windows 11 automatically adjusts the interface for touch devices. In Tablet Mode, checkboxes are often enabled by default to make selection easier for fingers. If you switch to a desktop setup, you might prefer to turn them off to save screen space.
Summary
Using item checkboxes in Windows 11 File Explorer makes managing files much easier, whether you use a mouse or a touchscreen.
Why do checkboxes appear on all my files automatically?
Checkboxes often appear automatically if your device is in tablet mode or if a recent Windows update reset your folder view settings. You can easily turn them off by navigating to the View menu in File Explorer and unchecking the Item check boxes option.
Are checkboxes faster than using Ctrl+Click?
For most users, checkboxes are faster and less prone to errors. Using Ctrl+Click requires precise timing and keyboard coordination. Checkboxes allow you to tap or click items one by one without worrying about accidentally deselecting your entire group of files.
Do checkboxes affect file performance in 🪟 Windows 11?
No, enabling checkboxes does not affect your computer’s performance. It is a simple visual overlay provided by the Windows 11 UI. It does not use extra system resources or slow down your file browsing experience, even when working with thousands of files.
Was this guide helpful?

About the Author
Richard
Tech Writer, IT Professional
Richard, a writer for Geek Rewind, is a tech enthusiast who loves breaking down complex IT topics into simple, easy-to-understand ideas. With years of hands-on experience in system administration and enterprise IT operations, he’s developed a knack for offering practical tips and solutions. Richard aims to make technology more accessible and actionable. He's deeply committed to the Geek Rewind community, always ready to answer questions and engage in discussions.

No comments yet — be the first to share your thoughts!