How to Make Your Network Public or Private in Windows 11
You make your network public or private in Windows 11 to control how your PC is visible and accessible to other devices on that network.
A “Private” network profile allows your PC to be discoverable and share files or printers with other devices in your home or office. A “Public” network profile, which Windows 11 often defaults to for Wi-Fi connections, restricts your PC’s visibility for enhanced security on unfamiliar networks like those at coffee shops or airports.
Understanding these settings is crucial. For instance, if you connect to your home Wi-Fi and can’t see other devices, you might need to change your network profile from Public to Private.
Why Does Network Type Matter?
Think of your network type like a privacy setting for your computer on that specific network. Windows uses this setting to control how visible your computer appears to other devices on the same network.
Public Network: The “Keep to Myself” Option
When you set a network to ‘public,’ you’re telling Windows to be careful. Your computer becomes almost invisible to other devices on that network. This is great for security, especially when you use Wi-Fi at places like coffee shops, airports, or hotels. It stops strangers from seeing your shared files or printers, or attempting to access your computer.
What happens when done: You can’t easily share files or printers with other devices on that public network. It’s good for security but not for sharing things on a local network.
When to use it:
- When you connect to Wi-Fi in public places (like cafes, libraries, airports, hotels).
- On any network where you don’t know or trust all the devices.
- When your main goal is to keep your computer private and safe from other devices on the network.
Private Network: The “Open House” Option
Choosing ‘private’ means you’re telling Windows that this is a network you trust. Think of it like your home or a small office where you know everyone and their devices. When you set a network to private, your computer can be seen by other devices on that network. This lets you easily share files, folders, and printers with other computers in your home or office.
What happens when done: Your computer is more visible. This is why you should only use this setting on networks you completely trust. Using this setting on a public network is a big security risk.
When to use it:
- Your home network.
- A small office network where you know and trust everyone.
- Any network where you need to share things like printers or files with other devices.
How to Change Your Network’s Profile Type
It’s easy to change this setting once you know where to look. Switching between public and private is simple in Windows 11.
Step-by-Step Guide
- Open Settings: Click the Start button (the Windows icon). Then, click the ‘Settings’ gear icon. You can also press the
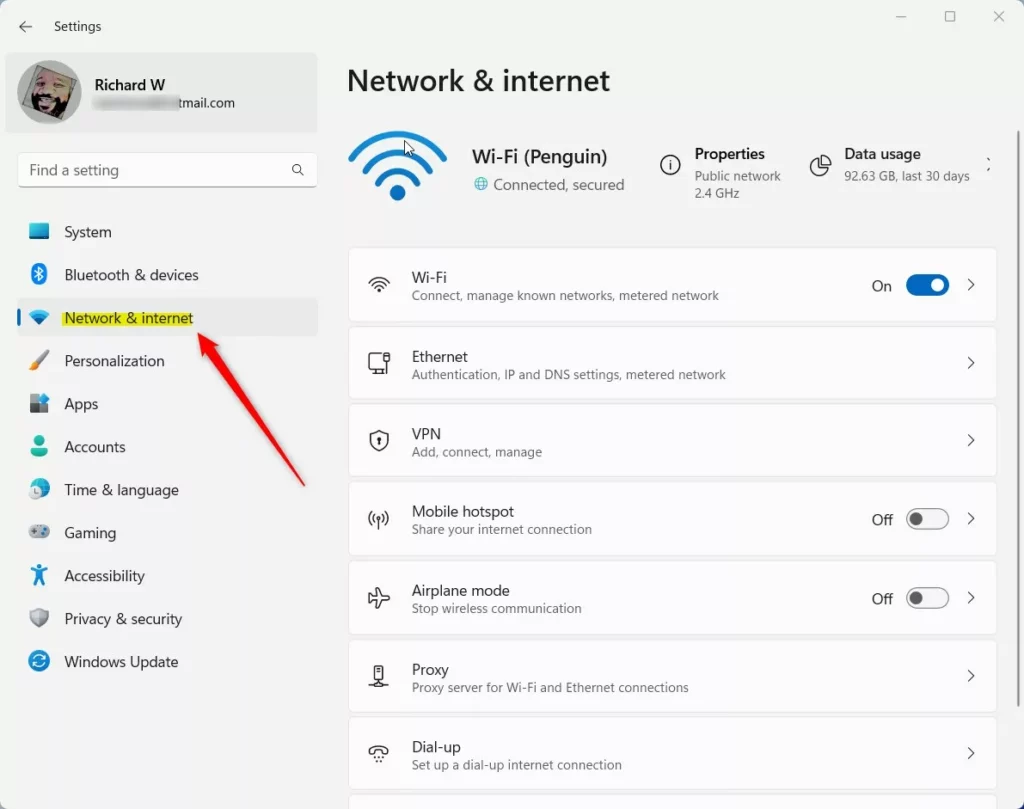
Windows key + Ion your keyboard to open Settings faster. - Go to Network & internet: In the Settings window, click on ‘Network & internet’ in the left sidebar.
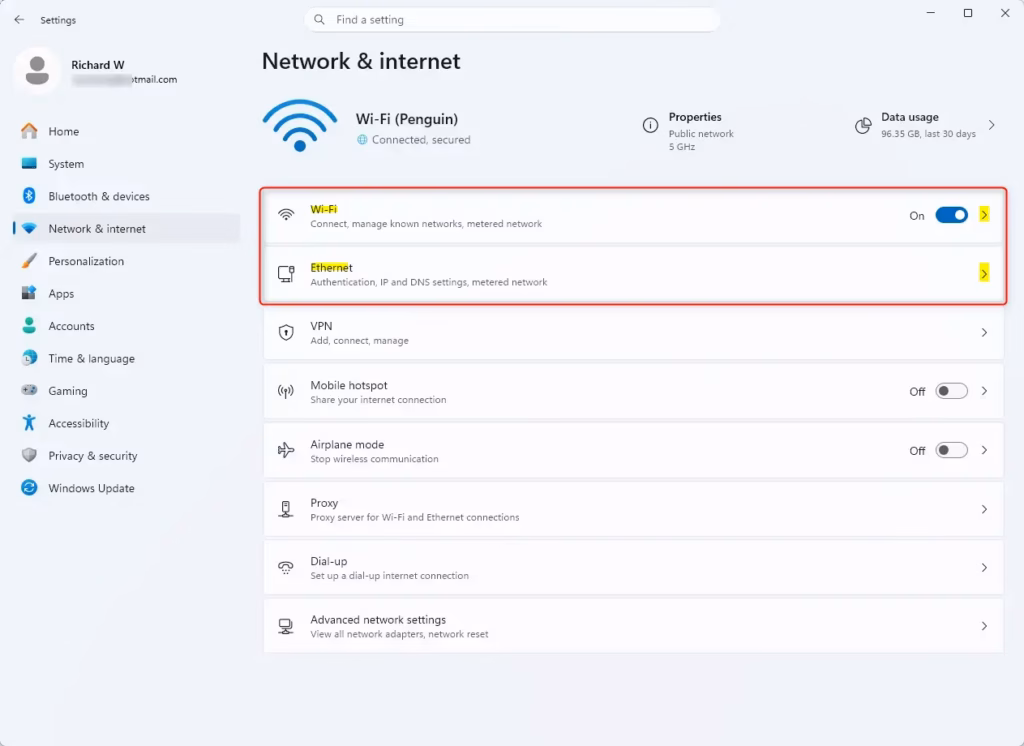
- Choose Your Connection: Click on ‘ Wi-Fi’ if you are using wireless internet. If you are using a cable, click on ‘Ethernet’.
- Select Your Network: Under Wi-Fi or Ethernet, you will see the network you are currently connected to. Click on its name to see its settings.
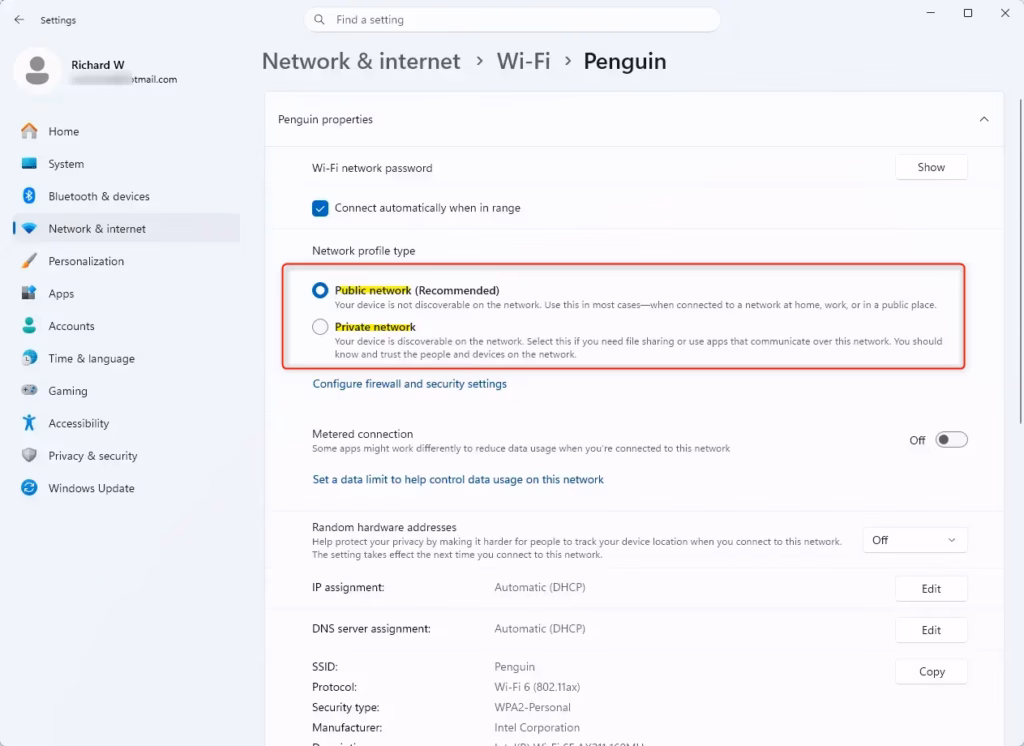
- Find Network Profile Type: Scroll down a little on the network settings page. You will see a section called ‘Network profile type’.
- Make Your Choice: You will see two options: ‘Public network (Recommended)’ and ‘Private network’. Click the circle next to the option you want for this network. Remember, ‘Public’ is the safer choice for most situations. ‘Private’ is for networks you trust and where you want to share things.

Summary
Changing your network from public to private or vice versa in Windows 11 is a straightforward process within the Settings app. This setting controls how visible your computer is on the network. Public networks hide your computer for better security in shared spaces, while private networks allow for easier sharing of files and printers on trusted networks like your home or office. By adjusting this setting, you can boost your computer’s security and its ability to connect and share resources when you need them.
Was this guide helpful?

About the Author
Richard
Tech Writer, IT Professional
Richard, a writer for Geek Rewind, is a tech enthusiast who loves breaking down complex IT topics into simple, easy-to-understand ideas. With years of hands-on experience in system administration and enterprise IT operations, he’s developed a knack for offering practical tips and solutions. Richard aims to make technology more accessible and actionable. He's deeply committed to the Geek Rewind community, always ready to answer questions and engage in discussions.


No comments yet — be the first to share your thoughts!