
This article explains how to join or connect to a Wi-Fi network using Windows 11.
Connecting to Wi-Fi on Windows 11 has changed a bit. There’s no longer a dedicated connection icon on the Taskbar that one can use to access Wi-Fi connection settings.
Windows 11 has a Quick Settings feature that combines the Wi-Fi, sound/speaker, and battery buttons in the right corner of the Taskbar. Each icon can be viewed separately by hovering the cursor over it, but when you click on a single button, it will automatically bring up the Quick Settings pop-up window.
You can access and connect to Wi-Fi from the Quick Settings pop-up box, including disabling and enabling Wi-Fi on Windows 11.
How to join a Wi-Fi network on Windows 11
As mentioned, Windows 11 allows you to connect to any Wi-Fi from the Quick Settings area on the Taskbar or the Windows Settings app.
The Quick Settings box is the one highlighted below. Click any of the icons on the Taskbar to bring up the Quick Settings pop-up window.
Next, click on the right-facing caret on the Wi-Fi symbol in the upper portion of the box.
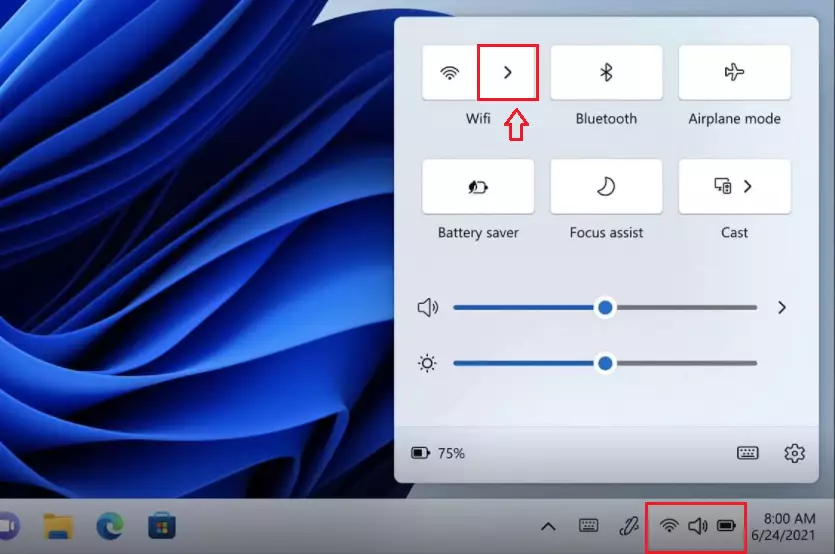
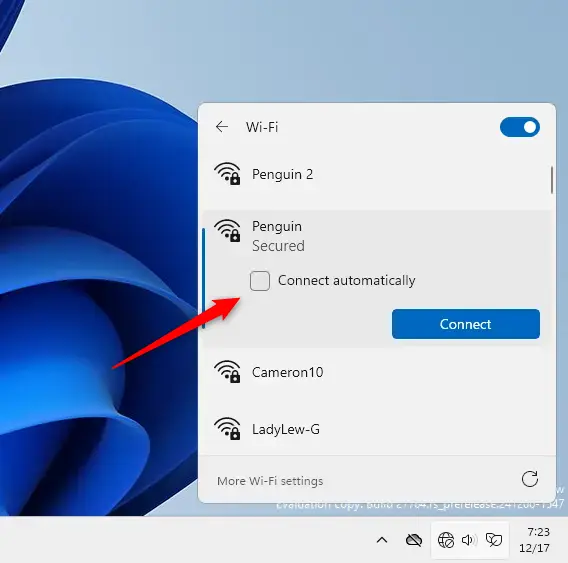
You can also turn on or off the Wi-Fi switch on Windows 11 from these windows. Once the Wi-Fi switch is on, Windows will show you Wi-Fi connections within your computer’s range.
Select the Wi-Fi connection from the list you wish to connect to, then type the password and connect.
Once you correctly type the Wi-Fi password, it should connect, as highlighted below.
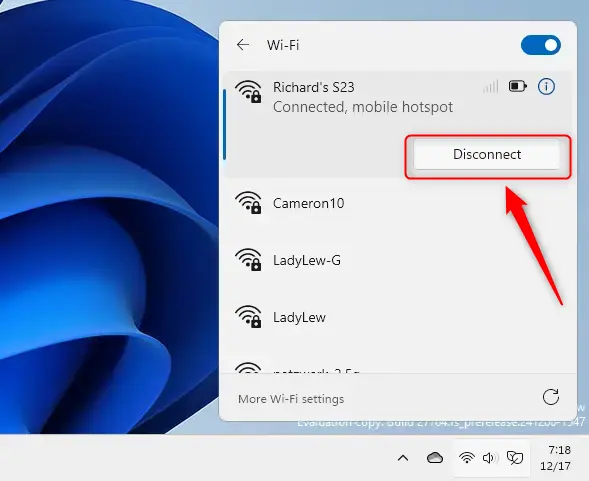
You’re now connected.
How to connect to Wi-Fi from Windows Settings
You can also join a Wi-Fi from the Windows Settings app.
Windows 11 has a centralized location for the majority of its settings. Everything can be done, from system configurations to creating new users and updating Windows from its System Settings pane.
To get to System Settings, you can use the Windows key + I shortcut or click on Start ==> Settings, as shown in the image below:

Alternatively, you can use the search box on the Taskbar to search for Settings. Then select to open it.
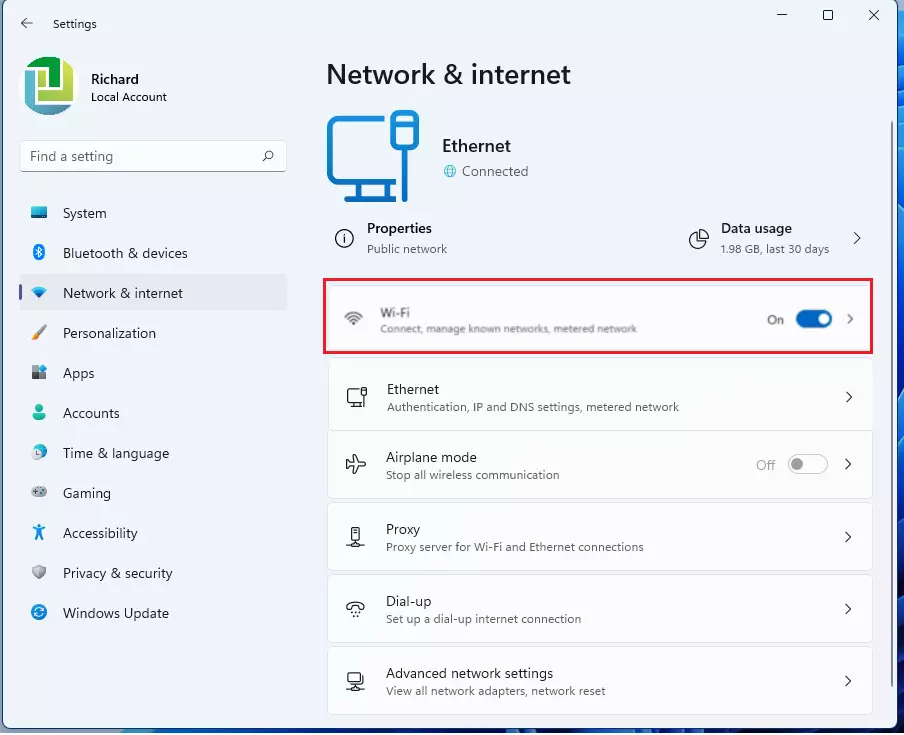
In Windows Settings, click Network & Internet, and select Wi-Fi on the right pane of your screen, as shown in the image below.
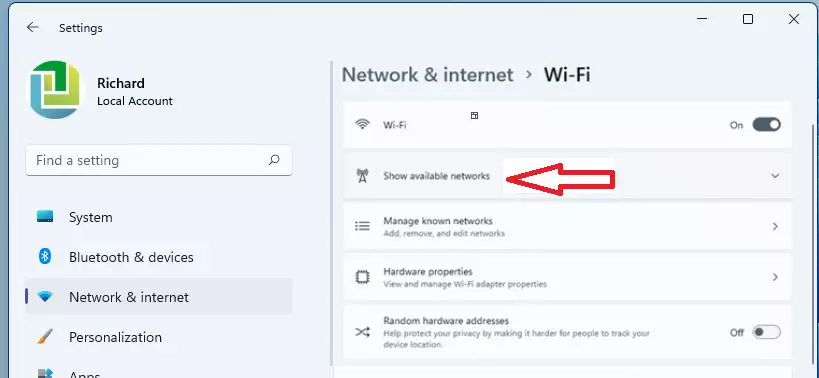
Ensure the Wi-Fi switch is On, then click or tap on Show available networks.
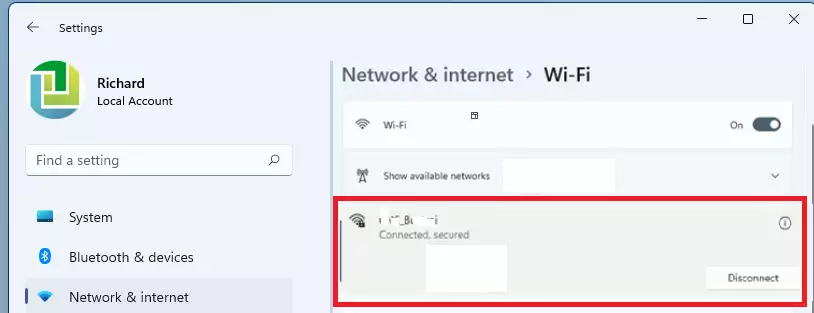
Windows 11 shows you the list of all the wireless networks within range. Select the connection from the list you wish to connect to.
Once you type in the correct password, Windows should connect.
That should do it!
Conclusion:
- Connecting to Wi-Fi on Windows 11 can be easily accomplished through the Quick Settings or the Windows Settings app.
- The Quick Settings feature simplifies access to Wi-Fi controls and network options directly from the Taskbar.
- Users can view available networks and connect by entering the correct password.
- Accessing Wi-Fi settings through the Windows Settings app provides a centralized way to manage device connections.
- A successful connection to a Wi-Fi network will enhance your internet experience on Windows 11.


Leave a Reply