How to Install OpenNMS on Ubuntu 24.04

OpenNMS on Ubuntu 24.04 sets up a free network management system that watches your network, spots problems, and tracks your connected devices. This open-source network monitoring tool runs on your server to keep a close eye on computer connections and network services.
Running OpenNMS Horizon on Ubuntu 24.04 takes a few configuration steps in the terminal, which is the text-based command window. You add external software repositories, install the core Java-based packages, and run terminal commands so your system downloads and sets up the required files.
Install OpenNMS by first setting up PostgreSQL, then downloading and adding the OpenNMS repository. Finally, install the OpenNMS packages using apt install opennms. Configure database access with scvcli and update opennms-datasources.xml.
Install PostgreSQL
PostgreSQL is the database system OpenNMS uses to store network data and system logs. To install PostgreSQL on Ubuntu 24.04 for your OpenNMS setup, open your terminal and run the command sudo apt install postgresql. This downloads and installs the database server so your system can create and manage the necessary tables for OpenNMS.
Run the command below to install it .
sudo apt install postgresql
After installing PostgreSQL, run the command below to create a database user account called ‘opennms‘ for PostgreSQL.
When prompted, type a secure password for the opennms database account.
sudo -u postgres createuser -P opennms
Next, run the command below to create an empty database called 'opennms' and set the owner to the opennms user account created above.
sudo -u postgres createdb -O opennms opennms
Finally, run the command below to set the PostgreSQL superuser password.
sudo -u postgres psql -c "ALTER USER postgres WITH PASSWORD 'type_your_password';"
Replace 'type_your_password' with your secure password.
Download and configure OpenNMS.
Downloading and configuring OpenNMS on Ubuntu 24.04 requires adding the official software repository and its security key so your system can safely fetch the package files. You must add the OpenNMS repository GPG key and package source to your system's software lists before you can install the actual application package through your terminal.
But first, add the openNMS repository GPG key by running the command below.
curl -fsSL https://debian.opennms.org/OPENNMS-GPG-KEY | sudo gpg --dearmor -o /usr/share/keyrings/opennms.gpg
Next, add the openNMS repository file.
echo "deb [signed-by=/usr/share/keyrings/opennms.gpg] https://debian.opennms.org stable main" | sudo tee /etc/apt/sources.list.d/opennms.list
Finally, run the commands below to install OpenNMS packages, including all dependencies.
sudo apt update
sudo apt install opennms
sudo apt install r-recommended
The command above will install Java JDK since OpenNMS depends on it.
Run the command below to see which version of Java JDK has been installed. At the time of this writing, Java JDK version 11 will be installed when you install the OpenNMS packages.
sudo update-alternatives --config java
Then, continue below to set your JAVA_HOME variable.
Next, run the command below to open the /etc/environment file.
sudo nano /etc/environment
Then, add the Java path displayed above at the end of the file and save.
JAVA_HOME="/usr/lib/jvm/java-11-openjdk-amd64"
Next, run the command below to apply the changes.
source /etc/environment
When you're done, OpenJDK should be installed and ready to use.
Configure PostgreSQL database access
Configuring PostgreSQL database access for OpenNMS ensures the monitoring software can securely communicate with your database server using stored credentials. You set up this secure connection by running the built-in command-line tool with your database username and password so OpenNMS can read and write network monitoring data without permission errors.
sudo -u opennms /usr/share/opennms/bin/scvcli set postgres opennms type_your_password
sudo -u opennms /usr/share/opennms/bin/scvcli set postgres-admin postgres type_your_password
Replace both type_your_password instances with the actual passwords for your opennms and postgres database accounts. |
Next, run the command below to open the opennms-datasources.xml file.
sudo -u opennms nano /usr/share/opennms/etc/opennms-datasources.xml
Set encrypted credentials to access the PostgreSQL database in the file below.
You shouldn't have to do anything in the file since the encrypted credentials variables are used in the configuration.
This is how the file should look.
...
  <jdbc-data-source name="opennms"
                    database-name="opennms"
                    class-name="org.postgresql.Driver"
                    url="jdbc:postgresql://localhost:5432/opennms"
                    user-name="${scv:postgres:username}"
                    password="${scv:postgres:password}" />

  <jdbc-data-source name="opennms-admin"
                    database-name="template1"
                    class-name="org.postgresql.Driver"
                    url="jdbc:postgresql://localhost:5432/template1"
                    user-name="${scv:postgres-admin:username}"
                    password="${scv:postgres-admin:password}">
    <connection-pool idleTimeout="600"
                     minPool="0"
                     maxPool="10"
                     maxSize="50" />
  </jdbc-data-source>

  <jdbc-data-source name="opennms-monitor"
                    database-name="postgres"
                    class-name="org.postgresql.Driver"
                    url="jdbc:postgresql://localhost:5432/postgres"
                    user-name="${scv:postgres-admin:username}"
                    password="${scv:postgres-admin:password}">
    <connection-pool idleTimeout="600"
                     minPool="0"
                     maxPool="10"
                     maxSize="50" />
...
Save and exit.
Detect the Java environment and persist in /usr/share/opennms/etc/java.conf
sudo /usr/share/opennms/bin/runjava -s
You should see the output below:
Output:
runjava: Looking for an appropriate JVM...
runjava: Checking for an appropriate JVM in JAVA_HOME...
runjava: Found: "/usr/lib/jvm/java-11-openjdk-amd64/bin/java" is an appropriate JVM.
runjava: Value of "/usr/lib/jvm/java-11-openjdk-amd64/bin/java" stored in configuration file.
sudo nano /etc/default/opennms
Then add the highlighted line in the file and save
# Set JAVA_HOME if it cannot be auto-detected
#JAVA_HOME=/usr/lib/jvm/java-8-oracle

JAVA_HOME=/usr/lib/jvm/java-21-openjdk-amd64
Initialize the database and detect system libraries persisted in /opt/opennms/etc/libraries.properties
sudo /usr/share/opennms/bin/install -dis
You should see an output with a success message.
Next, configure the system's service for OpenNMS to start Horizon on the system boot.
sudo systemctl enable --now opennms
sudo systemctl start opennms
Finally, the OpenNMS web application at the URL below.
http://localhost:8980/opennms
The default login user is admin, and the password is initialized to admin.
Username: admin
Password: admin
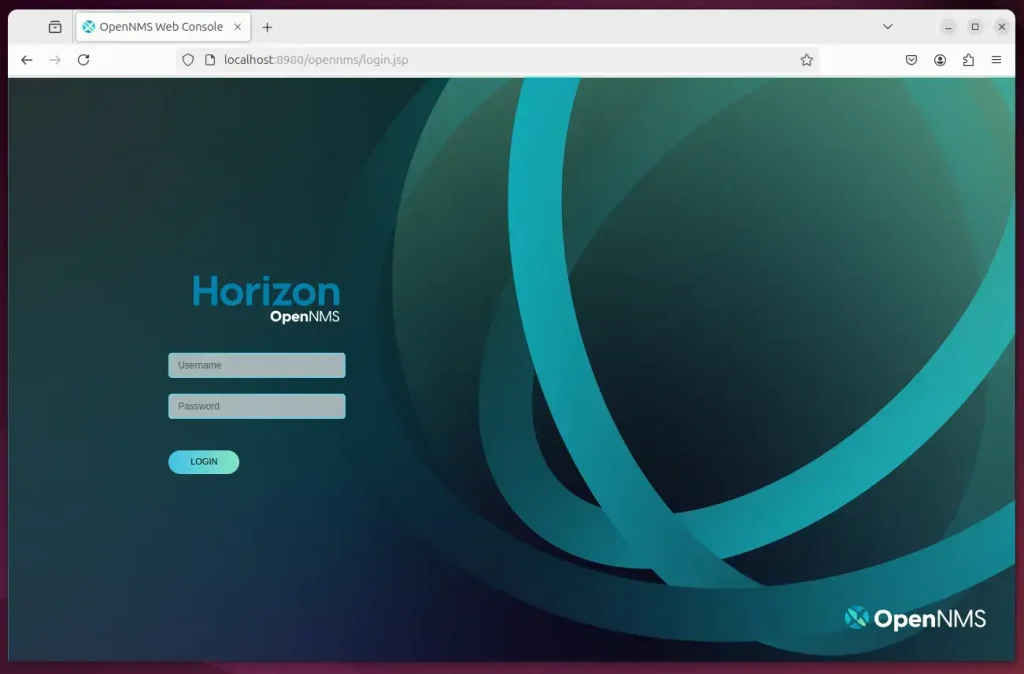
Log in and start configuring your settings.
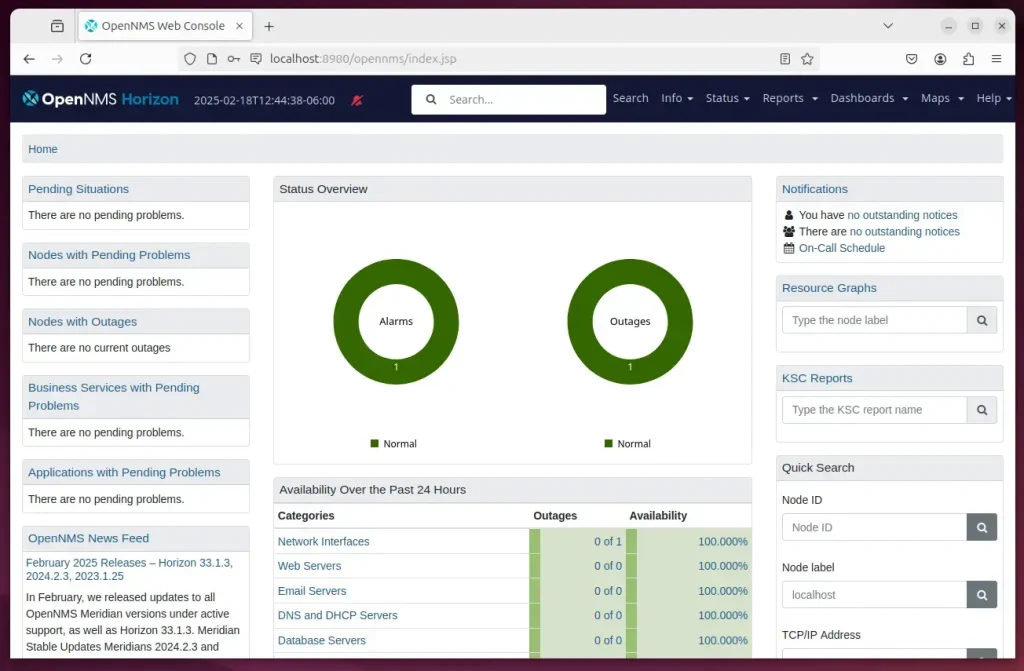
That should do it!
Conclusion:
This OpenNMS installation guide for Ubuntu 24.04 covers essential steps to configure the network management system. The OpenNMS system monitors network devices and services, preventing downtime by alerting you to issues before they impact users.
- OpenNMS Installation: Followed the installation process for OpenNMS to enable robust network management capabilities.
- PostgreSQL Setup: Installed and configured PostgreSQL, creating a dedicated database user and setting up the necessary databases.
- Java Configuration: Installed Java and configured the JAVA_HOME variable to ensure OpenNMS runs smoothly.
- Security Measures: Implemented credential storage using the secure credentials vault for PostgreSQL.
- Service Management: Enabled OpenNMS to start on system boot and initiated the service.
- Web Access: Gained access to the OpenNMS web interface for further configuration and monitoring.
By completing these steps, you now have a fully functional OpenNMS installation that can help you monitor and manage your network effectively.
Is OpenNMS still free?
OpenNMS is a free and open-source network monitoring and network management platform written in Java. It provides fault management, performance data collection, service monitoring, event processing, and topology mapping.
Was this guide helpful?

About the Author
Richard
Tech Writer, IT Professional
Richard, a writer for Geek Rewind, is a tech enthusiast who loves breaking down complex IT topics into simple, easy-to-understand ideas. With years of hands-on experience in system administration and enterprise IT operations, he’s developed a knack for offering practical tips and solutions. Richard aims to make technology more accessible and actionable. He's deeply committed to the Geek Rewind community, always ready to answer questions and engage in discussions.




No comments yet — be the first to share your thoughts!