Install Angular CLI on Ubuntu: A Step-by-Step Guide
Installing the Angular CLI on Ubuntu helps you easily create and manage Angular web projects. The Angular CLI is a command-line tool that gives you simple commands to build and run your applications.
This tool lets you generate new parts of your app, test it on your computer, and get it ready to go live. You’ll install Angular CLI version 17.
Install Angular CLI on Ubuntu by first installing Node.js with NVM, then running npm install -g @angular/cli. Verify the installation with ng version.
How to install and use Angular CLI on Ubuntu Linux
Installing the Angular CLI on Ubuntu Linux is safe using NVM to manage Node.js. This method avoids needing special admin rights to install global packages. First, open your terminal and run the following command to install NVM from its official source:
“`bash curl -o- https://raw.githubusercontent.com/nvm-sh/nvm/v0.40.1/install.sh | bash “`
After installing NVM, refresh your profile so the terminal recognizes the new command: `source ~/.bashrc`
Next, install the latest Long Term Support (LTS) version of Node.js. LTS versions are generally recommended for stability. For 2026, this would be version 22: `nvm install 22`
Verify your installation by checking the versions of Node and NPM:
“`bash node -v “`
“`bash npm -v “`
Now, install the Angular CLI globally using NPM:
“`bash npm install -g @angular/cli “`
Modern Angular Development
Modern Angular development speeds up tasks using tools like Esbuild, making your development server start almost instantly. This greatly improves your experience when starting a new Angular project. To create a new project, use the standard command: `ng new my-first-project`.
Modern Angular projects now default to “Standalone” components. This approach means you typically won’t need the older NgModules, making your code cleaner and easier to manage.
Check your version to confirm everything is ready:
“`bash ng version “`

Running your project
Running your Angular project locally is a quick process. First, navigate into your project’s folder using the `cd` command, then start the development server with `ng serve`. This command will show your app working in the browser, usually at http://localhost:4200/.
“`bash cd my-first-project “`
“`bash ng serve “`
Open your web browser and go to http://localhost:4200/ to see your app running.
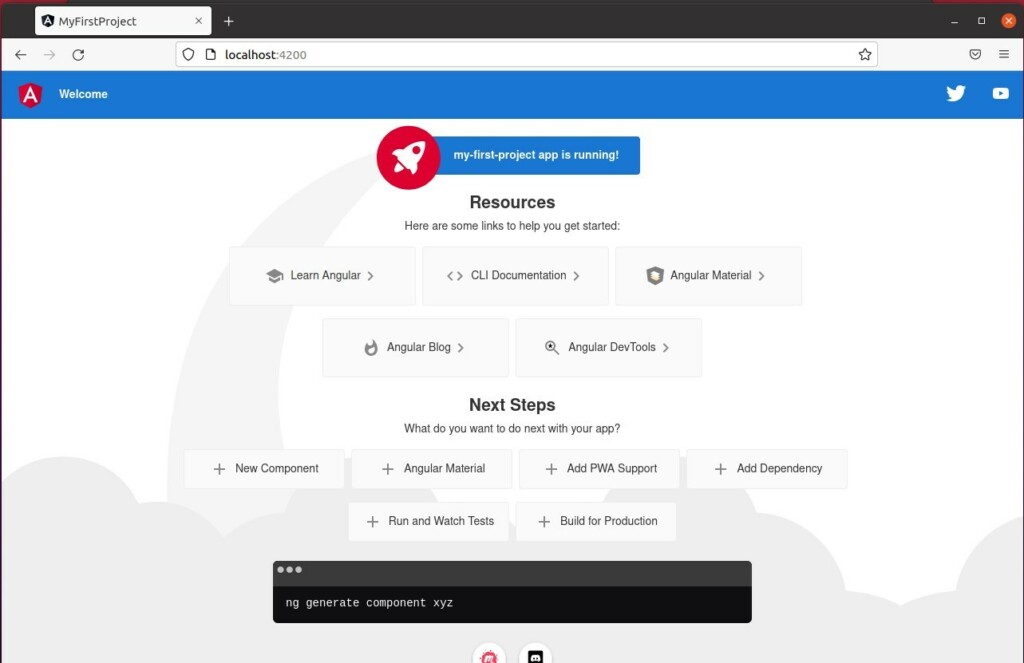
When you run the `ng serve` command, the CLI watches your files. Every time you save a change, the browser will update automatically.
Conclusion
By following these steps, you’ve got a modern setup with NVM and the latest Angular tools. You’re now ready to build fast, efficient web applications on Ubuntu.
If you’re curious about all the available versions, you can check them out here: https://github.com/angular/angular-cli/releases
What is npm install Angular CLI?
When you run ‘npm install @angular/cli’, it installs all the needed Angular packages and other bits your project requires.
Was this guide helpful?

About the Author
Richard
Tech Writer, IT Professional
Richard, a writer for Geek Rewind, is a tech enthusiast who loves breaking down complex IT topics into simple, easy-to-understand ideas. With years of hands-on experience in system administration and enterprise IT operations, he’s developed a knack for offering practical tips and solutions. Richard aims to make technology more accessible and actionable. He's deeply committed to the Geek Rewind community, always ready to answer questions and engage in discussions.
No comments yet — be the first to share your thoughts!