How to Hide the Account Protection Section in the Windows Security apps on Windows 11
Want to declutter your Windows Security app or prevent accidental changes? Here’s how you can hide the Account Protection section in Windows 11.
Open gpedit.msc to access Local Group Policy Editor. Navigate to Computer Configuration > Administrative Templates > Windows Components > Windows Security > Account protection, then double-click “Hide the Account protection area” and select “Enabled” to hide it.
Applies to
You can hide the Account Protection section in Windows Security on Windows 10 and Windows 11 Pro, Enterprise, and Education editions.
Why hide the Account Protection section?
You can hide the Account Protection section in Windows Security if you want to stop others from changing important security settings, like how you sign in with Windows Hello or the setting that locks your PC when you walk away.
What happens when done: The Account Protection section will disappear from the Windows Security app interface, preventing users from modifying those specific security configurations.
Prerequisites and Limitations
Before you hide Account Protection in Windows 11, you need to be logged in as an administrator and back up your registry, as changes can’t be undone easily.
Hide or Show Account Protection via Group Policy
You can hide or show the Account Protection section in Windows 11 using the Local Group Policy Editor, a tool that lets you change settings for your computer.
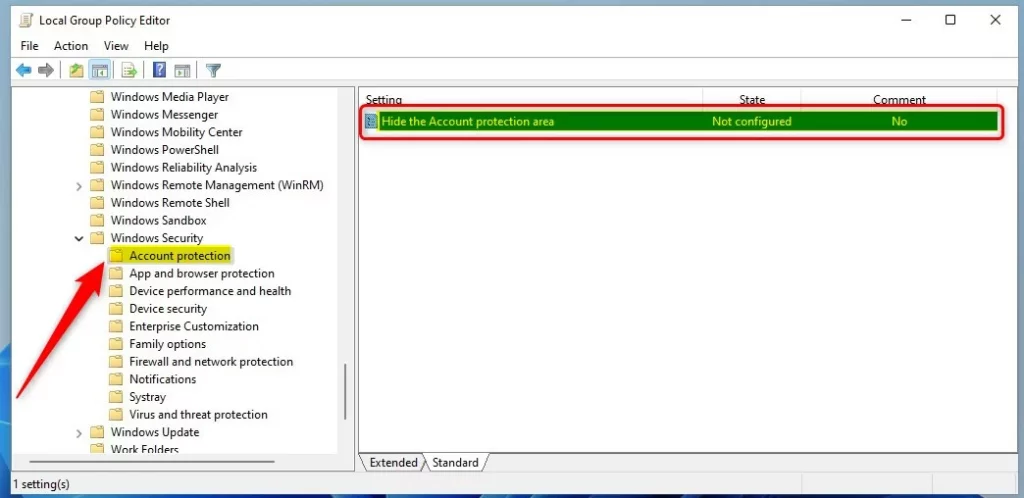
1. Open the Local Group Policy Editor by clicking the Start menu and searching for gpedit.msc.
2. In the menu on the left, go to: Computer Configuration > Administrative Templates > Windows Components > Windows Security > Account protection
3. On the right side, double-click the setting named “Hide the Account protection area.”
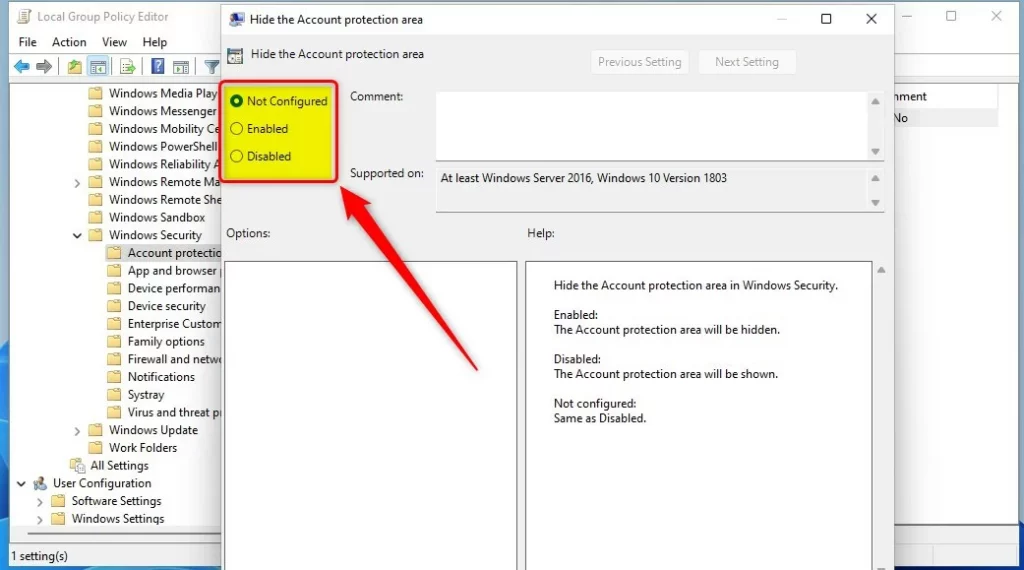
4. Choose your setting:
- Not Configured: This is the default setting.
- Enabled: This hides the Account protection area.
- Disabled: This shows the Account protection area.
Hide or Show Account Protection via Registry
If you can’t use the Group Policy Editor, you can still hide or show Account Protection in Windows 11 by making changes in the Windows Registry.
If you cannot use the Group Policy Editor, you can use the Windows Registry instead. Warning: Back up your registry before proceeding.
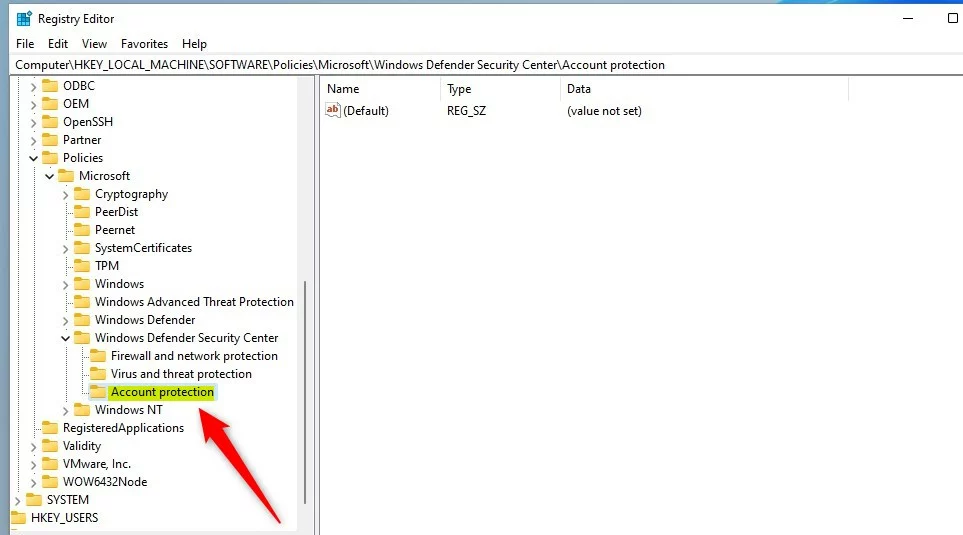
1. Open the Registry Editor by searching for regedit.exe in the Start menu.
2. Navigate to this path in the Registry Editor:
HKEY_LOCAL_MACHINE\SOFTWARE\Policies\Microsoft\Windows Defender Security Center\Account protection
If you don’t see those folders, right-click on the “Windows” folder and create the new keys yourself.
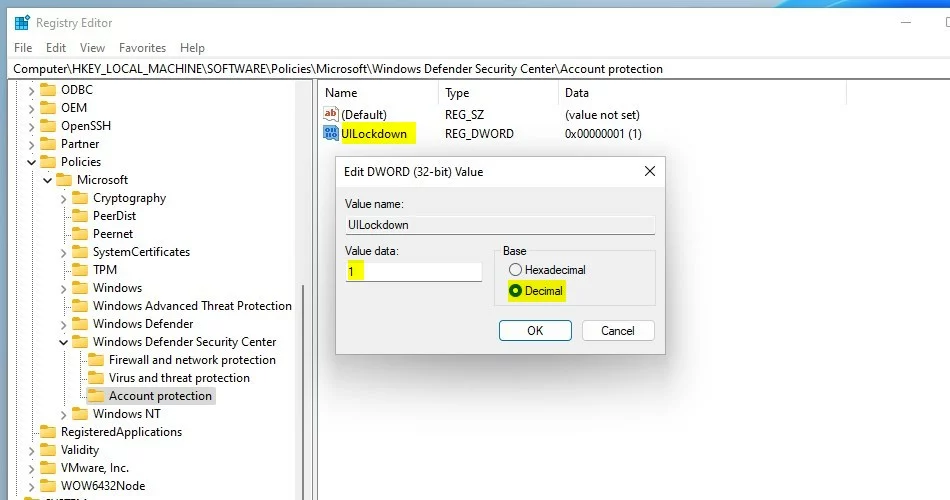
3. Right-click in the empty space on the right, select New, then DWORD (32-bit) Value.
4. Name this new file UILockdown.
5. Double-click UILockdown and change the Value data. Enter 1 to make the section visible in the Windows Security app, or enter 0 to hide it.
- Enter
0to show the section in the Windows Security app. - Enter
1to hide the section.
6. Restart your computer to apply the changes.
Summary
You can hide or show the Account Protection section in Windows 11 using either the Local Group Policy Editor or the Registry Editor, and a restart may be needed for changes to take effect.
Does hiding Account Protection disable security features?
No, hiding the Account Protection section does not disable your security features. It only removes the visual menu from the Windows Security app. Your existing settings for Windows Hello, Dynamic Lock, and account security remain active and fully functional in the background to protect your device.
Can I hide this section on 🪟 Windows 11 Home edition?
Yes, you can hide the section on Windows 11 Home. Since the Local Group Policy Editor is not available in the Home edition, you must use the Registry Editor method. Follow the registry steps carefully, ensuring you create the correct keys and DWORD values as described in this guide.
Is a system restart required after modifying the registry?
Yes, a system restart is generally required after modifying the registry to ensure the changes take effect. While some settings might apply immediately, restarting your computer ensures that the Windows Security app refreshes its configuration and correctly hides or displays the Account Protection section as you intended.
Was this guide helpful?

About the Author
Richard
Tech Writer, IT Professional
Richard, a writer for Geek Rewind, is a tech enthusiast who loves breaking down complex IT topics into simple, easy-to-understand ideas. With years of hands-on experience in system administration and enterprise IT operations, he’s developed a knack for offering practical tips and solutions. Richard aims to make technology more accessible and actionable. He's deeply committed to the Geek Rewind community, always ready to answer questions and engage in discussions.
📚 Related Tutorials


[…] you to quickly see the status of your virus and threat protection, firewall and network security, Account protection, App and Browser Control, and […]
[…] security status. It covers areas like virus and threat protection, firewall and network security, Account protection, App and Browser Control, and Device […]