
This article explains the steps to turn on or off Variable Refresh Rate (VRR) for games in Windows 11.
Variable refresh rate (VRR) allows a monitor with VRR capabilities, including AMD’s FreeSync, Nvidia’s G-SYNC, and VESA DisplayPort Adaptive-Sync, to adjust its refresh rate based on the frame rate of the image being displayed.
For DirectX 11 full-screen games that do not support VRR natively, this feature will enable the machine to output higher frame rates and help reduce screen tearing in games.
This setting will only appear if your machine has the necessary drivers and a VRR-capable monitor. Otherwise, you won’t see the settings.
Turn on or off Variable Refresh Rate (VRR) via Windows Settings
As described above, VRR enhances your VRR-capable monitors to adjust their refresh rate based on the image’s frame rate.
Here’s how to turn it on or off.
First, open the Windows Settings app.
You can do that by clicking on the Start menu and selecting the Settings app. Press the keyboard shortcuts (Windows key + I) to launch the Settings app.
When the Settings app opens, click the System button on the left.
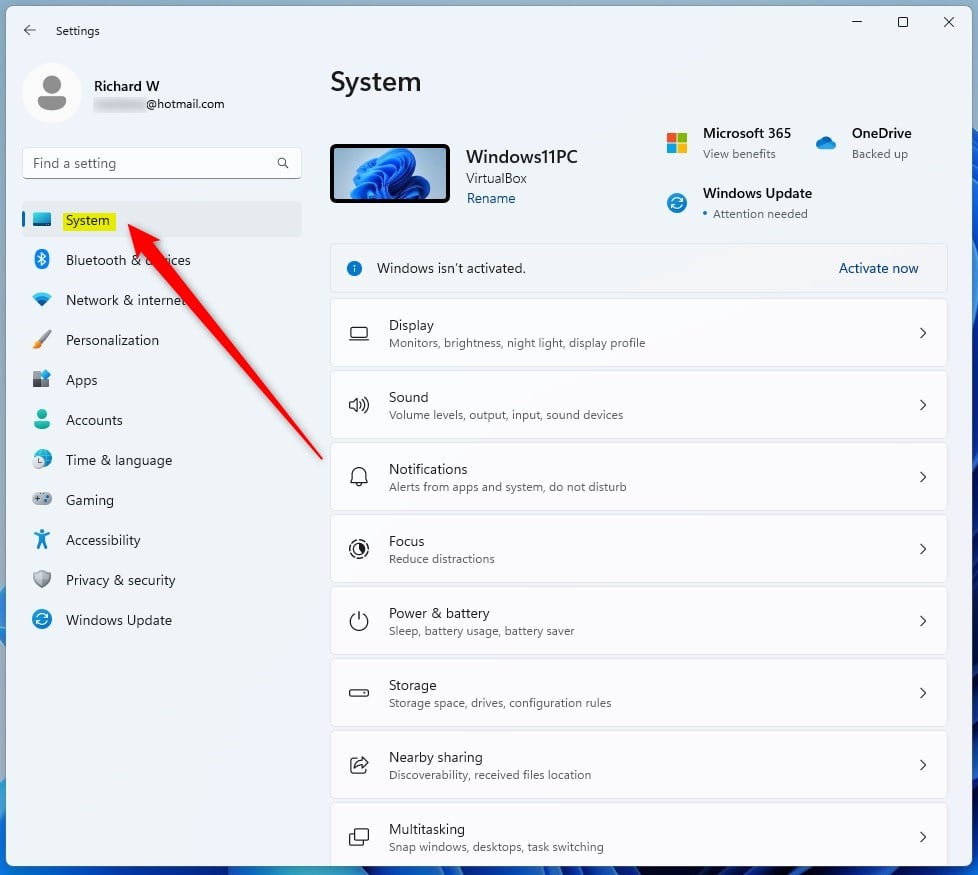
On the right, click on the Display tile to expand.

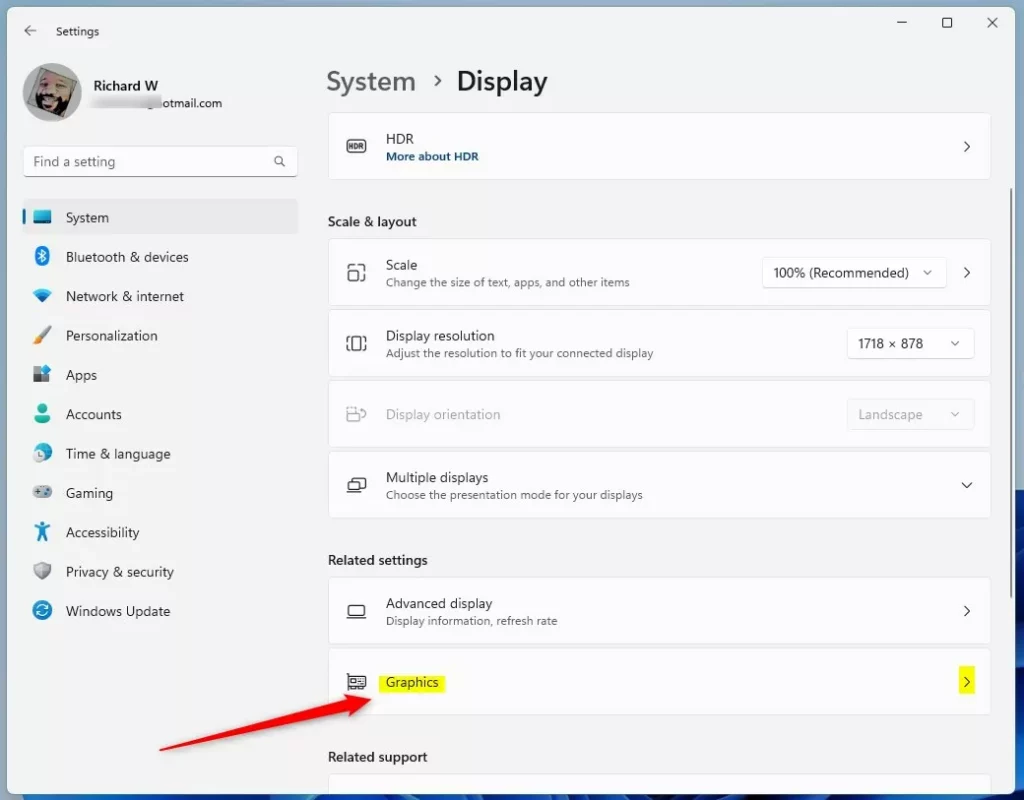
On the System -> Display settings pane, under Related settings, select the Graphics tile to expand.
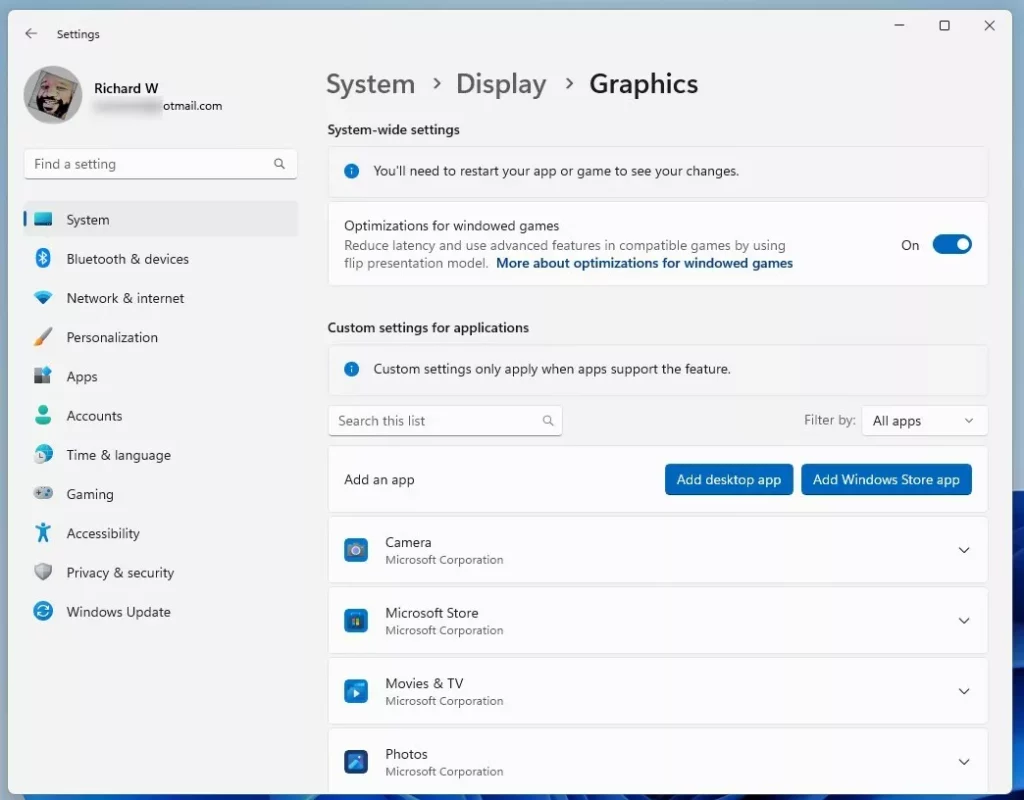
On the System -> Display -> Graphics settings pane, click the Advanced graphics settings at the bottom to expand.
Then, toggle the button for Variable refresh rate to the On position to enable.
To disable it, toggle the button back to the Off position.
Turn On or Off Variable Refresh Rate (VRR) via the Registry Editor
Alternatively, users can turn Variable Refresh Rate (VRR) on or off via the Windows Registry Editor.
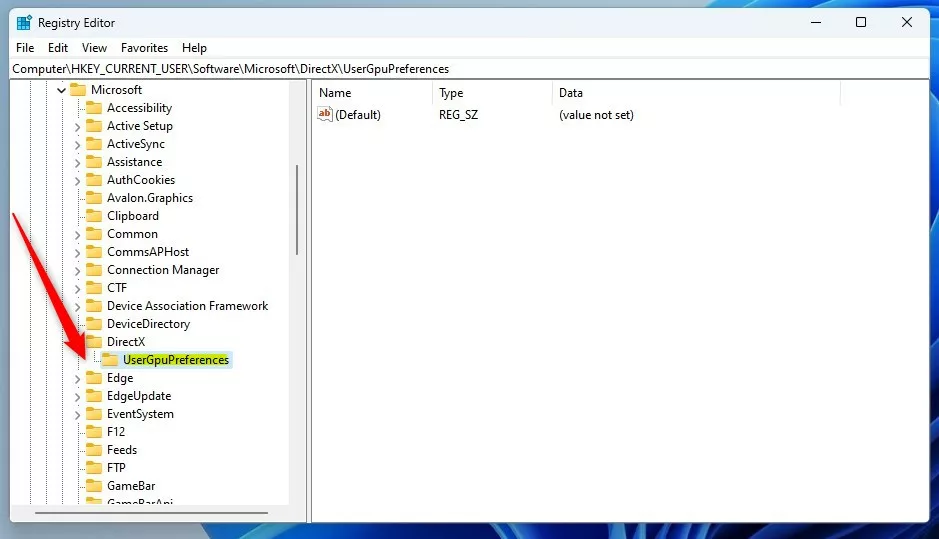
To do that, first, open the Windows Registry, and navigate to the folder key path as listed below.
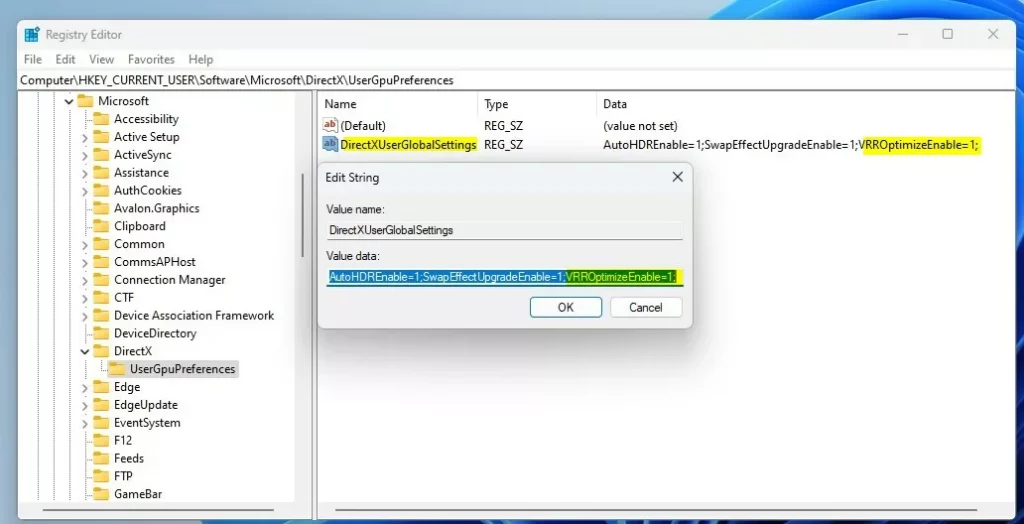
HKEY_CURRENT_USER\Software\Microsoft\DirectX\UserGpuPreferences
If you don’t see the UserGpuPreferences folder key, right-click on the DirectX key, then create the subkey (UserGpuPreferences) folders.
Right-click on the right pane of the UserGpuPreferences folder key and select New -> String. Next, type a new string value named DirectXUserGlobalSettings.
Double-click the new value name (DirectXUserGlobalSettings) and enter the Value data of 1 to the end of the string for VRROptimzeEnable to enable the VRR feature.
A Value data of 0 will turn off the VRR feature.
That should do it!
Reference:
Conclusion:
- Enabling Variable Refresh Rate (VRR) in Windows 11 can significantly enhance the gaming experience by allowing VRR-capable monitors to adjust their refresh rate based on the frame rate of the displayed image.
- This feature is particularly beneficial for DirectX 11 full-screen games that lack native VRR support, as it can help increase frame rates and reduce screen tearing.
- Users can easily toggle VRR on or off via Windows Settings by navigating through the System > Display > Graphics settings panel and accessing the Advanced graphics settings.
- Alternatively, advanced users can utilize the Windows Registry Editor to enable or disable VRR by modifying the Value data for the VRROptimzeEnable string value under the UserGpuPreferences key path.
- Users can refer to the official Microsoft DevBlog post linked in the reference section for more detailed information.


Leave a Reply