
When you delete files on your computer, they usually go to the Recycle Bin. This lets you easily get them back if you need to. But did you know that Windows 11 does not create a Recycle Bin for removable drives like USB sticks or memory cards by default? If you delete something from those drives, it’s gone for good — no easy way to restore it.
Don’t worry! You can turn on the Recycle Bin for these removable drives to protect your files from accidental deletion. Below, you’ll find simple steps to do this by making a small change in Windows’ settings.
Why Enable Recycle Bin for Removable Drives?
- Protect your files from being lost by mistake.
- Deleted files from USB drives will go to Recycle Bin first, so you can restore them.
- You get extra peace of mind when working with external drives.
Step-by-Step: How to Enable Recycle Bin for USB and Other Removable Drives
Follow these easy steps carefully. You will be using the Windows Registry Editor — a tool that controls important settings for your system. Don’t worry, we’ll guide you through!
Step 1: Open the Registry Editor
- Press Windows key + R on your keyboard.
- Type
regeditand press Enter. - [Admin Privileges Required] If asked “Do you want to allow this app to make changes?”, click Yes.
If you want more info on how to open the registry, visit this guide: How to Open the Registry in Windows 11.
Step 2: Go to the First Folder Path
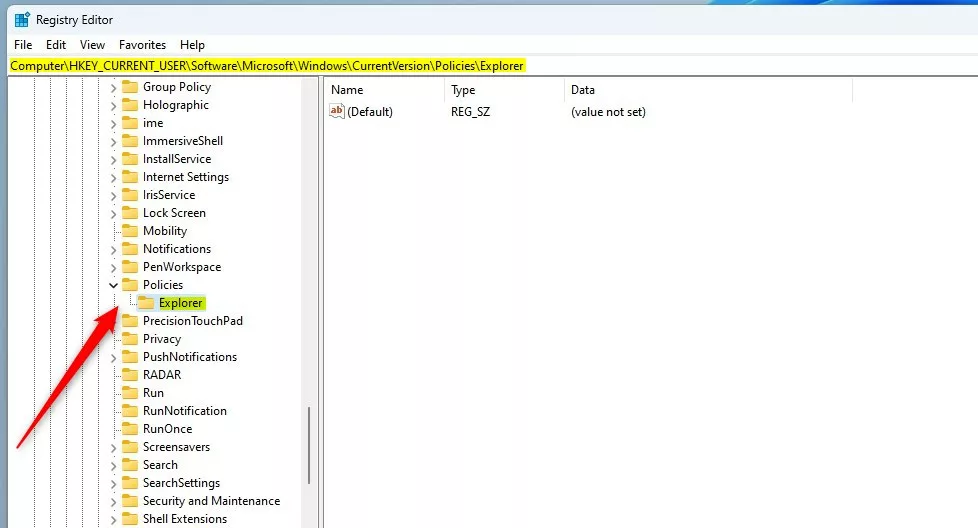
In the Registry Editor, use the left sidebar to navigate to:
HKEY_CURRENT_USER\Software\Microsoft\Windows\CurrentVersion\Policies\ExplorerStep 3: Check for the Explorer Folder
If you don’t see the Explorer folder under Policies, right-click on Policies, select New > Key, and name it Explorer.
Step 4: Create a New Value
- Click on the Explorer folder.
- On the right side, right-click on empty space, select New > DWORD (32-bit) Value.
- Name it RecycleBinDrives.
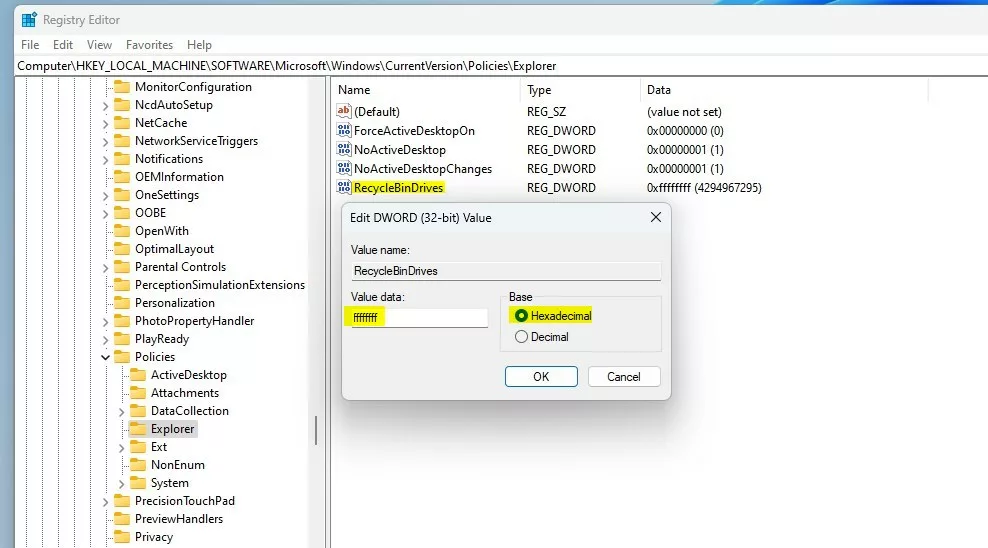
Step 5: Set the Value to Enable Recycle Bin
- Double-click the new RecycleBinDrives entry.
- In the window that opens, select Hexadecimal under Base.
- Type
ffffffffin the Value data box. - Click OK.
Step 6: Repeat for the Second Folder Path
Navigate to:
HKEY_LOCAL_MACHINE\SOFTWARE\Microsoft\Windows\CurrentVersion\Policies\ExplorerThen repeat Steps 3 to 5 here as well.
Step 7: Close the Registry Editor
Exit the Registry Editor when you’re done.
Step 8: Restart Your Computer
Restart your computer to apply the changes.
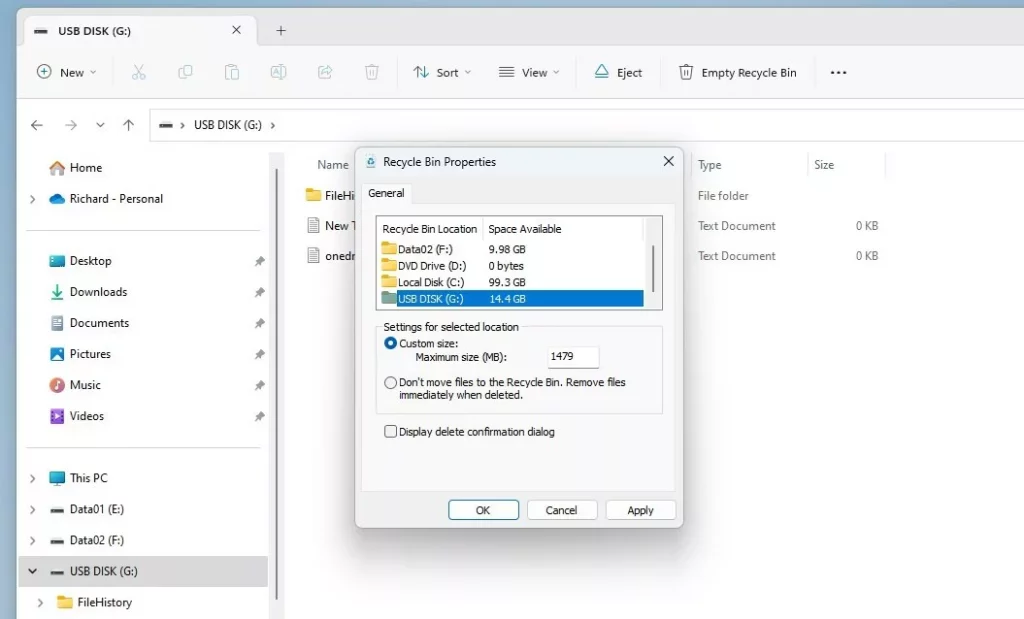
What to Expect Now
When you delete files from your USB or memory card, they will go to a hidden Recycle Bin folder on that drive first.
This folder is named $Recycle.Bin and is hidden by default.
To see hidden files and folders, you can follow this simple guide: Show Hidden Files in Windows 11.
Summary
By enabling the Recycle Bin for removable drives, you get extra safety for files on USB sticks and memory cards. This change requires editing the Windows Registry, but if you follow the steps carefully, it’s easy to do. Don’t forget to restart your PC after making the changes. If you ever want to turn off this feature, just open the Registry Editor again and either delete the RecycleBinDrives entry or leave its value empty, then restart your PC. Enjoy safer file deletion on your removable drives!


Leave a Reply