
This article explains how to enable or disable the Task Manager app in Windows 11.
The Task Manager app has been part of Windows since early Windows NT 4.0 / 2000, allowing users to view tasks (processes), start-up programs, services, and the computer’s overall performance.
The app is pretty essential to system administrators. However, not all users should have access to it. If you don’t want users using the Task Manager app in Windows, you can turn it off.
Once disabled, users will get a message that the system administrator has disabled the Task Manager app.
Learning how to enable or disable Task Manager on Windows 11 can be helpful when you want to restrict access to certain computer features. For example, if you are a system administrator, you may want to disable Task Manager for standard users to prevent them from ending critical system processes or accessing sensitive information.
On the other hand, if you are a regular user, you may want to enable Task Manager to troubleshoot issues or monitor your computer’s performance. Knowing how to enable or disable Task Manager can be useful in various situations.
Disable or Enable the Task Manager app
As mentioned above, the system administrator can turn on or off the Task Manager app for specific or all users on Windows.
Here’s how to do that.
First, open the Local Group Policy Editor.
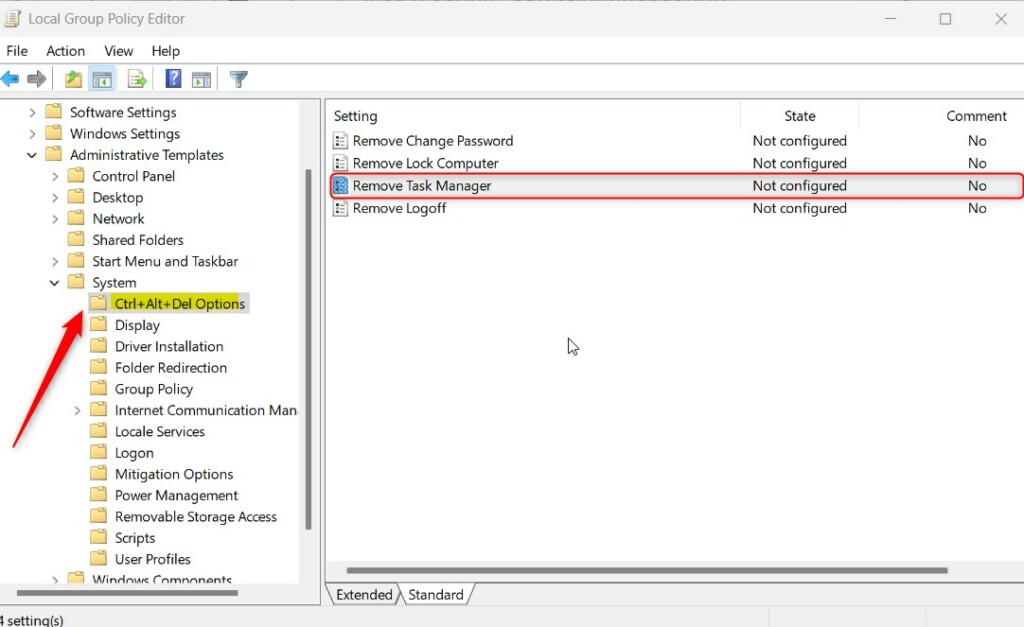
Then expand the following folders User Configuration > Administrative Templates > Ctrl+Alt+Del Options.
User Configuration > Administrative Templates > Ctrl+Alt+Del Options
Next, click on the CTRL-Alt-Del Options folder on the left panel, and double-click the setting on the right called “Remove Task Manager” to open.
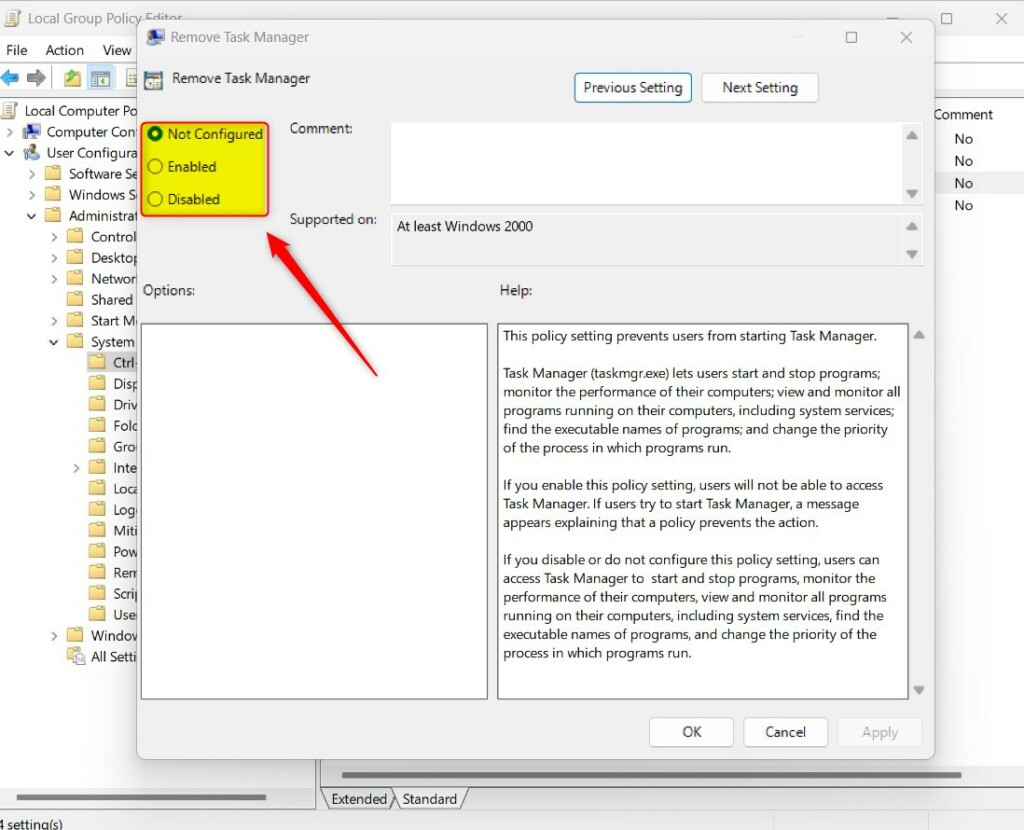
When the setting window opens, select one of the options:
- Not Configured – Same as Disabled. Users will be able to access Task Manager.
- Enabled – Users will not be able to access the Task Manager.
- Disabled – Users can access the Task Manager to start, stop, and view system performance.
Save your settings and restart your computer for the changes to apply.
Turn on or off Task Manager via Windows Registry Editor
Yet another way to turn on or off Task Manager in Windows is to use the Windows Registry Editor.
If you can’t open the Local Group Policy Editor, use the Windows Registry editor instead.
Open the Windows Registry, and navigate to the two folder keys below. The USER key will disable or enable Task Manager for standard users. Use the MACHINE key to disable or enable for all users.
HKEY_CURRENT_USER\SOFTWARE\Microsoft\Windows\CurrentVersion\Policies\System
HKEY_LOCAL_MACHINE\SOFTWARE\Microsoft\Windows\CurrentVersion\Policies\System
If you don’t see the System folder key, right-click on the Policies key, then create the subkey (System) folders.

Right-click the System folder key’s right pane and select New -> DWORD (32-bit) Value. Type a new key named DisableTaskMgr.
Double-click the new key item name (DisableTaskMgr) and make sure the Base option is Decimal, and then update the Value data:
- To disable the Task Manager, type 1.
- To enable the Task Manager, delete the name DisableTaskMgr created above.

Save your changes and restart your computer.
That should do it!
Conclusion:
- The Task Manager app is a crucial tool in Windows 11 for monitoring system performance and troubleshooting issues.
- System administrators can disable the Task Manager to restrict access for standard users and prevent interference with critical system processes.
- Users can employ the Local Group Policy Editor or Windows Registry Editor to enable or disable the Task Manager per their requirements.
- Knowing how to control Task Manager access can be valuable in maintaining system integrity and enhancing overall security measures.


Leave a Reply