
This article explains how to allow or prevent users from enabling slideshow on the lock screen in Windows 11.
The lock screen is the screen or curtain you see when you turn on your Computer before the sign-in screen. It is also displayed once your Computer is locked after you step away or press the Windows key + L.
Windows allows you to customize the lock screen background using Windows Spotlight, Pictures, or a Slideshow that randomly displays your chosen images.
Any user can customize their lock screen background. However, Windows also has settings that can prevent users from accessing the slideshow settings and stop the slideshow from ever running on the lock screen.
Allow or prevent users from playing slideshow on the lock screen
As described above, Windows can allow or prevent users from playing slideshow on the lock screen. Enable this setting will lock the slideshow settings on your PC and prevent a slideshow from playing on the lock screen.
Here’s how to do that.
First, open the Local Group Policy Editor.
Then expand the following folders Computer Configuration -> Administrative Templates -> Control Panel -> Personalization.
Computer Configuration -> Administrative Templates -> Control Panel -> Personalization
Next, click on the Personalization folder on the left panel, and double-click the setting on the right called “Prevent enabling lock screen slide show” to open.

When the setting window opens, select one of the options:
- Not Configured – Same as Disabled. Users can enable a slide show that runs on the lock screen.
- Enabled – If enabled, users will no longer be able to modify slide show settings and no slide show on the lock screen.
- Disabled – If disabled, users can enable a slide show that runs on the lock screen.

Save your settings and restart your Computer for the changes to apply.
Enable or disable the lock screen slideshow via Windows Registry Editor
Yet another way to enable or disable users by changing the lock screen slideshow settings in Windows is to use the Windows Registry Editor.
If you can’t open the Local Group Policy Editor, use the Windows Registry editor instead.
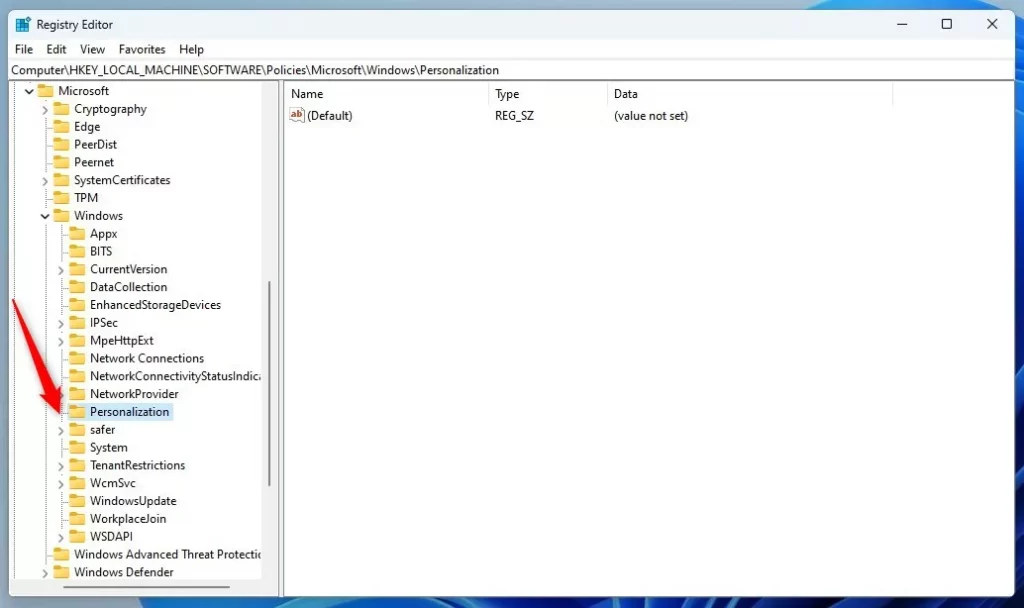
Open the Windows Registry, and navigate to the folder key path below.
HKEY_LOCAL_MACHINE\SOFTWARE\Policies\Microsoft\Windows\Personalization
If you don’t see the Personalization folder key, right-click on the Windows key, then create the subkey (Personalization) folders.
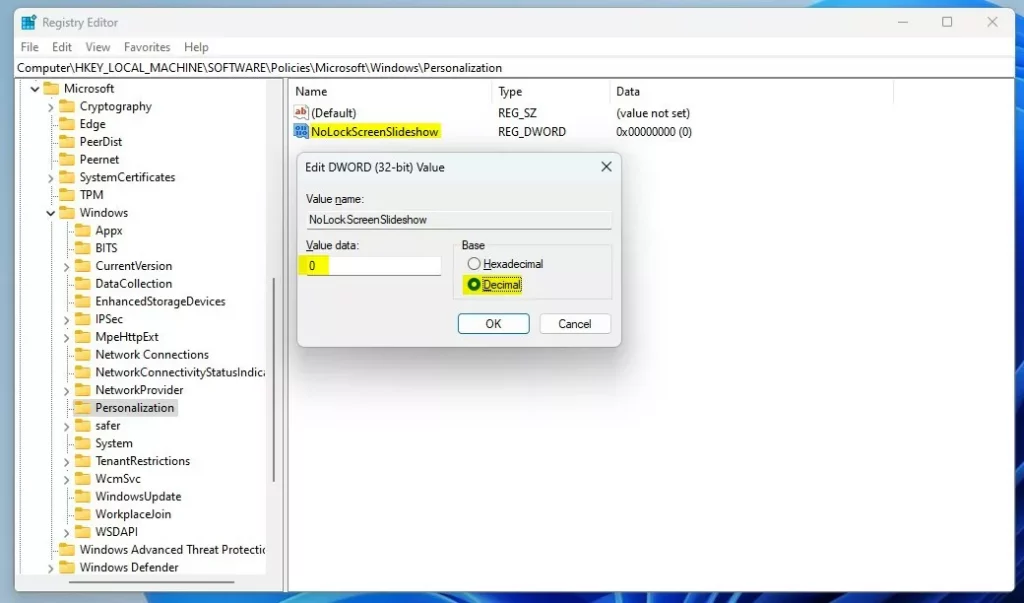
Right-click the Personalization folder key’s right pane and select New -> DWORD (32-bit) Value. Type a new key named NoLockScreenSlideshow.
Double-click the new key item name (NoLockScreenSlideshow) and make sure the Base option is Decimal, and then update the Value data:
- To turn this feature on. Type 1.
- To turn this feature off. Type 0.
Save your changes and restart your Computer.
That should do it!
Conclusion:
- Enabling or preventing users from enabling slideshow on the lock screen in Windows 11 can be achieved through the Local Group Policy Editor or the Windows Registry Editor.
- Using the Local Group Policy Editor, navigate to the “Prevent enabling lock screen slide show” setting to lock the slideshow settings and prevent it from running on the lock screen.
- Create a DWORD (32-bit) Value named “NoLockScreenSlideshow” in the Windows Registry Editor to turn the feature on or off.
- After making changes, it’s essential to save settings and restart the computer for the modifications to take effect.
- These methods allow customization of user access to lock screen slideshow settings based on specific organizational or personal preferences.
Leave a Reply