
This article describes the steps to turn on or off networking from the host into the Sandbox in Windows 11.
When you turn on Sandbox in Windows 11, you enable a lightweight, isolated desktop environment to run applications safely. The sandbox environment is completely isolated, remains “sandboxed,” and runs separately from the host machine.
By default, networking is disabled in the Windows sandboxed environment to decrease the attack surface exposed by the Sandbox. If you need the sandboxed environment to access external networks, you must allow networking to the Windows sandbox.
This is done by creating a virtual switch on the host and connecting the Windows Sandbox via a virtual NIC.
Below is how to do that in Windows 11.
How to turn on or off networking with Sandbox in Windows 11
As described above, by default, networking is disabled in the Windows sandboxed environment to decrease the attack surface exposed by the Sandbox.
You cannot access external networks, including the internet, if you don’t allow networking.
Below is how to do that.
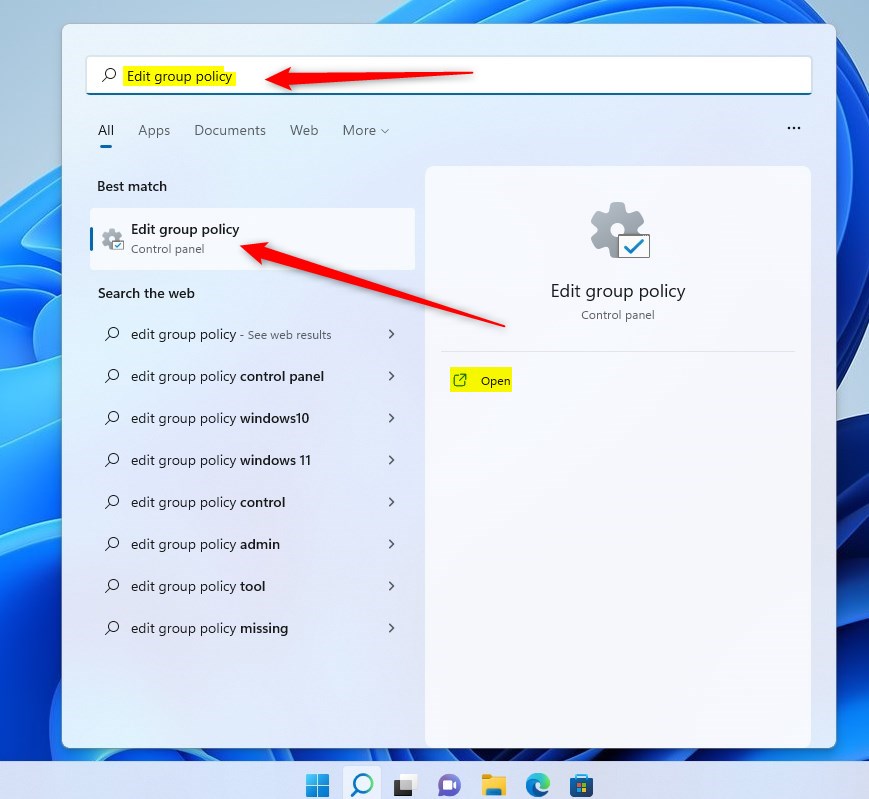
First, open Local Group Policy Editor by clicking on the Start Menu and searching for Edit group policy, as highlighted below.
Under Best match, select Edit group policy to launch Local Group Policy Editor.
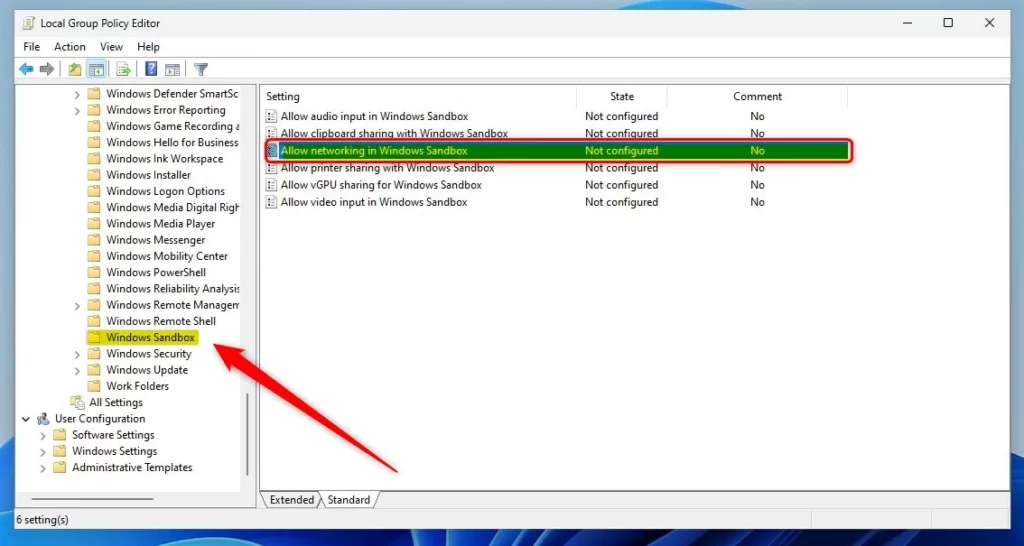
In the left pane of Local Group Policy Editor, expand the tree:
Computer Configuration > Administrative Templates > Windows Components > Windows Sandbox
Then, in the Windows Sandbox details pane on the right, locate and double-click the setting “Allow networking in Windows Sandbox.”
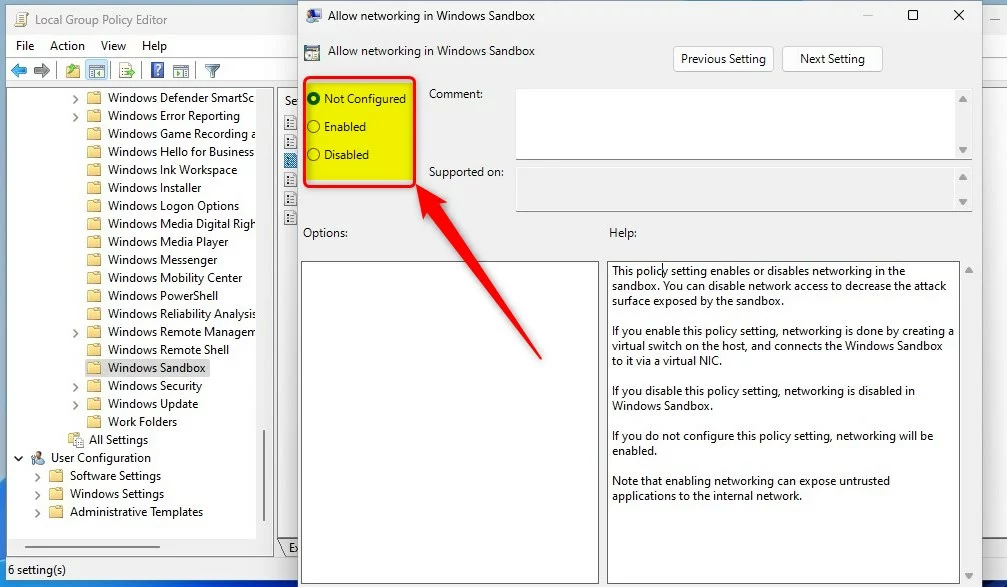
On the Allow networking in Windows Sandbox window, set the option to Not Configure, Enabled, or Disabled.
- Not Configured (default)
- Enabled – Virtual switch is created to allow networking to the Windows sandbox.
- Disabled – Networking is disabled in the Windows sandbox
Enable or disable printer sharing with Sandbox via Windows Registry
If you can’t open the Local Group Policy Editor, use the Windows Registry instead.
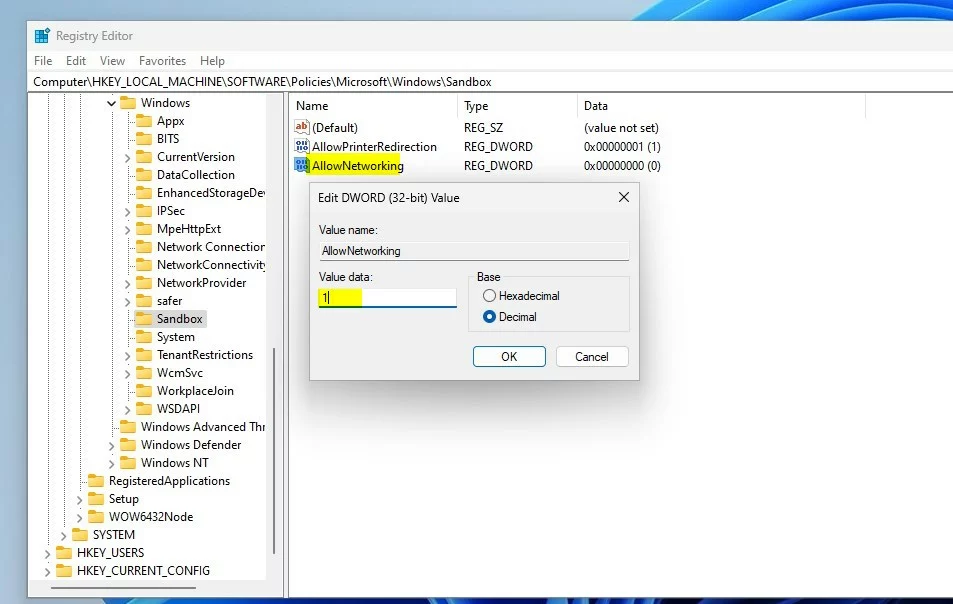
Open the Windows Registry, and navigate to the folder key path as listed below.
HKEY_LOCAL_MACHINE\SOFTWARE\Policies\Microsoft\Windows\Sandbox
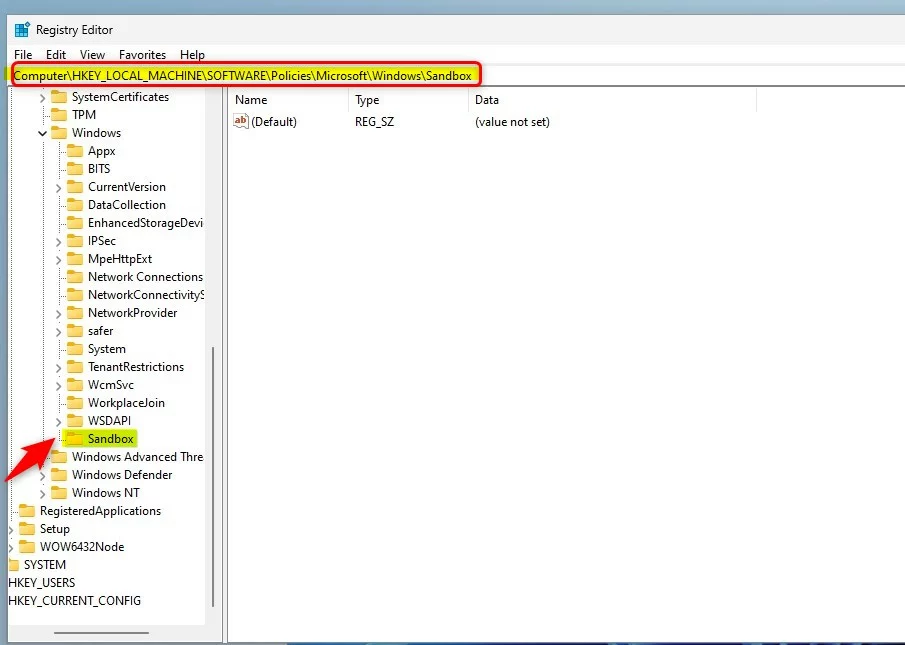
If you don’t see the Sandbox folder key, right-click on the Windows key, then create a subfolder key called Sandbox.
Right-click on the Sandbox folder key’s right pane and select New -> DWORD (32-bit) Value. Next, type a new key named AllowNetworking.
Double-click the new key and enter the Value data as 1 to enable networking between the host and the sandbox environment.
A 0-value data or simply deleting the key will disable networking between the host and the sandbox environment.
That should do it!
Reference:
Conclusion:
- Turning on networking in the Windows sandboxed environment can be crucial for accessing external networks and the internet.
- The steps for networking involve using the Local Group Policy Editor to enable a virtual switch to connect the Windows Sandbox to the host.
- If accessing the Local Group Policy Editor is not possible, the Windows Registry can be utilized to enable or disable networking between the host and the sandbox environment.
- These methods provide the flexibility to control networking in the Windows Sandbox based on specific requirements.


Leave a Reply