How to Enable or Disable Chrome’s Bookmark Bar
You can enable or disable Chrome’s bookmark bar directly within the browser’s settings to manage your screen space and quick access to favorite websites.
The Chrome bookmark bar, also known as the bookmarks bar, is a row that appears just below the address bar, displaying your saved links for easy access. When you enable it, you get one-click access to your most-used sites. Disabling it gives you a cleaner browsing interface and more vertical screen real estate.
For instance, if you’re working with a smaller monitor or prefer a minimalist look, hiding the bookmark bar can make a significant difference. Conversely, if you frequently visit a dozen or more favorite sites throughout your day, keeping it visible streamlines your workflow.
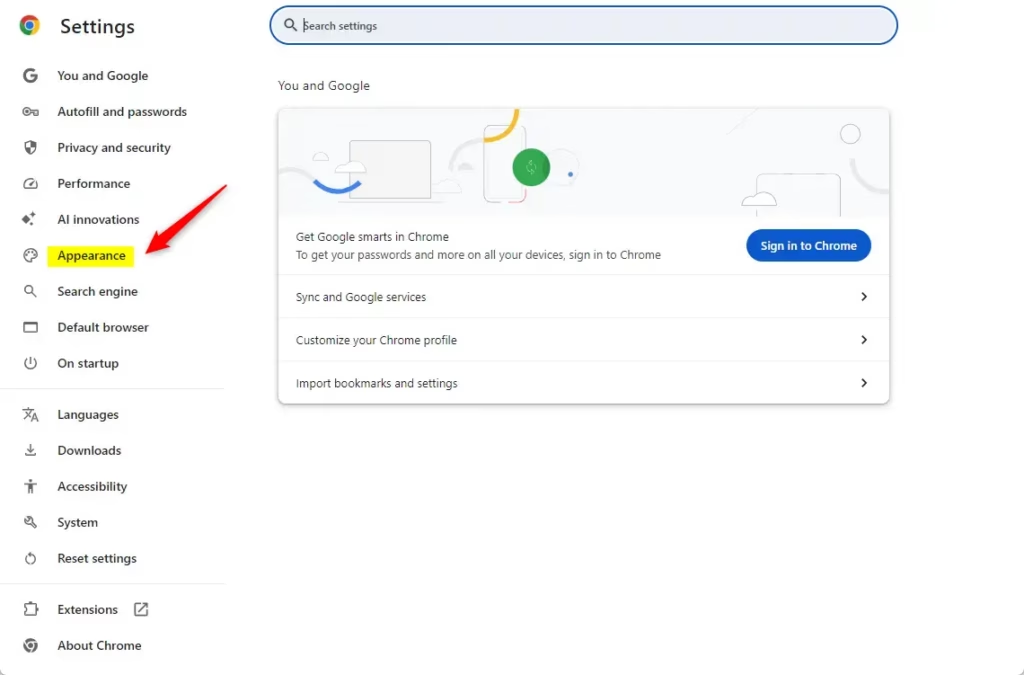
Press Ctrl+Shift+B to toggle the bookmark bar on or off. Alternatively, go to Settings, click Appearance, and toggle the “Show bookmark bar” option.
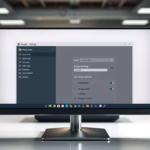
Enable/Disable the bookmark bar in Chrome
You can quickly turn the Chrome bookmark bar on or off using a simple keyboard shortcut or through the browser’s settings menu.
If you prefer to use the menu, you can also manage this in the settings. Google updates the Chrome interface often. If you can’t find the setting, use the “Search settings” bar at the top of the Settings page to locate it quickly.
You can also hide the bookmark bar to save vertical screen space. If you do this, you can still manage your sites by using the Chrome Side Panel.
Here is how to change the setting manually:
- Open the Google Chrome browser.
- Click the three vertical dots in the top right corner.
- Select Settings.
- Click Appearance on the left menu.
Find the “Show bookmark bar” option and toggle it to your preference.
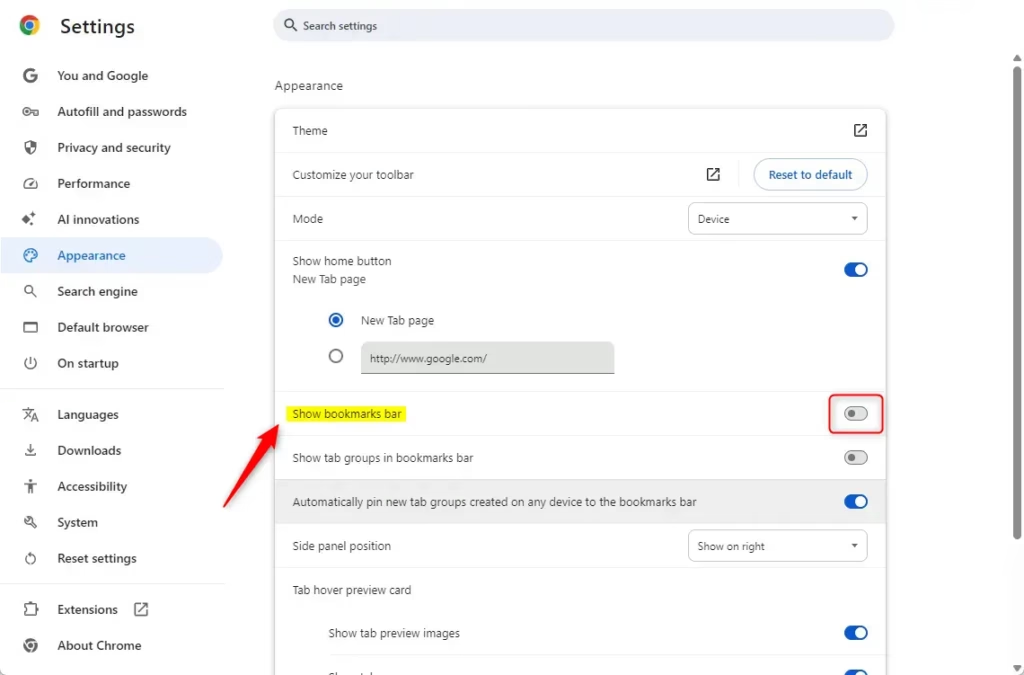
Close the settings tab when you are finished.
Advanced/Enterprise: Enable/Disable the bookmark bar using the Registry
IT admins can control the Chrome bookmark bar for multiple computers by changing a setting in the Windows Registry Editor.
IT administrators can control this setting by editing the Windows Registry Editor (a powerful tool for advanced users).
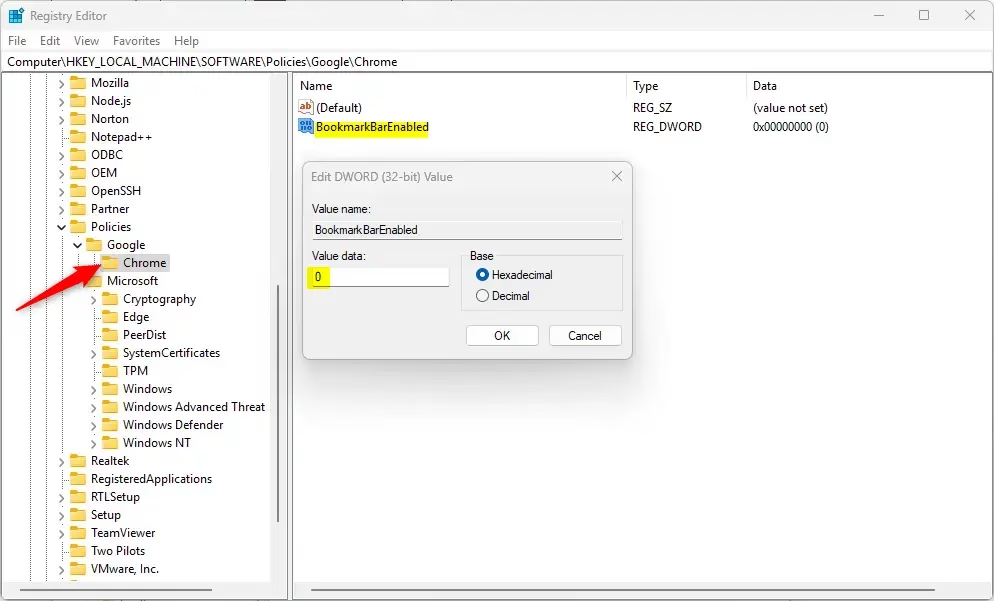
Open the Windows Registry Editor and navigate to this path:
Computer\🗝️HKEY_LOCAL_MACHINE\SOFTWARE\Policies\Google\Chrome
Before you make any changes, it’s a good idea to back up your registry or create a System Restore point as a precaution.
If you don’t see the Google or Chrome folders, right-click the Policies folder and select ‘New’ > ‘Key’ to create them. Then, right-click inside the Chrome folder, select ‘New’ > ‘DWORD (32-bit) Value’ (a type of registry entry), and name it BookmarkBarEnabled.
Double-click this new value and set its data to 0 to hide the bar or 1 to show it.
You might need to restart your computer for these changes to apply.
Reference: Chrome Enterprise Policy
Customizing your bookmark bar helps you browse faster. Whether you use the keyboard shortcut or the settings menu, you can adjust your view to fit your needs.
How do I activate the bookmark bar?
To activate your bookmark bar, right-click anywhere on the bar itself. If you want to hide it, there are a couple of ways. One is to right-click anywhere on the bookmark bar.
How do I activate bookmarks on Chrome?
To add bookmarks to the bar, click the three dots in the top right corner. Then go to ‘Bookmarks,’ then ‘Bookmark manager.’
Was this guide helpful?

About the Author
Richard
Tech Writer, IT Professional
Richard, a writer for Geek Rewind, is a tech enthusiast who loves breaking down complex IT topics into simple, easy-to-understand ideas. With years of hands-on experience in system administration and enterprise IT operations, he’s developed a knack for offering practical tips and solutions. Richard aims to make technology more accessible and actionable. He's deeply committed to the Geek Rewind community, always ready to answer questions and engage in discussions.
No comments yet — be the first to share your thoughts!