How to Enable or Disable Windows 11 Services
You can enable or disable Windows 11 services to fine-tune how your PC operates and manage background processes.
Windows services are essential background programs that support your operating system, handling everything from network connectivity to security features. They run automatically without user intervention.
For example, disabling the Windows Update service (wuauserv) can temporarily stop automatic updates. This action can potentially free up system resources, but it also means you won’t receive the latest security patches.
When you disable a service, your computer prevents it from starting automatically. Conversely, enabling a service ensures it is ready to perform its intended function when needed.
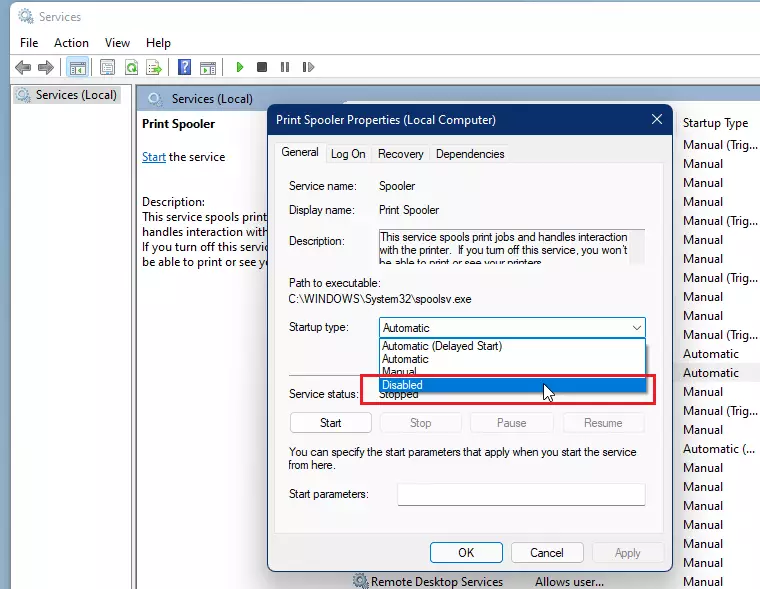
Open the Services app by searching for “Services” or running “services.msc”. Double-click a service, change its “Startup type” to Automatic or Disabled, then click Apply. You can also use `sc.exe` in Command Prompt as an administrator.
Safety First: Creating a System Restore Point
Before you change any Windows 11 services, create a safety net. If something goes wrong, you can easily return your system to its previous state.
1. Press the Windows key and type Create a restore point.
2. Select the drive (usually C:\) and click Configure to make sure protection is turned on.
3. Click Create and give your restore point a name.
Understanding Service Startup Types
Windows manages services in a few different ways:
Windows manages services in a few different ways:
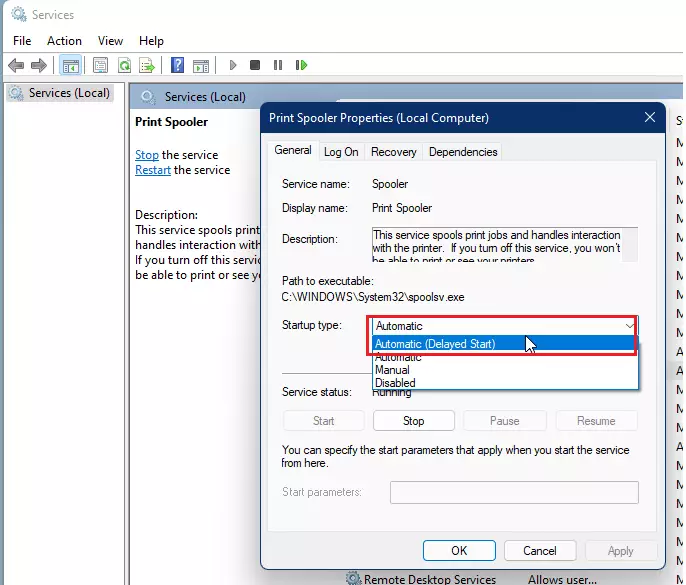
* **Automatic:** The service starts when you turn on your computer. * **Automatic (Delayed Start):** The service starts shortly after your computer finishes booting up, helping things run smoothly. * **Manual:** The service only starts when an app needs it. * **Disabled:** The service is completely turned off and won’t run.- Automatic: The service starts as soon as you turn on your computer.
- Automatic (Delayed Start): The service starts shortly after the computer finishes booting up to keep things running smoothly.
- Manual: The service only starts when you open an app that needs it.
- Disabled: The service is turned off completely and will not run.
How to Manage Services in the Services App
Note: You must be logged in with an administrator account to change these settings.
To open the management screen, click the Start button and search for “Services.” You can also press the Windows key + R to open the Run dialog box, type `services.msc`, and press Enter:
services.msc

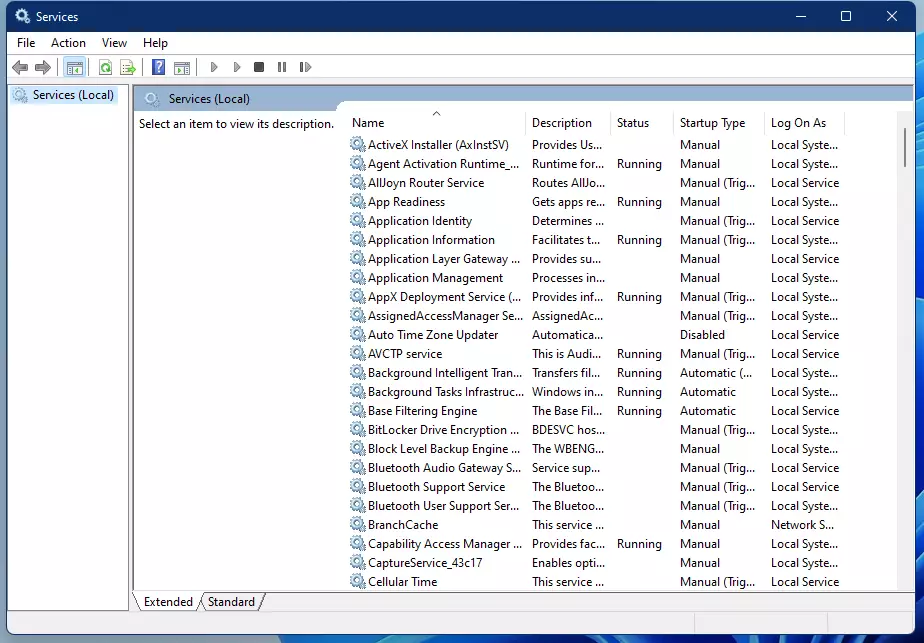
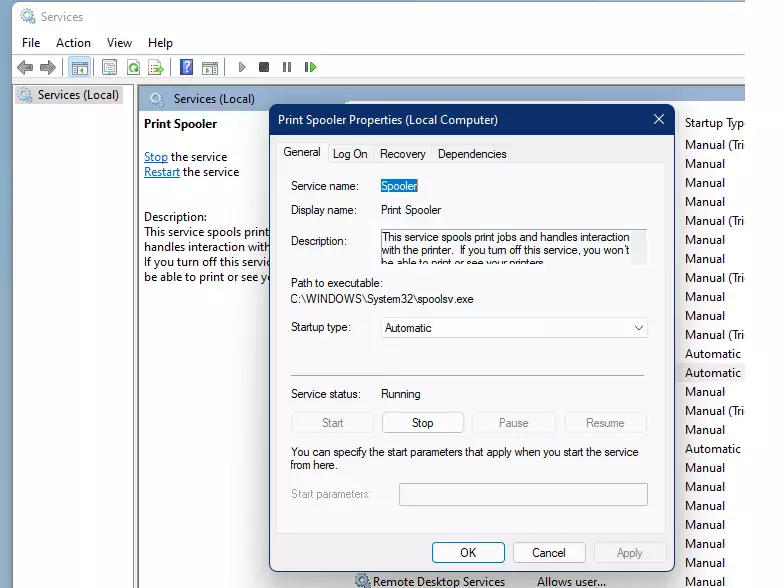
Once the window appears, find the service you want to change and double-click it. This opens its properties window.
Important: Check the Dependencies tab before disabling anything. If other services rely on the one you are disabling, those features will stop working too.
To enable a service, change its ‘Startup type’ to Automatic or Automatic (Delayed Start). Click Apply, then OK. To start it right away, click the Start button in the same window.

Managing Services via Command Prompt
Advanced users can use sc.exe from the Command Prompt. You must open the Command Prompt as administrator.

Use these commands to change a service (replace “ServiceName” with the actual name):
sc config "ServiceName" start= auto
sc config "ServiceName" start= delayed-auto
sc config "ServiceName" start= demand
sc config "ServiceName" start= disabled
Registry Editor Method
You can also change services using the Registry Editor. Warning: Making incorrect changes here can damage your system. Navigate to 🗝️HKEY_LOCAL_MACHINE\SYSTEM\CurrentControlSet\Services to find service keys. To disable a service, change its Start value to 4.
Best Practices for Optimization
For Gaming: Focus on disabling non-essential background bloatware like printer spoolers or secondary update services, but keep Windows Update and security services active.
For Office Use: Keep most services at their default settings. Only disable services if you’re absolutely sure you don’t use the associated hardware or software features.
Summary
Managing Windows 11 services gives you a powerful way to improve performance. By understanding startup types, checking dependencies, and creating restore points, you can customize your system safely. Always remember that disabling the wrong service can lead to system instability.
Is it safe to disable all 🪟 Windows 11 services?
No, it is not safe to disable all services. Many services are critical for the operating system to function. Disabling essential services can cause system crashes, prevent you from logging in, or break core features like networking and security. Always research a service before changing its status.
Was this guide helpful?

About the Author
Richard
Tech Writer, IT Professional
Richard, a writer for Geek Rewind, is a tech enthusiast who loves breaking down complex IT topics into simple, easy-to-understand ideas. With years of hands-on experience in system administration and enterprise IT operations, he’s developed a knack for offering practical tips and solutions. Richard aims to make technology more accessible and actionable. He's deeply committed to the Geek Rewind community, always ready to answer questions and engage in discussions.


No comments yet — be the first to share your thoughts!