How to Enable Hyper-V on Windows 11
You enable Hyper-V on Windows 11 to create and manage virtual machines, allowing you to run multiple operating systems simultaneously on your PC.
Hyper-V is Microsoft’s native hypervisor technology. It partitions a physical computer into multiple virtual machines, each acting as an independent computer.
This capability is particularly useful for developers or IT professionals who need to test software in different environments or run legacy applications. For example, you can install Windows 10 alongside your Windows 11 installation using Hyper-V.
Follow these steps to turn on the Hyper-V feature in Windows 11 Home, Pro, Enterprise, or Education editions.
What is Hyper-V?
Hyper-V is a free feature built into Windows 11. It lets you create virtual computers inside your actual computer. Each virtual computer can run its own operating system and programs. This is helpful for:
- Trying new software safely without risking your main computer
- Learning how other operating systems work
- Running programs that only work on other systems
Before You Start: Check Virtualization Support
Hyper-V needs your computer’s hardware to support something called virtualization. Most modern PCs have this built in, but it might be turned off in your settings.
Why check this? Your computer won’t run Hyper-V without virtualization enabled.
To check and turn it on:
- Restart your computer and enter the BIOS/UEFI settings. (Usually by pressing Delete, F2, or F10 while your PC starts up.)
- Look for an option named Virtualization Technology or Intel VT-x or AMD-V.
- Make sure it shows Enabled.
- Save and exit the BIOS. Your PC will restart.
If you’re unsure how to do this, check your PC or motherboard manual. Or search online for “how to enable virtualization on [your PC model].”
Turn On Hyper-V via Windows Features
Why use this method? It’s the easiest way for most people.
What happens? Windows will install the Hyper-V tools on your computer and ask you to restart.
Here’s how:
- Click the Start button (Windows icon) and type
Turn Windows features on or off, then click the matching result. - In the window that opens, scroll down and find Hyper-V.
- Check the box next to Hyper-V. Also check its two sub-boxes: Hyper-V Management Tools and Hyper-V Platform.
- Click OK.
- Windows will prepare the feature. Then it will ask you to restart your PC. Click Restart now.
Alternative: Enable Hyper-V Using Command Prompt
Why use this method? Some people prefer typing commands instead of clicking through windows.
Here’s how:
- Click Start and type
Command Prompt. - Right-click Command Prompt and choose Run as administrator. %📂%FLAG_ADMIN%%
- Copy and paste this command and press Enter:
DISM /Online /Enable-Feature /All /FeatureName:Microsoft-Hyper-V - When it finishes, it will ask if you want to restart. Type
Yand press Enter to reboot your PC.

Another Way: Enable Hyper-V Using PowerShell
Why use this method? PowerShell is another way to run commands on your computer.
Here’s how:
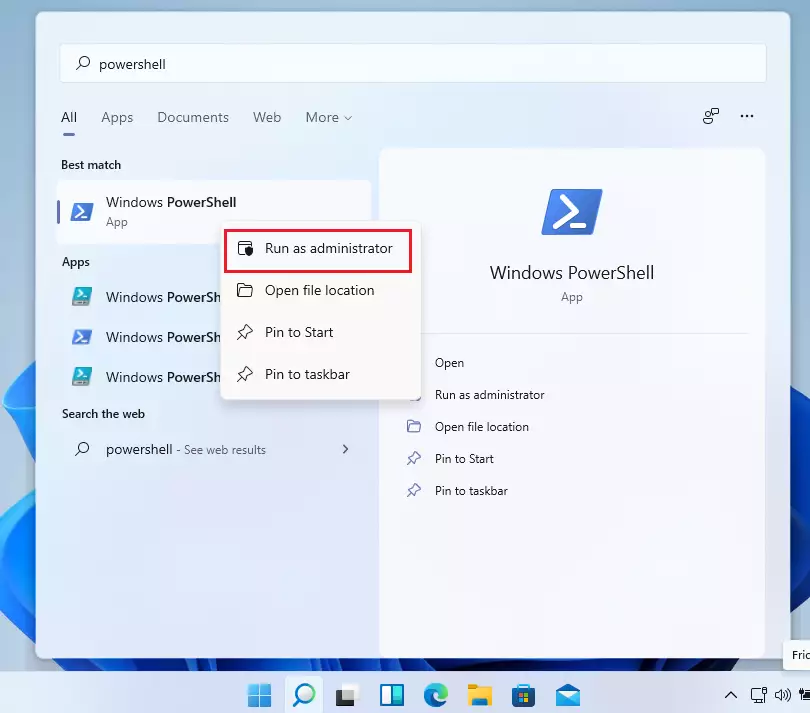
- Click Start and type
PowerShell. - Right-click Windows PowerShell and select Run as administrator. %📂%FLAG_ADMIN%%
- Type or paste this command and press Enter:
Enable-WindowsOptionalFeature -Online -FeatureName Microsoft-Hyper-V -All - When it finishes, restart your computer if asked.
How to Create a Virtual Machine Using Hyper-V
What happens? You’ll create your first virtual machine where you can run a different operating system.
Here’s how:
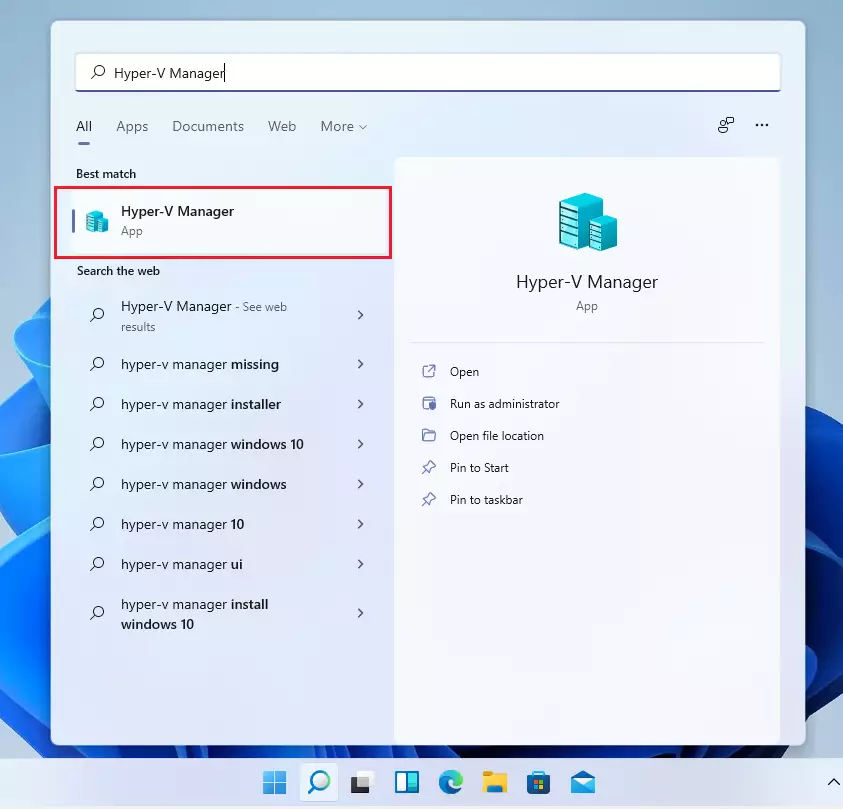
- Click Start and search for
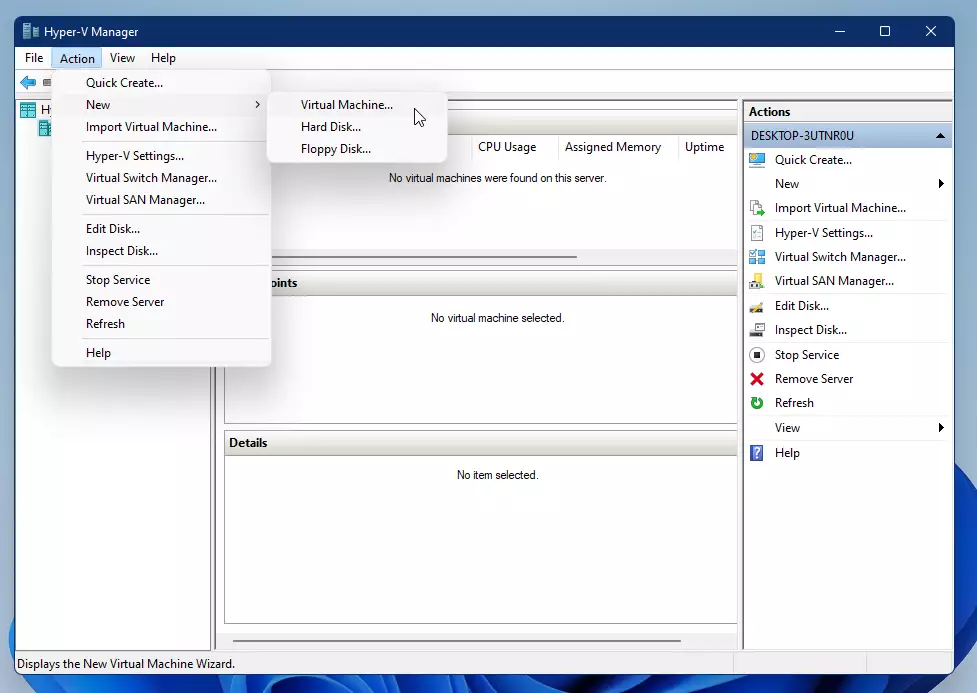
Hyper-V Managerand open it. - In the Hyper-V Manager window, click Action > New > Virtual Machine.
- Follow the on-screen wizard to set up your new virtual machine. You’ll choose things like the name, how much memory (RAM), and disk size.
- Once done, you can start your virtual machine and install an operating system inside it.
Summary
- Hyper-V lets you run multiple virtual computers on your Windows 11 PC.
- You need to make sure virtualization is enabled in your BIOS before turning on Hyper-V.
- You can enable Hyper-V using Windows Features, Command Prompt, or PowerShell.
- After enabling it, you can create virtual machines to test new software or try other operating systems.
- This is a safe way to explore different systems without buying extra hardware.
- Want to learn more about Hyper-V or virtual machines? Check out Microsoft’s official Hyper-V guide.
Frequently Asked Questions
What is Hyper-V?
Why check this?
Why use this method?
What happens?
Was this guide helpful?

About the Author
Richard
Tech Writer, IT Professional
Richard, a writer for Geek Rewind, is a tech enthusiast who loves breaking down complex IT topics into simple, easy-to-understand ideas. With years of hands-on experience in system administration and enterprise IT operations, he’s developed a knack for offering practical tips and solutions. Richard aims to make technology more accessible and actionable. He's deeply committed to the Geek Rewind community, always ready to answer questions and engage in discussions.


No comments yet — be the first to share your thoughts!