How to Manage Addresses in Google Chrome
You manage addresses in Google Chrome through its Autofill settings.
Chrome’s Autofill feature automatically populates forms with your saved address information, like street name, city, and ZIP code.
This saves you time when shopping online or completing lengthy sign-up forms, ensuring you use the right details every time.
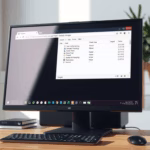
To add, edit, or delete these saved addresses, you navigate directly to the browser’s Autofill section, typically found via chrome://settings/autofill.
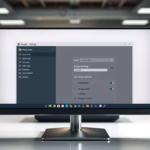
Access Chrome’s Autofill settings by clicking the three vertical dots, selecting Settings, then Autofill and passwords, and finally Addresses and more. From there, you can add, edit, or delete saved addresses. You can also type chrome://settings/addresses directly into the address bar.
Managing Addresses in Chrome
Managing addresses in Chrome is simple and can be done right from your browser’s settings menu.
- Open the Google Chrome browser on your computer.
- Click the Customize and Control button (three vertical dots) in the top right corner.
- Select Settings.
- On the left side of the screen, click Autofill and passwords.
- Click the Addresses and more tile on the right side.
- You can also go directly to this page by typing the following into your address bar:
chrome://settings/addresses
Note: You do not need admin privileges to perform these steps. These settings are specific to your user profile.
Adding, Editing, or Deleting
- To add an address: Click the Add button in the top right corner and fill in your details.
- To edit an address: Click the three dots next to an existing address and select Edit.
- To delete an address: Click the three dots next to the address and select Delete.
Summary
Managing your saved addresses in Google Chrome keeps your personal information secure and accurate. By following these steps, you can quickly add new locations, fix errors, or remove old entries to keep your browser organized and efficient.
How do I delete old addresses on Chrome?
And more screen where you can see a list of your saved addresses. And then tap edit tap to select the address you want to delete. And then tap Del those addresses will be deleted.
Where are my autofill addresses?
Your Google Account provides the home and work addresses that Chrome autofill suggests. You can find and manage it in your Google Account settings. Addresses and more.
Was this guide helpful?

About the Author
Richard
Tech Writer, IT Professional
Richard, a writer for Geek Rewind, is a tech enthusiast who loves breaking down complex IT topics into simple, easy-to-understand ideas. With years of hands-on experience in system administration and enterprise IT operations, he’s developed a knack for offering practical tips and solutions. Richard aims to make technology more accessible and actionable. He's deeply committed to the Geek Rewind community, always ready to answer questions and engage in discussions.


No comments yet — be the first to share your thoughts!