
If you share your Windows 11 PC with others, each person usually has their own user account. This keeps files, settings, and apps separate for everyone.
Sometimes, you might have a user account that’s no longer needed. You can delete that account to free up space and keep your PC tidy.
Important: You must be signed in as an administrator to delete user accounts. Also, you cannot delete an account that is currently signed in — you’ll need to sign out of that account first.
Learn More
For official information, see Manage User Accounts in Windows – Microsoft Support.
Method 1: Delete User Account Using Settings
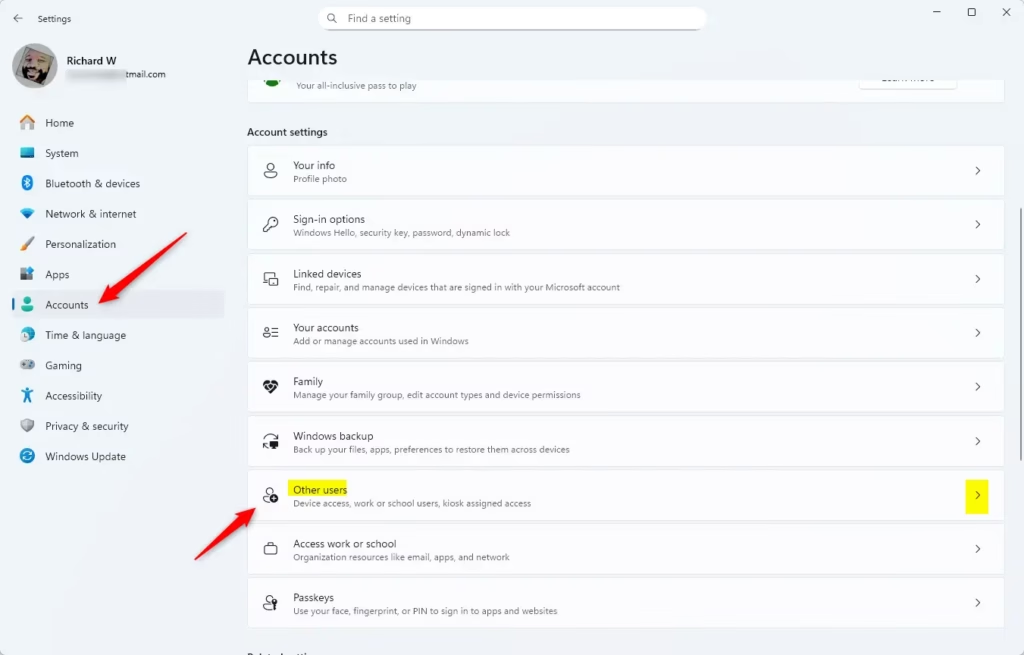
- Press Win + I to open Settings.
- Click Accounts on the left menu.
- Select Family & other users (or Other Users).
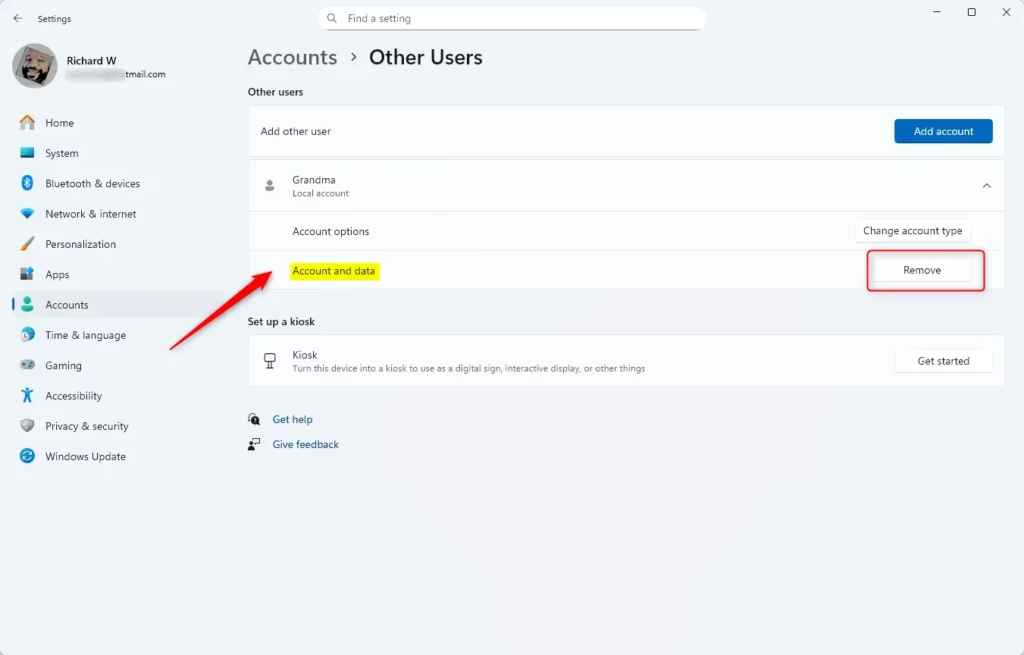
- Find the user account you want to delete under Other users, click on it, then click Remove.
- Click Delete account and data to confirm the removal.
- You can now close Settings.
Method 2: Delete User Account Using Control Panel
- Open the Control Panel. To do this, type
Control Panelin the search box and click it. - Set the view to Small icons or Large icons (top-right dropdown).
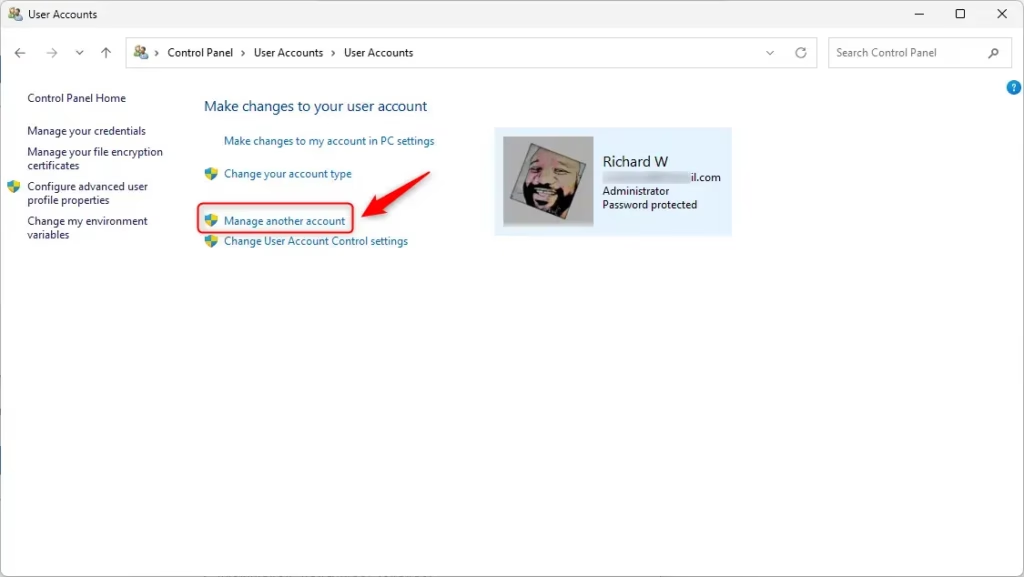
- Click User Accounts.
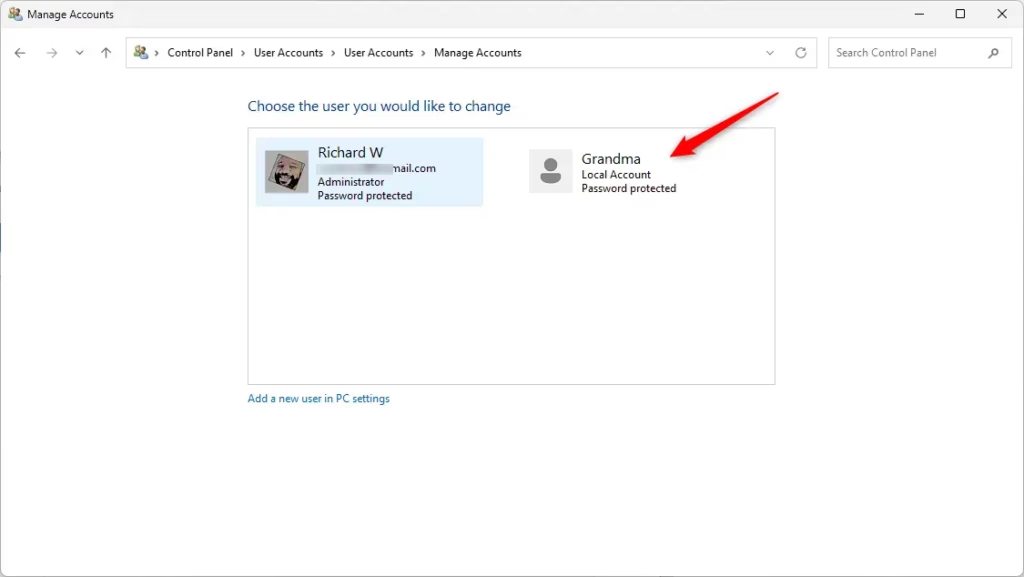
- Click Manage another account.
- Choose the account you want to delete.
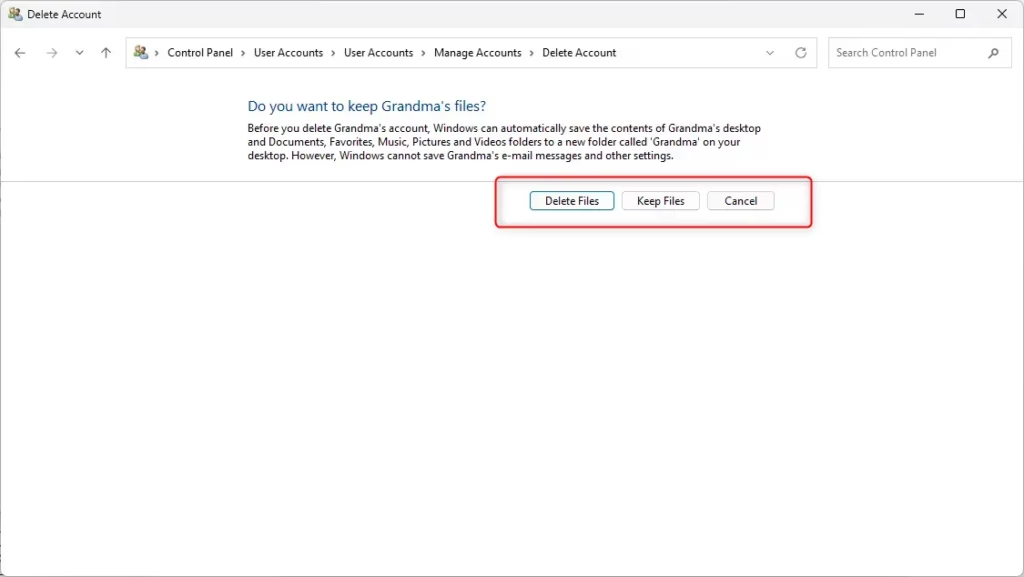
- Click Delete the account.
- Choose whether to Delete Files or Keep Files (your choice if you want to keep the user’s files or remove them).
- Click Delete Account to confirm.
- Close Control Panel when done.
Method 3: Delete User Account Using Command Prompt
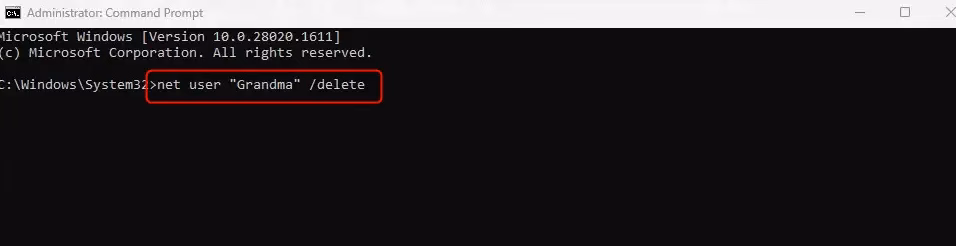
- Right-click the Start button and select Windows Terminal (Admin).
- Make sure you are in the Command Prompt tab (you can switch from the dropdown arrow at the top).
- Type
net userand press Enter to see a list of user accounts on your PC. - Find the exact name of the account you want to delete.
- Type the following command and press Enter (replace
UserNamewith the real user name):net user "UserName" /delete - Close Windows Terminal when done.
Method 4: Delete User Account Using PowerShell
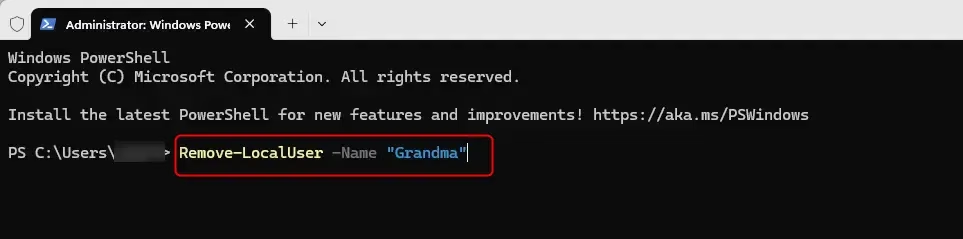
- Right-click the Start button and select Windows Terminal (Admin).
- Switch to the PowerShell tab.
- Type
Get-LocalUserand press Enter to see all user accounts. - Note the user account name you want to delete.
- Type the following command and press Enter (replace
UserNamewith the actual name):Remove-LocalUser -Name "UserName" - Close Windows Terminal when finished.
Tips Before Deleting a User Account
- Make sure the account you want to delete is no longer needed.
- Backup any important files from that user before deleting.
- You must be signed in as an administrator account to delete users.
- Don’t delete an account that is currently signed in.
- Choose the deletion method you feel most comfortable with.
Summary
Deleting a user account in Windows 11 is easy and helps keep your PC organized. You have many ways to do this: through Settings, Control Panel, or advanced tools like Command Prompt and PowerShell. Always be careful to backup data you want to keep before deleting an account.

Leave a Reply