
This article explains how to create and use a guest account in Windows 11.
Earlier versions of Windows (before Windows 10) used to come with a guest account that allowed temporary access to users.
The guest account had limited access, allowing them to perform basic tasks like browsing the web without permission to install or change the configuration in any way. Once Windows reboots, the data created in the guest account during the session is automatically erased or deleted.
Windows 11 doesn’t have a helpful guest account anymore. However, you can create a local account with limited rights to serve as a guest account, allowing users to sign in with that account without making any meaningful changes to the system.
A local account can install apps and make basic changes, but it won’t affect other user profiles. All changes made within the guest account sessions are restricted to the account.
How to enable a guest account in Windows 11
As mentioned above, Windows 11 doesn’t have a helpful guest account. However, you can create a local account with limited rights to serve as a guest account, allowing users to sign in with that account without making any meaningful changes to the system.
To create a guest account in Windows 11, follow the steps below:
Windows 11 has a centralized location for the majority of its settings. From system configurations to creating new users and updating Windows, all can be done from the System Settings pane.
To get to System Settings, you can use the Windows key + I shortcut or click on Start ==> Settings, as shown in the image below:

Alternatively, you can use the search box on the taskbar and search for Settings. Then select to open it.
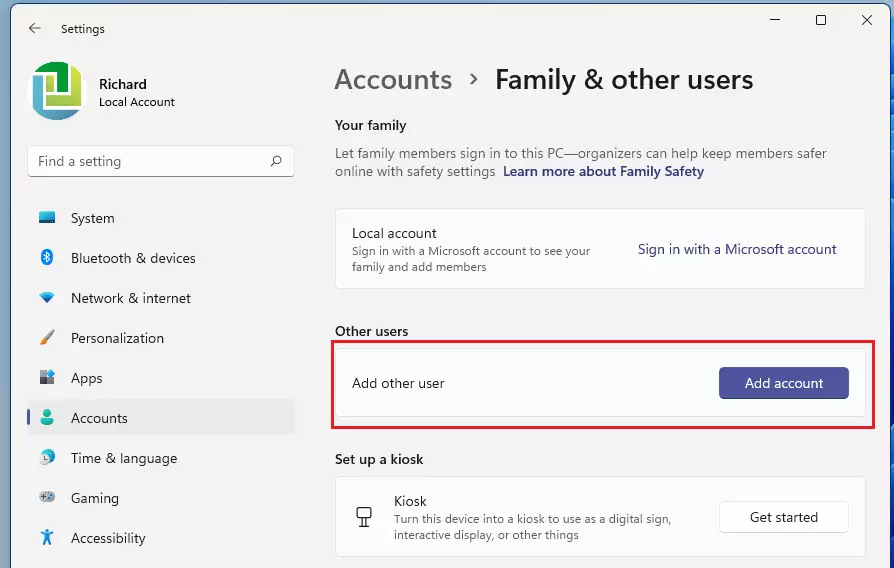
In Windows Settings, click Accounts, then on the right pane, and select the Family & other users tile to expand it.

On the Family & other users settings pane, select the Add another user tile under Other users, then click the Add account button to begin adding the guest account.
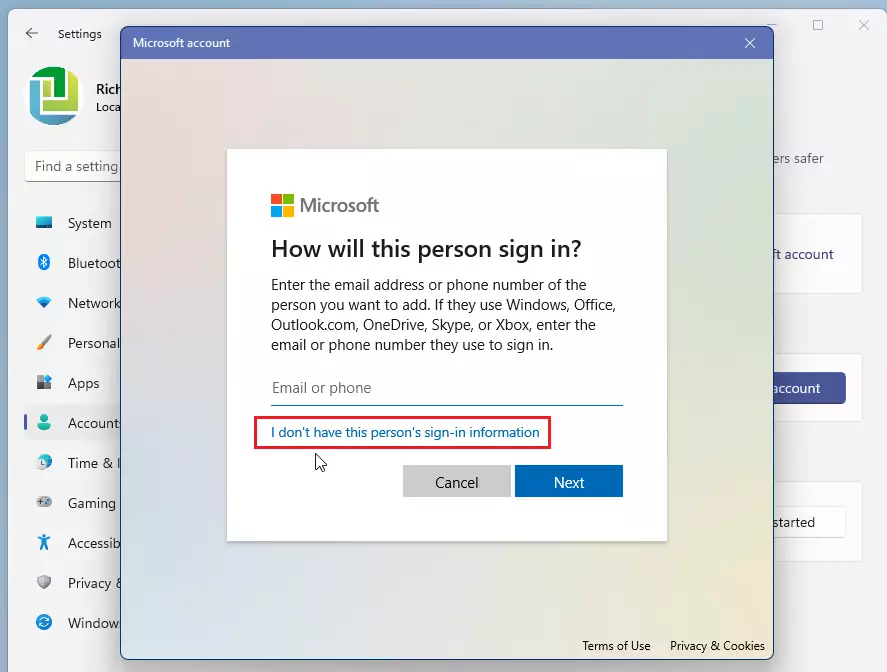
The Microsoft account sign-in screen will allow you to sign in on the pop-up window. However, instead of signing in, click the I don’t have this person’s sign-in information link as highlighted below.
Next, click the Add a user without a Microsoft account link, as highlighted below.

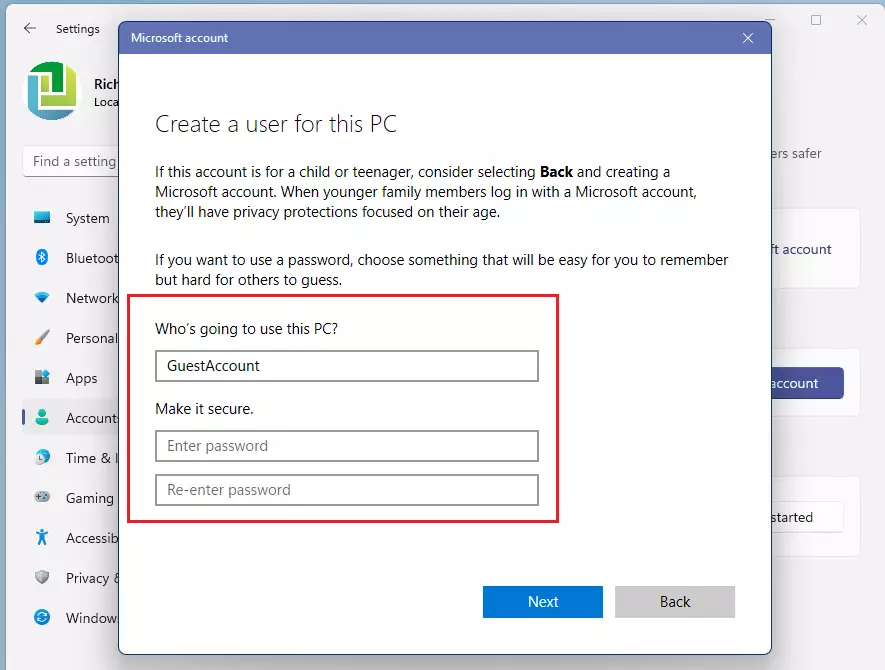
When prompted, type in a name for the local account. Windows will not allow you to use the account named Guest.
Type in an account name other than Guest, then leave the password field blank, as shown below.
When you’re done, a new account will appear under Other users in the Family & other users settings pane.
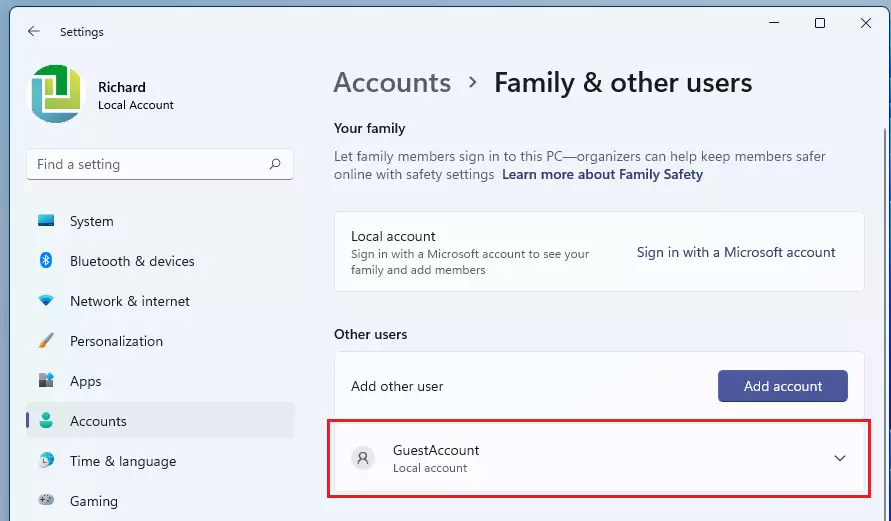
The account will now appear on Windows sign-in screen as an option.

That should do it!
How to create a guest account using Command Prompt
Alternatively, one can create a local account using Windows Command Prompt. To set up a guest account via the Command Prompt, you should first open the Command Prompt as administrator.
Type the commands below to create the account on the Command Prompt console.
net user GuestAccount /add /active:yes
That should do it!
Conclusion:
- Windows 11 has no built-in guest account feature, but you can create a local account with limited rights to serve this purpose.
- Using the System Settings, you can easily add a local account that allows temporary and restricted access for guests.
- Alternatively, you can create a guest account through the Command Prompt for a more advanced approach.
- All changes made in the guest account will not affect other user profiles, preserving the main system’s integrity.
- Creating a guest account ensures that any temporary data is not retained once the session ends, similar to the traditional guest account experience.
Leave a Reply