How to Connect to WPA3 Wi-Fi in Windows 11
You connect to WPA3 Wi-Fi in Windows 11 by ensuring your PC supports WPA3 and then connecting to a WPA3-enabled network.
WPA3 is the newest way to keep your Wi-Fi connections secure. Think of it as a significant upgrade over WPA2, offering better protection against online threats. It uses stronger encryption methods to keep your data safe.
For Windows 11 to connect to WPA3, your PC’s network adapter needs to support Wi-Fi 6 (that’s 802.11ax or newer). Your router also needs to be set up to broadcast a WPA3 network. Many modern laptops and desktops with Wi-Fi 6 capabilities are WPA3-ready.
Connect to WPA3 Wi-Fi by first ensuring your Windows 11 is updated and your PC’s Wi-Fi adapter supports WPA3. Then, connect to your WPA3-enabled network through the taskbar Wi-Fi icon and verify the security type in Settings.
What is WPA3 and Why It Matters?
WPA3 is the newest way to keep your Wi-Fi connections safe from hackers. It works best with devices that support Wi-Fi 6, giving you faster speeds and better coverage.
Step 1Check Your 🪟 Windows 11 Is Up to Date
Before connecting to WPA3 Wi-Fi, make sure your Windows 11 has the latest updates.
- Click the Start button (Windows icon).
- Go to Settings (gear icon).
- Choose Windows Update.
- Click Check for updates and install any updates available.
Learn more about updating Windows 11 here: How to update Windows 11
Step 2Check if Your PC Supports WPA3
Before you can connect to WPA3 Wi-Fi in Windows 11, you need to make sure your computer’s network adapter supports it. You can easily check this using a simple command in the Command Prompt.
- Open the Command Prompt:
- Press ⊞ Win+S to open search.
- Type
cmdand click Command Prompt.
- Type this command and press Enter:
netsh wlan show drivers - Look for the line Authentication and cipher supported in infrastructure mode.
- If you see WPA3-Personal listed, your PC supports WPA3!
If WPA3-Personal is NOT listed, your PC’s Wi-Fi adapter may not support WPA3. Check the manufacturer’s website for updates or consider upgrading your Wi-Fi adapter.
Step 3Connect to a WPA3 Wi-Fi Network
Once you’ve confirmed your PC supports WPA3, connecting to a WPA3 Wi-Fi network in Windows 11 is just like connecting to any other network. You’ll select your network, enter the password, and Windows will handle the rest.
- Click the Wi-Fi icon on the right side of the taskbar.
- Select the Wi-Fi network you want to connect to and enter the password.
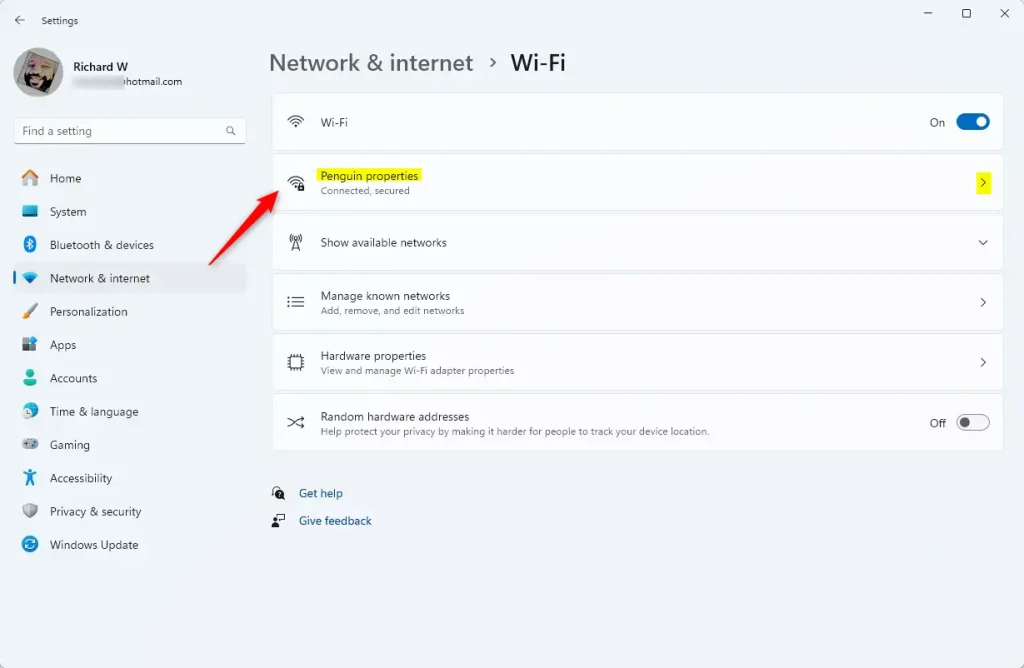
- Once connected, open Settings > Network & internet > Wi-Fi.
- Click Manage known networks or Manage Wi-Fi connections.
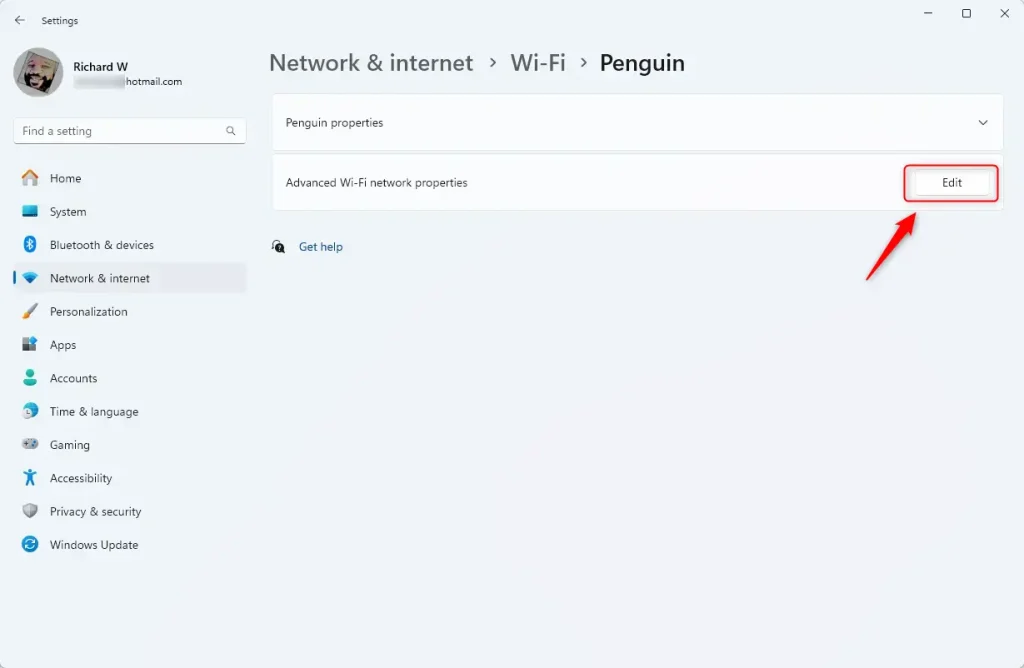
- Find your connected Wi-Fi network and click Edit next to Advanced Wi-Fi network properties.
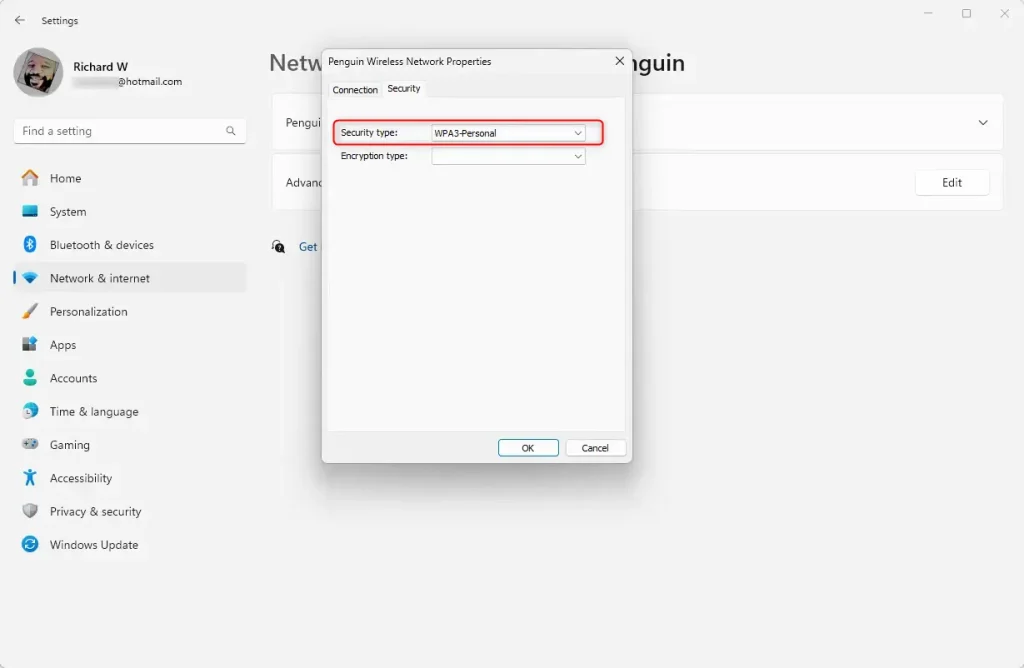
- In the pop-up window, find the Security type field. If it shows WPA3, you are connected securely!
Why Use WPA3?
- Better Security: WPA3 helps protect your data from hackers.
- Stronger Password Protection: Even weak passwords are safer.
- Supports New Devices: Works best with Wi-Fi 6 devices for faster, safer connections.
Summary
- Make sure Windows 11 is updated.
- Check your PC’s Wi-Fi adapter supports WPA3 using the Command Prompt.
- Connect to your Wi-Fi and check if it uses WPA3 security.
- Using WPA3 keeps your Wi-Fi connection safer and more reliable.
To connect to WPA3 Wi-Fi in Windows 11, first ensure your system is up-to-date and that your PC’s Wi-Fi adapter supports WPA3 by checking the drivers. Then, simply connect to your WPA3-enabled network using your password for a more secure connection.
Does 🪟 Windows 11 support WPA3 personal?
Windows 11 supports the newest wireless technology standards set by the Wi-Fi Alliance (WFA), including Wi-Fi 6, Wi-Fi 7, and WPA3.
Was this guide helpful?

About the Author
Richard
Tech Writer, IT Professional
Richard, a writer for Geek Rewind, is a tech enthusiast who loves breaking down complex IT topics into simple, easy-to-understand ideas. With years of hands-on experience in system administration and enterprise IT operations, he’s developed a knack for offering practical tips and solutions. Richard aims to make technology more accessible and actionable. He's deeply committed to the Geek Rewind community, always ready to answer questions and engage in discussions.


No comments yet — be the first to share your thoughts!