How to Check RAM Size and Type in Windows 11
You can check your RAM size and type in Windows 11 by opening the Task Manager.
RAM, which stands for Random Access Memory, acts as your PC’s temporary workspace. It holds data for programs you’re currently using so your system can access it quickly. Knowing your RAM’s size (like 8GB or 16GB) and type (such as DDR4) helps you understand what your computer can do.
This information is vital, especially if you’re troubleshooting performance problems or confirming your system meets Windows 11’s minimum requirement of 4GB of RAM.
Open Task Manager, go to the Performance tab, and click Memory to see your RAM size and type. Alternatively, navigate to Settings > System > About and find Installed RAM.
1Check RAM Using the Settings App
You can quickly check your total RAM size in Windows 11 using the Settings app, a straightforward method for finding out how much memory your computer has installed.
- Click the Start button (Windows icon) at the bottom-left of your screen.
- Click Settings (gear icon). Or press Windows key + I on your keyboard to open Settings quickly.
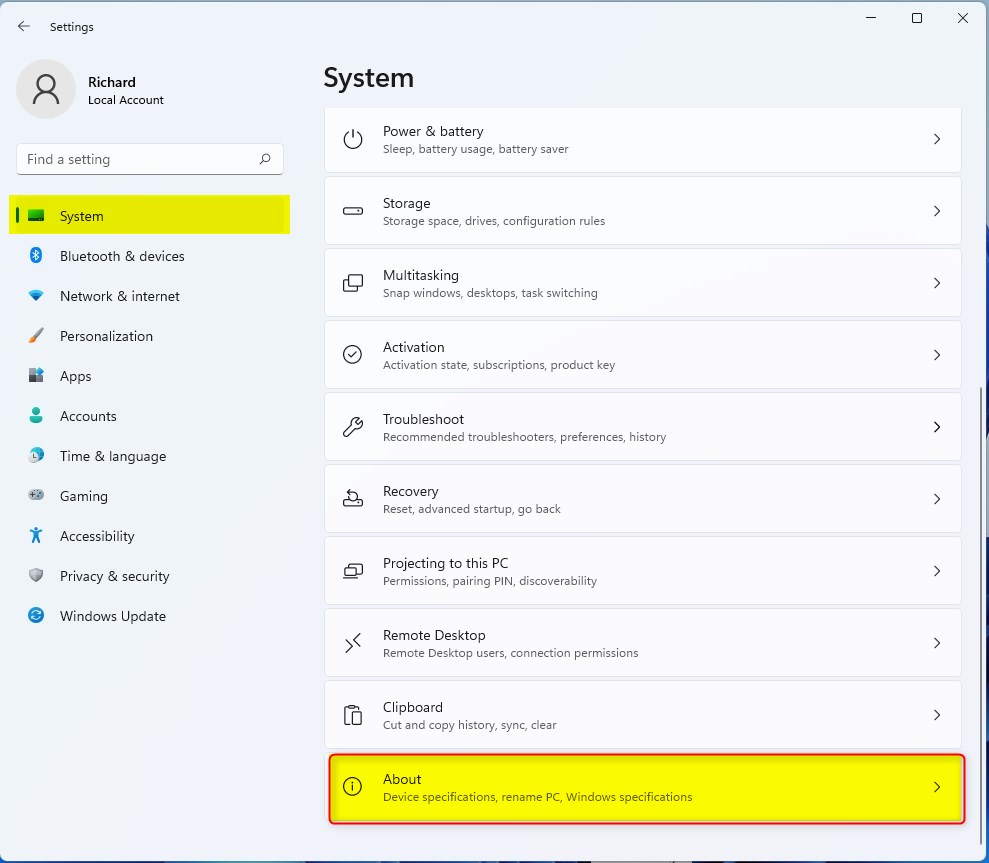
- In Settings, click System on the left side.
- Scroll down and click About at the bottom of the System menu.
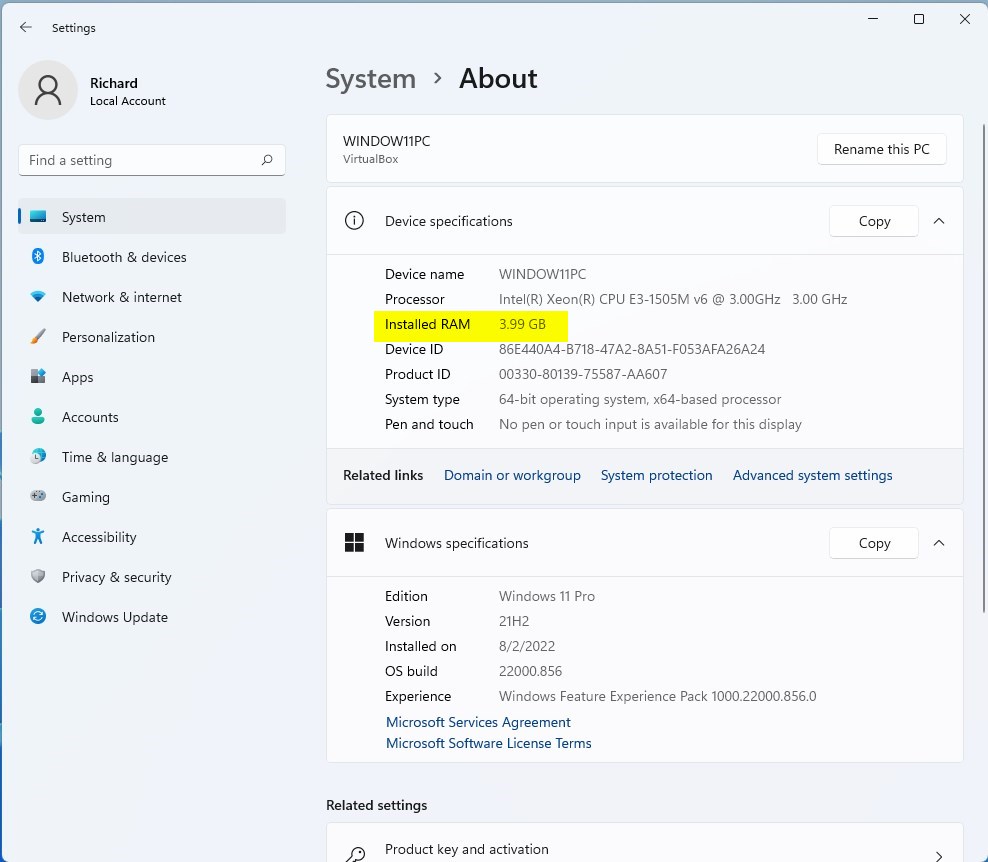
- Look for Installed RAM on the right. This shows how much RAM is currently installed.
2Check RAM Using Task Manager
Task Manager offers a detailed view of your RAM in Windows 11, letting you see not only the total amount but also its speed and how many memory slots your PC is using.
- Click Start and type Task Manager, then open it.
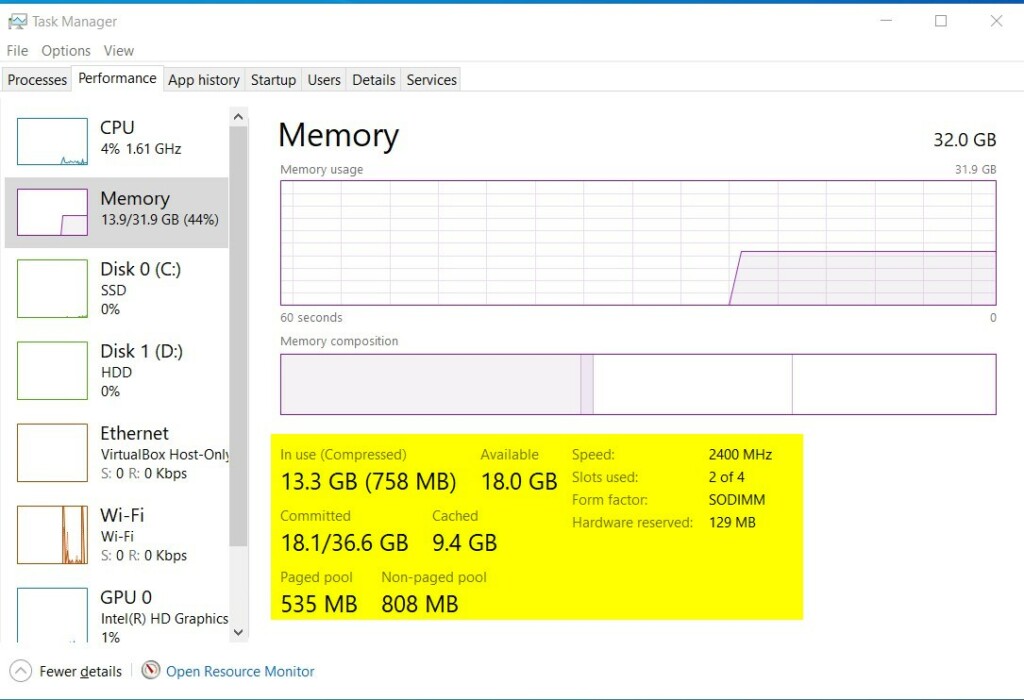
- In Task Manager, click the Performance tab at the top.
- Click Memory on the left side.
- Here, you can see your total RAM, speed (in MHz), type (e.g., DDR4), how many slots are used, and more.
3Check RAM Using System Information
The System Information app offers a summary of your computer, including your RAM details.
- Click Start and type System Information, then open it.
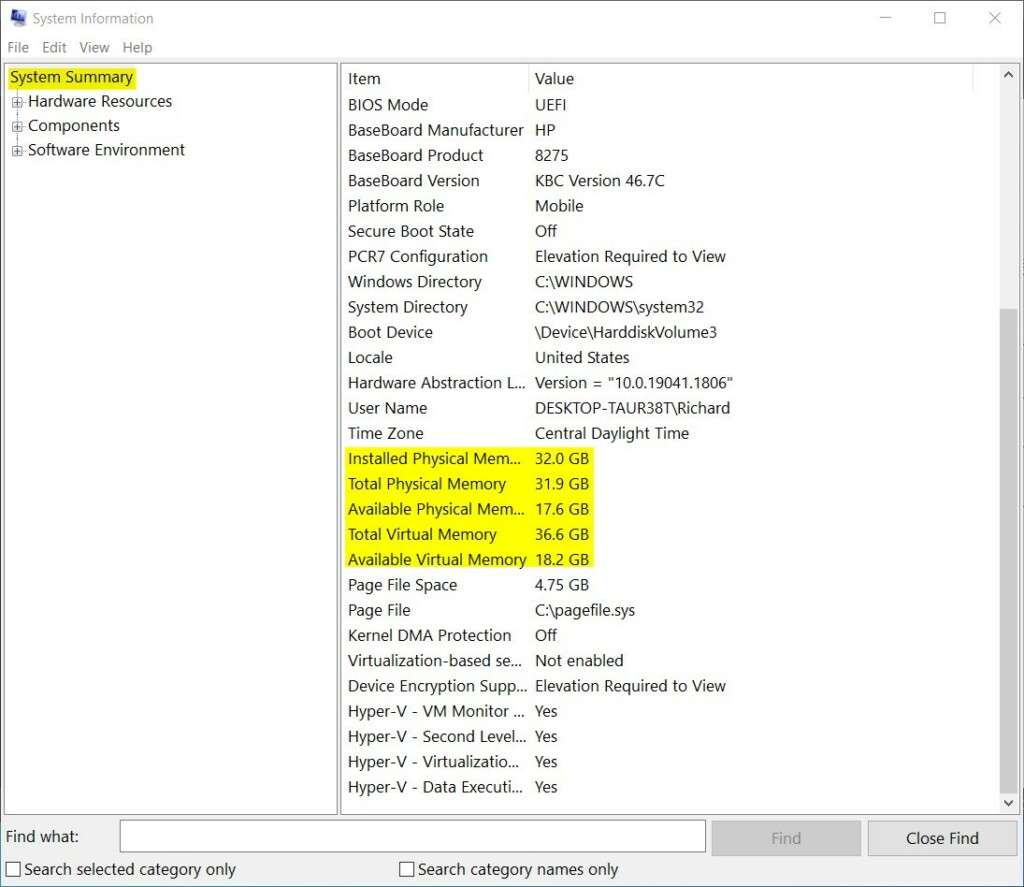
- Make sure System Summary is selected on the left.
- Look for Installed Physical Memory (RAM) to see your total RAM.
4Check RAM Using PowerShell Commands
For those who prefer commands, Windows 11’s PowerShell can give you very detailed information about your RAM, like its capacity, speed, and manufacturer.
- Click Start, type Windows Terminal or PowerShell, and open it.
- Type or copy-paste the following command and press Enter:
Get-WmiObject Win32_PhysicalMemory | Format-Table Capacity, Manufacturer, FormFactor, BankLabel, ConfiguredClockSpeed, Speed, DeviceLocator, SerialNumber -AutoSizeThis command will show details like the size of each RAM stick, its manufacturer, speed, and slot location.
Summary
- RAM is important for your computer’s speed and performance.
- You can easily check your RAM size and type using Windows 11’s Settings, Task Manager, System Information, or PowerShell.
- Knowing your RAM details helps you decide if you need to upgrade or if your PC meets Windows 11 requirements.
- If you want to learn more about Windows 11 features, check out our Geek Rewind website.
Knowing how to check your RAM in Windows 11 is important for understanding your computer’s performance and deciding if you need an upgrade.
How do I run RAM check on 🪟 Windows 11?
To run a RAM check on Windows 11, you can use the Windows Memory Diagnostic tool by typing ‘mdsched’ into the Run app or searching for ‘memory’ in the Settings menu.
Was this guide helpful?

About the Author
Richard
Tech Writer, IT Professional
Richard, a writer for Geek Rewind, is a tech enthusiast who loves breaking down complex IT topics into simple, easy-to-understand ideas. With years of hands-on experience in system administration and enterprise IT operations, he’s developed a knack for offering practical tips and solutions. Richard aims to make technology more accessible and actionable. He's deeply committed to the Geek Rewind community, always ready to answer questions and engage in discussions.


No comments yet — be the first to share your thoughts!