How to Check BitLocker Drive Status on Windows 11
This guide explains how to check your BitLocker encryption drive status on Windows 11.
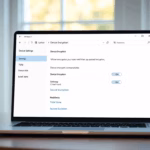
Open Settings, navigate to Privacy & security, then click Device encryption. If you don’t see Device encryption, search for “Manage BitLocker” in the Start menu. This will show if your drives are encrypted.
Understanding BitLocker and Device Encryption
BitLocker is a Windows security feature that scrambles your files to keep them private, using your computer’s special chip to store encryption keys safely, which helps prevent unauthorized access if your device is stolen.
This prevents unauthorized access if your device is stolen.
Once encrypted, your drive becomes unreadable to anyone without your password or recovery key.
It is important to know the difference between standard BitLocker and Device Encryption. Device Encryption is a simplified version found on most modern Windows 11 devices. Full BitLocker is usually reserved for Pro, Enterprise, or Education editions.
How to Check BitLocker Status via Settings
Checking your BitLocker status in Windows 11 is easy using the Settings app; this is the simplest way for most people to see if their drive is protected by encryption.
- Open the Settings app.
- Go to Privacy & security.
- Click on Device encryption.
- If you do not see this option, search for Manage BitLocker in the Start menu search bar to open the Control Panel view.
This confirms if your disk is protected by the system. You’ll see an ‘On’ or ‘Off’ status for your drives.
Checking Status with Command Line (Admin Required)
You can check your BitLocker status using the command line for more detailed information, which is useful for advanced users who need to see specific drive protection levels.
Right-click the Start button and select Terminal (Admin) or Command Prompt (Admin).
Type the following command and press Enter:
manage-bde -status
To check a specific drive, use:
manage-bde -status C:
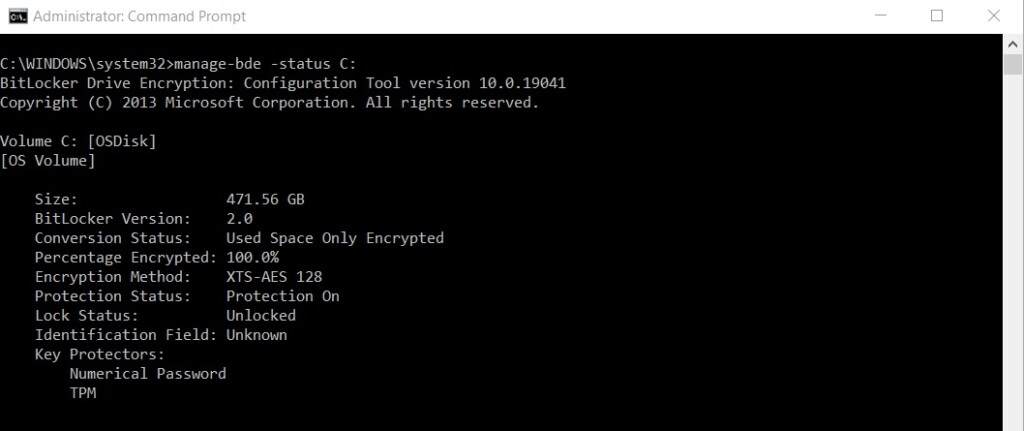
This command-line tool shows the exact encryption method and confirms if the drive is fully protected. You’ll see a detailed report, including the Recovery Key ID.
Using PowerShell to Verify Encryption
PowerShell is a powerful command-line tool often used by IT professionals. Note: This requires administrative privileges.
Open PowerShell as an administrator.
Run this command:
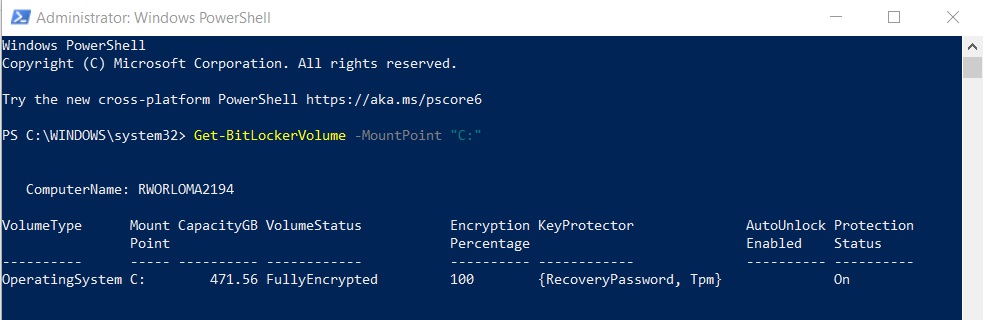
Get-BitLockerVolume -MountPoint "C:"
If you have lost your key, visit the official Microsoft recovery key portal to retrieve it.
Summary
Knowing your BitLocker status in Windows 11 is key to keeping your data safe, and you can easily check it using Settings or the command line to confirm your drive is protected.
How do I know if BitLocker is enabled on 🪟 Windows 11 Home?
Windows 11 Home typically uses ‘Device Encryption’ instead of full BitLocker. You can check this in Settings under Privacy & security. If the toggle is on, your drive is encrypted. If you need the full feature set of BitLocker, you’ll need to upgrade to Windows 11 Pro.
Why is BitLocker not showing up in my Control Panel?
BitLocker is only available on Windows 11 Pro, Enterprise, or Education editions. If you are using the Home edition, the BitLocker management interface will not appear in the Control Panel. You are limited to the basic Device Encryption settings found in the main Windows Settings app.
What does ‘Waiting for activation’ mean in BitLocker?
This status means BitLocker is prepared but not yet fully protecting your data. It usually happens after a fresh install or hardware change. The system is waiting for the recovery key to be backed up to your Microsoft Account or Active Directory before finalizing the encryption process.
Was this guide helpful?

About the Author
Richard
Tech Writer, IT Professional
Richard, a writer for Geek Rewind, is a tech enthusiast who loves breaking down complex IT topics into simple, easy-to-understand ideas. With years of hands-on experience in system administration and enterprise IT operations, he’s developed a knack for offering practical tips and solutions. Richard aims to make technology more accessible and actionable. He's deeply committed to the Geek Rewind community, always ready to answer questions and engage in discussions.


No comments yet — be the first to share your thoughts!