How to Change Wi-Fi Roaming Aggressiveness in Windows 11
You change Wi-Fi roaming aggressiveness in Windows 11 to control how quickly your network adapter (the part of your computer that connects to Wi-Fi) switches to a stronger Wi-Fi signal.
This setting dictates how your PC prioritizes maintaining a connection versus actively seeking a better one, impacting your overall wireless experience.
The Wi-Fi Roaming Aggressiveness setting typically has three levels: Lowest, Medium, and Highest.
Adjusting this can help you prevent dropped connections or reduce battery drain by optimizing your Wi-Fi adapter’s behavior.
You can adjust Wi-Fi roaming aggressiveness in Windows 11 through Settings, Device Manager, or Network and Sharing Center. Navigate to your Wi-Fi adapter’s advanced properties and select a level from the Roaming aggressiveness dropdown menu. This controls how readily your device switches to a stronger Wi-Fi signal.
What is Wi-Fi Roaming Aggressiveness?
Wi-Fi roaming aggressiveness is a setting that tells your Windows computer when to look for a better Wi-Fi signal.
Roaming aggressiveness tells your Wi-Fi adapter when to look for a better signal. For example, if your current Wi-Fi gets weak, it can automatically switch to a stronger one nearby.
Why does this matter? If you move around your home or office a lot, a higher setting helps you stay connected to the strongest signal. But it might also use up your battery a bit faster.
There are 5 levels of roaming aggressiveness:
| Level | What It Means |
| 1. Lowest | Switches only when the current signal is very weak. |
| 2. Medium-low | A bit more sensitive than lowest. |
| 3. Medium (Default) | Balanced between switching often and staying connected. |
| 4. Medium-high | Looks for better signals more actively. |
| 5. Highest | Switches even when the current signal is still good. |
Usually, the default Medium setting works best for most people. If you move around a lot and want to connect to stronger signals faster, try higher levels. If you notice your Wi-Fi keeps disconnecting or your battery drains faster, try a lower level.
How to Change Your Wi-Fi Roaming Aggressiveness
Option 1Change It in 🪟 Windows 11 Settings
You can easily change your Wi-Fi roaming aggressiveness directly in Windows 11’s main settings menu.
- Press
Win + Ito open Settings. - Click Network & internet on the left, then select Wi-Fi on the right.
- Click on Hardware properties.
- Click Edit next to More adapter options.
- Click the Configure button.
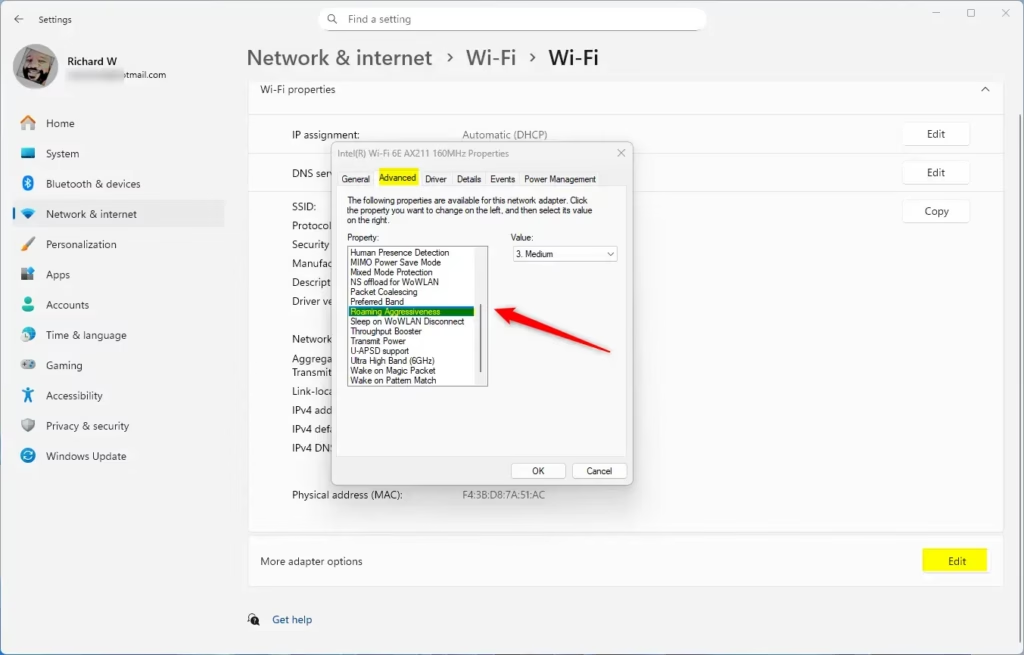
- In the new window, go to the Advanced tab.
- Select Roaming aggressiveness in the list on the left.
- Choose your preferred level from the dropdown menu on the right.
- Click OK to save your changes.
Option 2Change It Using Device Manager
Another way to adjust your Wi-Fi roaming aggressiveness is by using the Device Manager in Windows.
- Press
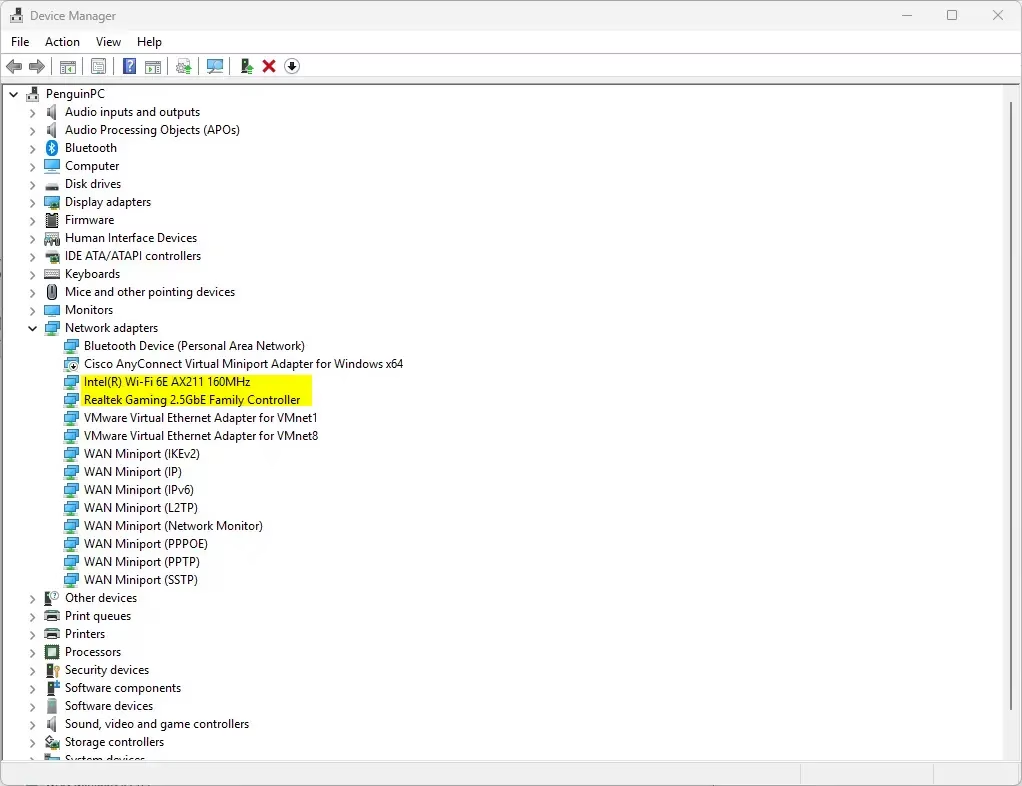
Win + Xand select Device Manager, or pressWin + R, typedevmgmt.mscand press Enter. - Expand Network adapters.
- Double-click your Wi-Fi adapter (name might include “Wireless” or “Wi-Fi”).
- Go to the Advanced tab.
- Select Roaming aggressiveness from the list.
- Pick the level you want from the dropdown menu.
- Click OK.
Option 3Change It in Network and Sharing Center
- Open the Control Panel and select Network and Sharing Center.
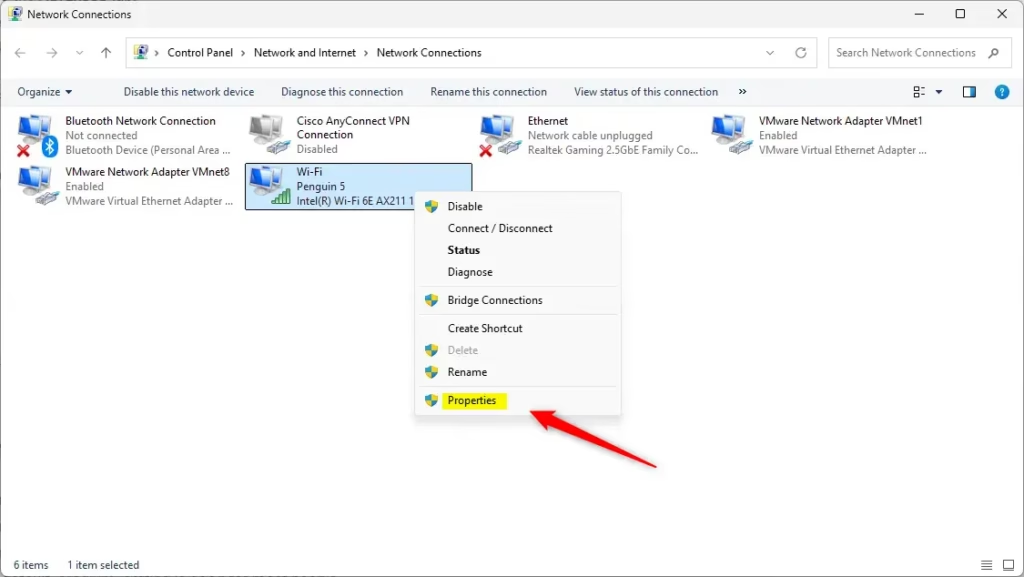
- Click Change adapter settings on the left.
- Right-click your Wi-Fi adapter and choose Properties.
- Click the Configure button.
- Go to the Advanced tab.
- Select Roaming aggressiveness and choose your level.
- Click OK to save.
Summary
In short, Wi-Fi roaming aggressiveness controls how readily your computer switches to a stronger Wi-Fi signal when you’re moving around.- Your computer saves Wi-Fi network info for easier connections.
- Roaming aggressiveness controls how often your Wi-Fi looks for a stronger signal to switch to.
- There are 5 levels, from very relaxed to very aggressive.
- The default “Medium” setting works well for most people.
- If you move around a lot and want better performance, try higher levels.
- If you experience connection drops or faster battery drain, try lowering the level.
- You can change this setting via Settings, Device Manager, or Network and Sharing Center.
- By adjusting roaming aggressiveness, you improve your Wi-Fi experience based on how you use your device.
More Info
Learn more about Wi-Fi roaming aggressiveness from Intel: Intel Wi-Fi Roaming Aggressiveness Setting
For advanced users, you can also manage this setting with PowerShell: Set-NetAdapterAdvancedProperty (NetAdapter)
How high should my roaming aggressiveness be?
Medium: Recommended value.
Was this guide helpful?

About the Author
Richard
Tech Writer, IT Professional
Richard, a writer for Geek Rewind, is a tech enthusiast who loves breaking down complex IT topics into simple, easy-to-understand ideas. With years of hands-on experience in system administration and enterprise IT operations, he’s developed a knack for offering practical tips and solutions. Richard aims to make technology more accessible and actionable. He's deeply committed to the Geek Rewind community, always ready to answer questions and engage in discussions.


No comments yet — be the first to share your thoughts!