This article explains how to change the Internet Time Server in Windows 11.
In Windows, an internet time server is a server that provides accurate time data to synchronize your computer’s clock. This helps ensure that your system time is correct, which is important for various applications and services.
Windows typically uses the Network Time Protocol (NTP) to synchronize the system clock with time servers. You can configure your computer to sync with popular NTP servers such as:
- time.windows.com
- time.nist.gov
- pool.ntp.org
Windows uses the time.windows.com time server by default, but you can change it and use any time server you prefer.
Change the time server using the Settings app
There are multiple ways to change the internet time server in Windows. The most recent Windows updates let users change this setting in the Settings app.
Here’s how to do it.
First, open the Windows Settings app.
You can do that by clicking on the Start menu and selecting Settings. Or press the keyboard shortcut (Windows key + I) to launch the Settings app.
When the Settings app opens, click the Time & language button on the left. Then, select the Date & time tile on the right to expand it.
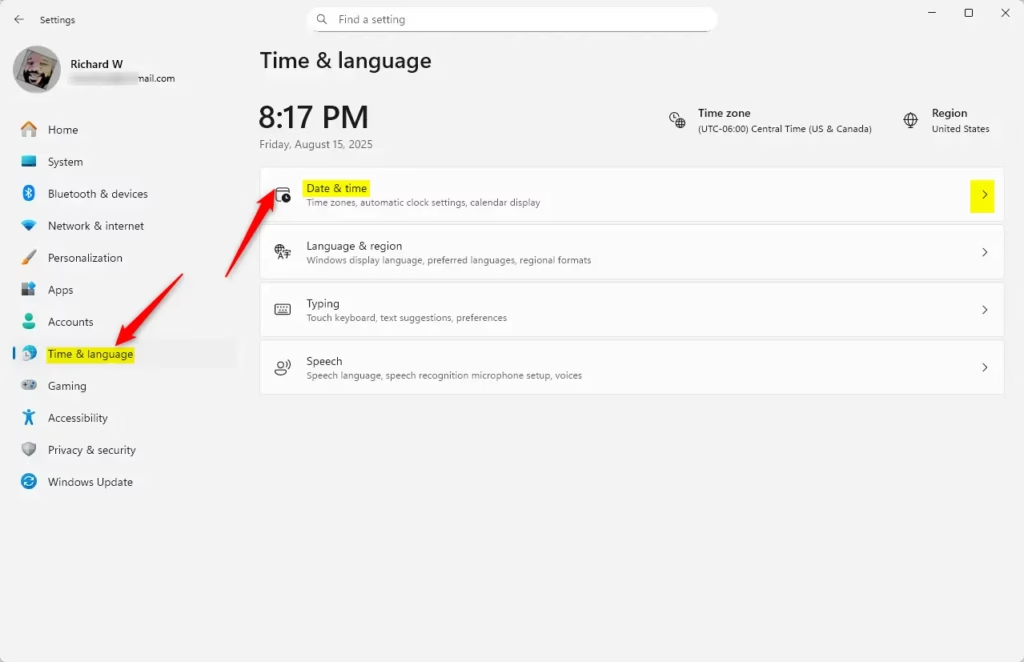
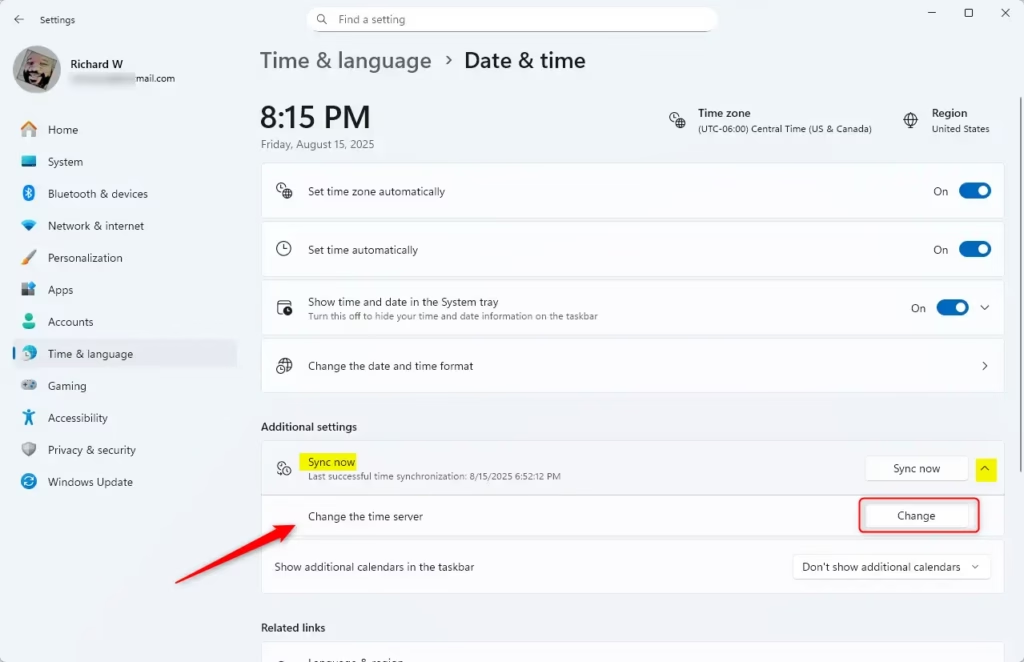
On the Date & time tile, click on the “Sync now” tile to expand it.
On the expanded Sync now tile, click the Change button to change the time server.
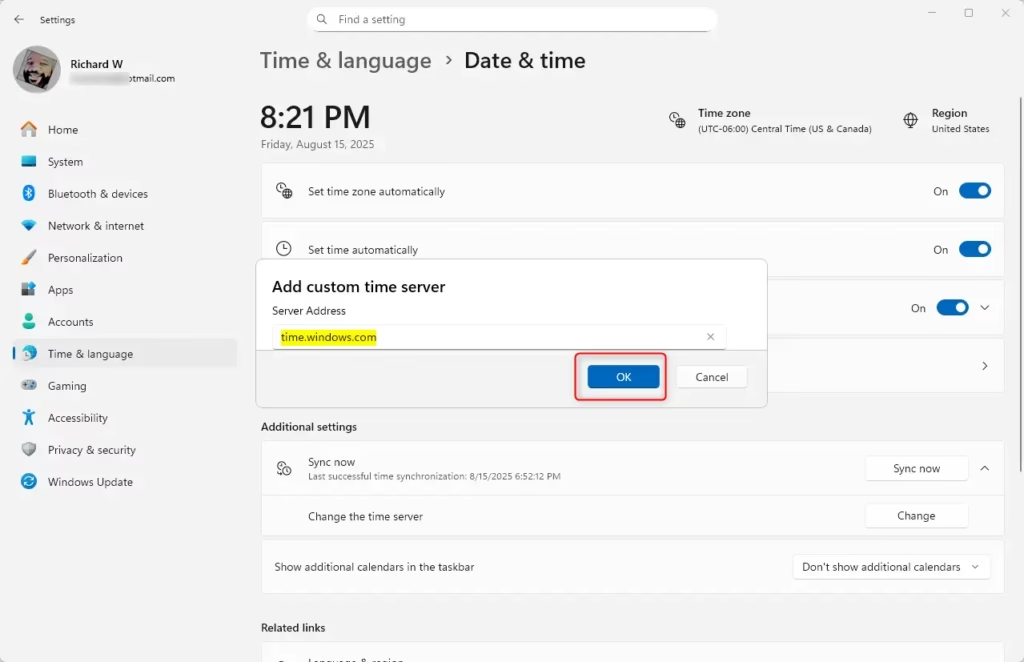
Add a custom time server that you wish to change and click OK to save your changes.
Change time server via Control Panel
Another way to change the time server in Windows is to use the Control Panel.
First, open the Control Panel app.
Then go to Control Panel -> Clock and Region settings page. Click the Set the time and date link on the Clock and Region setting page.

Select the Internet Time tab on the pop-up Date and Time window, then click the Change settings button.

Next, select a Time server from the drop-down menu option on the Internet Time Settings window.

As stated above, one can choose from very few Internet time servers. Below, we’ll show you how to add more.
Add or change Internet Time Servers via Windows Registry Editor
If you want to add Internet Time Servers or change the default, Windows lets you do it via the System Registry editor.
First, open the Windows Registry, and navigate to the folder key path below.
HKEY_LOCAL_MACHINE\SOFTWARE\Microsoft\Windows\CurrentVersion\DateTime\Servers
If you don’t see the Server folder key, right-click on the DateTime key, then create the subkey (Server) folders.
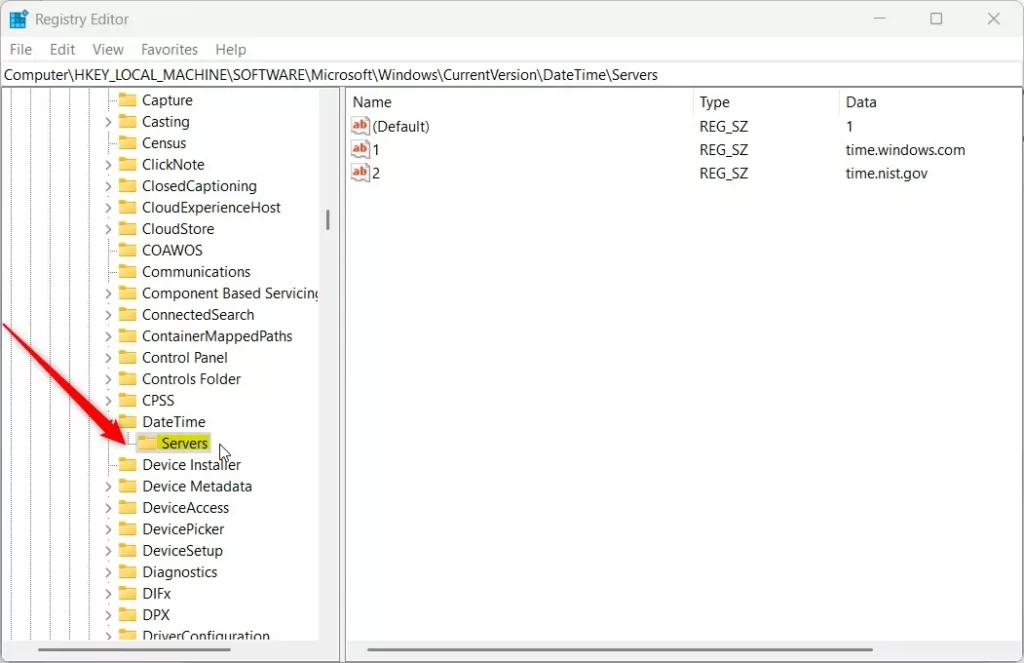
On the right pane, you will see a list of available Internet Time Servers with a default value set for one of the servers.
The server name should be in the Control Panel app.
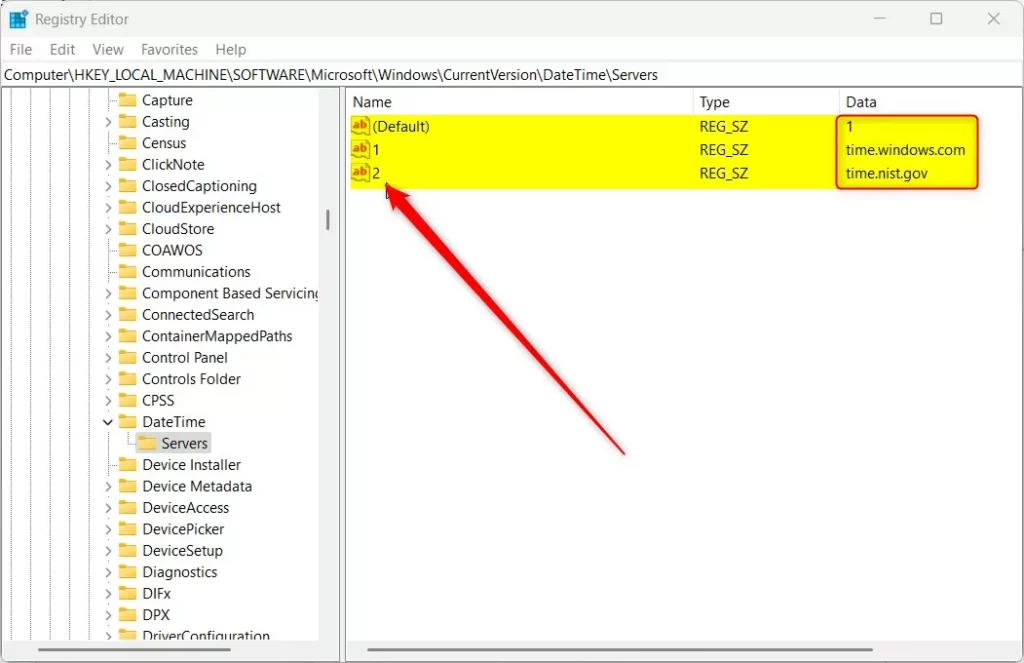
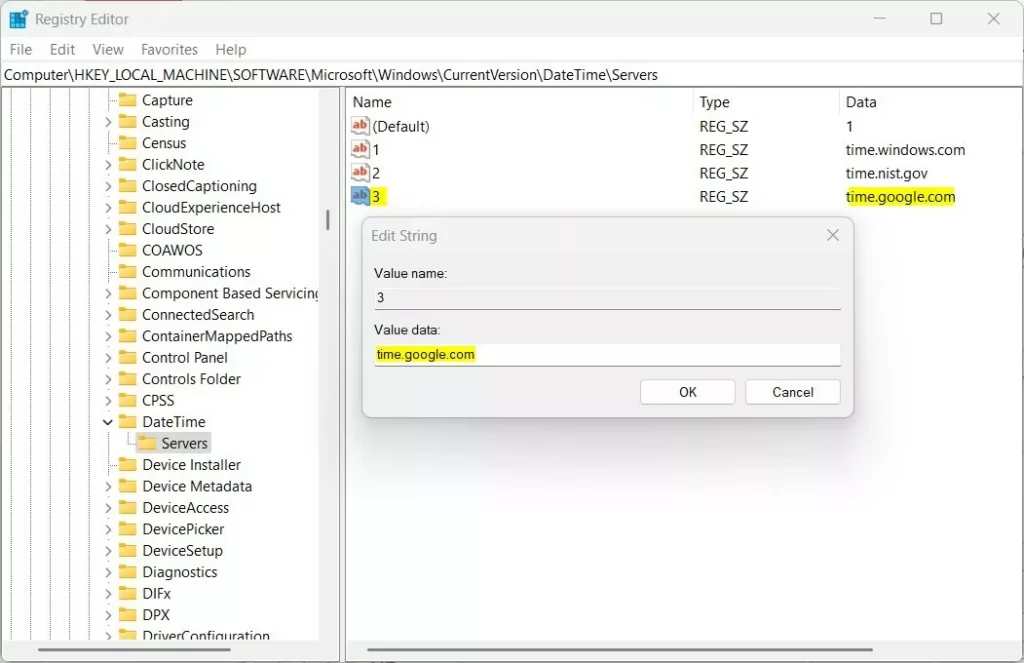
To create additional servers, right-click the Server folder key’s right pane and select New -> String Value. Next, type a new string number name. Ex. 3.
Double-click the new key item name (3) and type in a Value data:
ex. time.google.com
You can then use the (Default) name to set the default time server from the list available.
Next, browse the registry key below.
HKEY_LOCAL_MACHINE\SYSTEM\CurrentControlSet\Services\w32time\Parameters
Double-click the parameters key NtpServer in the right pane to open it. Then change the time server (ex: “time.windows.com,0x9″) value to whatever time server you added above (ex: “time.google.com,0x9″).
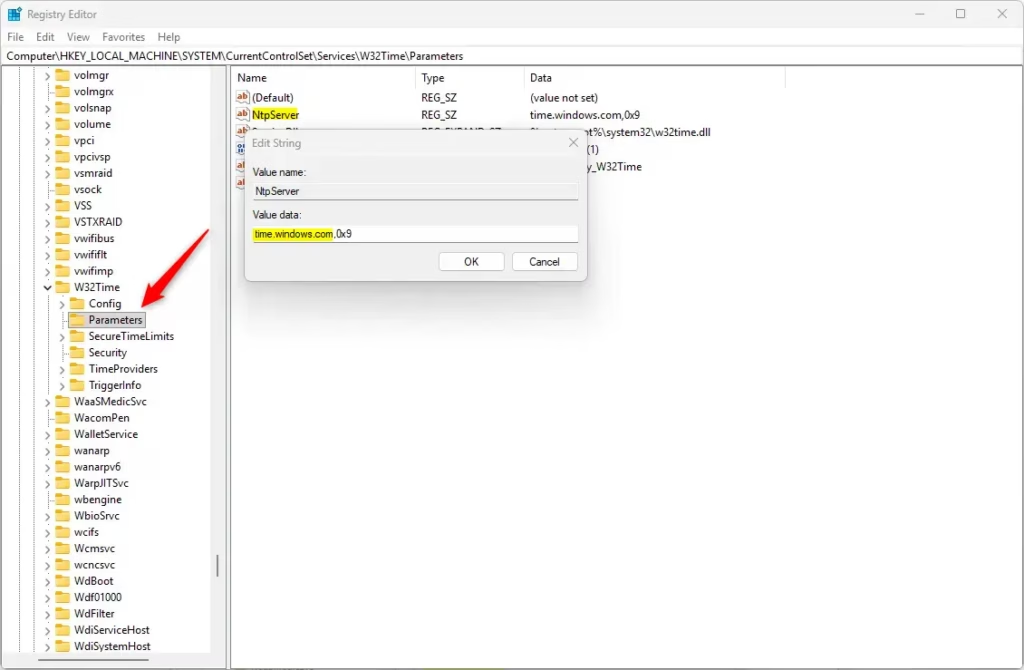
Save your changes and restart your computer.
That should do it!
Conclusion:
In summary, changing the Internet Time Server in Windows 11 is a straightforward process that can be accomplished through various methods. Here are the key points to remember:
- You can change the time server using the Settings app, Control Panel, or Windows Registry Editor.
- The default time server in Windows is time.windows.com, but you can switch to others like time.nist.gov or pool.ntp.org.
- Always ensure that the time server you choose is reliable for accurate synchronization.
- After making changes, it’s important to restart your computer for them to take effect.
- Regularly check and sync your system clock for maintaining the correct time across applications and services.


Leave a Reply