How to Change the Screen Recordings Folder for Snipping Tool in Windows 11
Do you use the Snipping Tool on Windows 11 to record your screen? You might want to save those recordings in a different folder. This guide will show you how to easily change where your screen recordings are saved.
What is the Snipping Tool?
The Snipping Tool is a built-in app on Windows 11. It helps you take screenshots and record your screen. You can capture the whole screen. You can capture just a window. Or you can capture part of your screen.
Besides taking pictures, the Snipping Tool also lets you record videos of your screen. You can even change settings like:
- Including or excluding system sounds and microphone audio
- Automatically saving screenshots
- Changing where screenshots and videos are saved
Why Change the Screen Recordings Folder?
By default, videos you record with the Snipping Tool are saved in C:\Users\UserName\Videos\Screen Recordings. What happens if you want to save your recordings somewhere else? Maybe you want to use another drive or folder. Good news! You can now do that easily.
How to Change the Screen Recordings Folder
Follow these simple steps to pick a new folder for your Snipping Tool screen recordings.
- Open the Snipping Tool app. You can find it by typing Snipping Tool in the Start menu search bar and clicking the app.
- Click the See more button (three dots) in the top-right corner. Then select Settings.
- In Settings, find the section that says “Screen recordings are saved to”. Click the Change link next to it.
- Choose a new folder. A File Explorer window will open. Browse to the folder where you want your recordings saved. Then click Select Folder.
- Close the Snipping Tool when done. Your new folder setting will be saved automatically.
Here are some pictures to help you:
Open Snipping Tool, click the three dots, and select Settings.
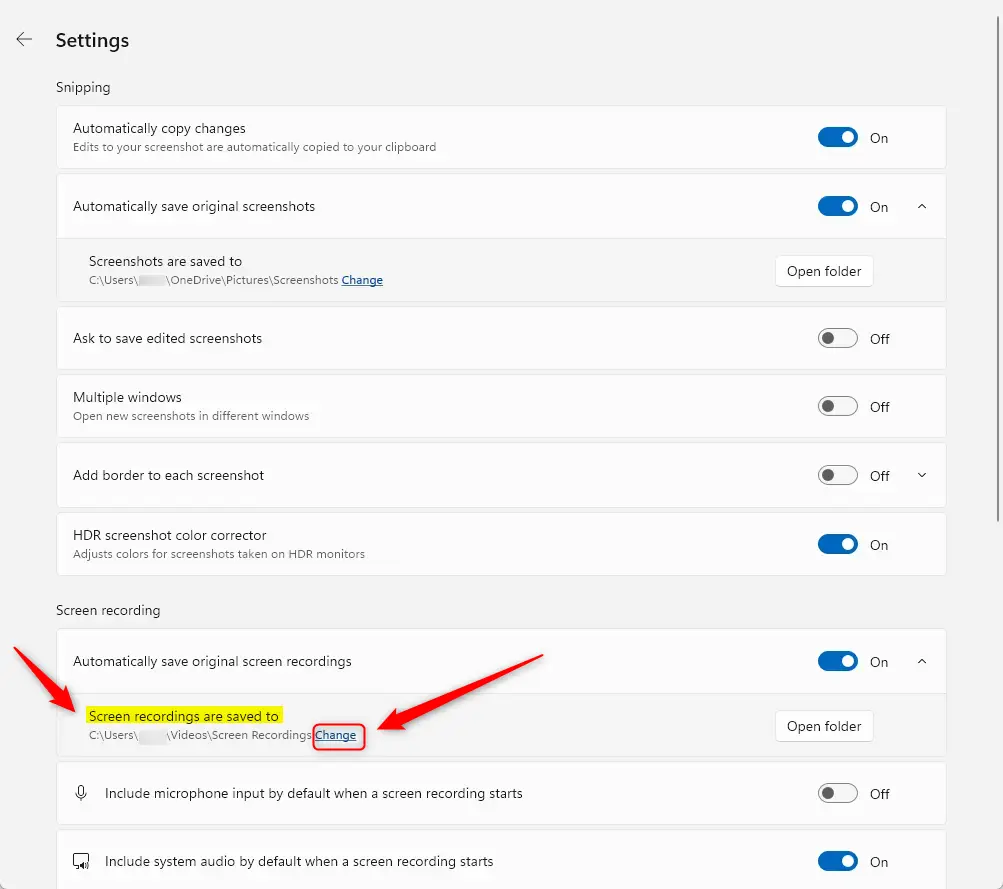
Click “Change” to pick a new folder for your recordings.
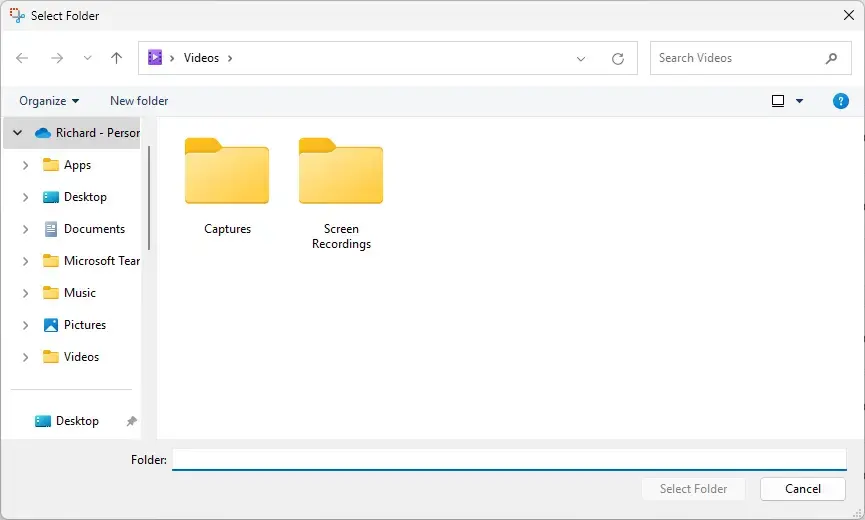
Use File Explorer to select your preferred folder.
Summary
The Snipping Tool lets you take screenshots and record your screen easily.
Starting with version 11.2408.13.0, you can change the folder where screen recordings are saved.
Here is what to do: Open Snipping Tool → Settings → Change the “Screen recordings are saved to” folder.
This helps keep your recordings organized where you want them.
Don’t forget to close the app after making changes so they are saved.
By following these easy steps, you can keep your screen recordings organized and saved exactly where you want on your PC.
Was this guide helpful?


Leave a Reply Cancel reply