
Narrator is a screen reader. It reads text on your screen out loud. It also describes what’s happening on your screen. This helps people with low vision or blindness.
With Narrator, you can enable or disable Narrator phonetic reading, pause for punctuation, adjust how the Narrator read advanced details, adjust the way capitalized text is read, add a braille display with Narrator, change input and output language for braille with Narrator, enable the Narrator announcing function keys, modifier keys, and more.
One great feature is changing the Narrator modifier key. A modifier key is a button you hold down to make other keys work. By default, Narrator uses Caps Lock or Insert. You can change this to fit what works best for you.
Why Change Your Narrator Modifier Key?
Different keys work better for different people. You might prefer one key over another. Changing it makes Narrator more comfortable to use.
How to Change Narrator Modifier Keys Using Settings
Step 1: Open the Windows Settings app.
Click the Start menu and select Settings. Or press Windows key + I on your keyboard.
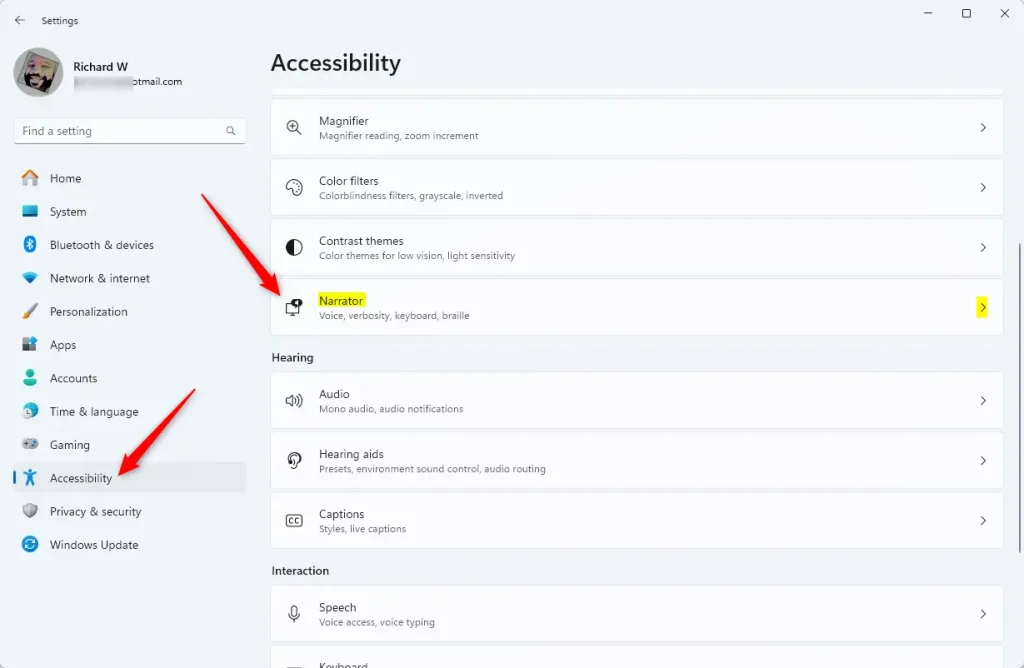
Step 2: Click Accessibility on the left side.
Step 3: Find Narrator on the right side and click it to expand the options.
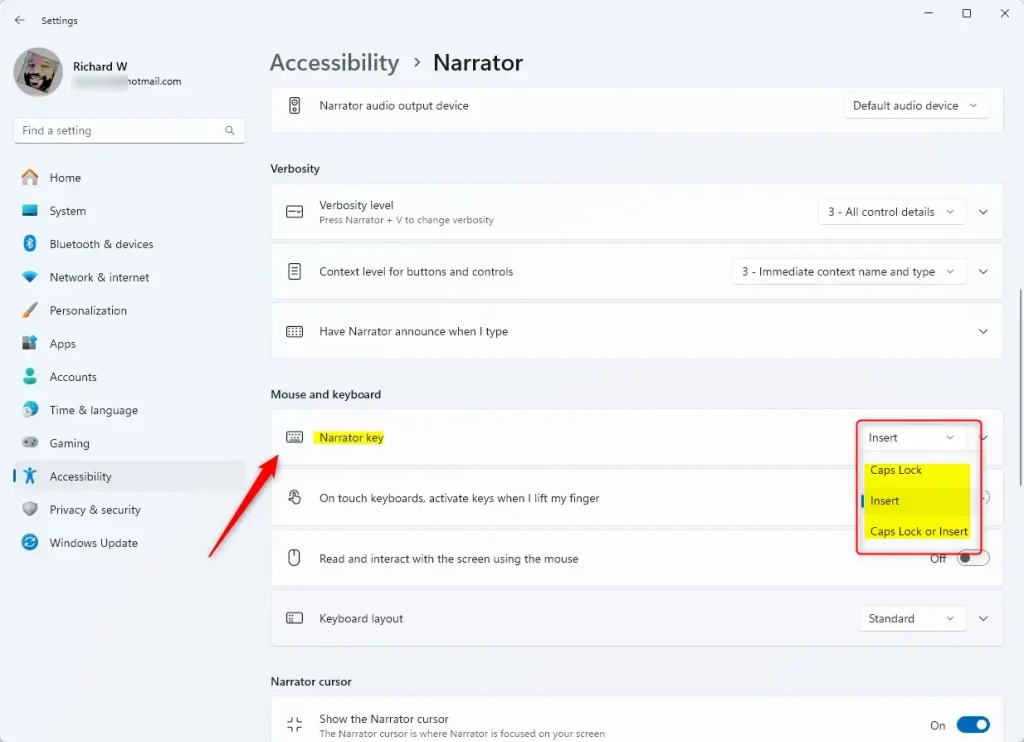
Step 4: Look for “Mouse and keyboard” and click the Narrator key option.
Step 5: Use the drop-down menu to pick one of these choices:
- Caps Lock
- Insert
- Caps Lock or Insert
Step 6: Close the Settings app when you’re done.
How to Change Narrator Modifier Keys Using Registry Editor
There’s another way to change your Narrator modifier key. You can use the Windows Registry Editor.
⚠️ Admin Required: These steps need admin privileges. Be careful when editing the registry.
Before you start, back up your registry or create a System Restore point just in case something goes wrong.
Step 1: Open the Windows Registry.
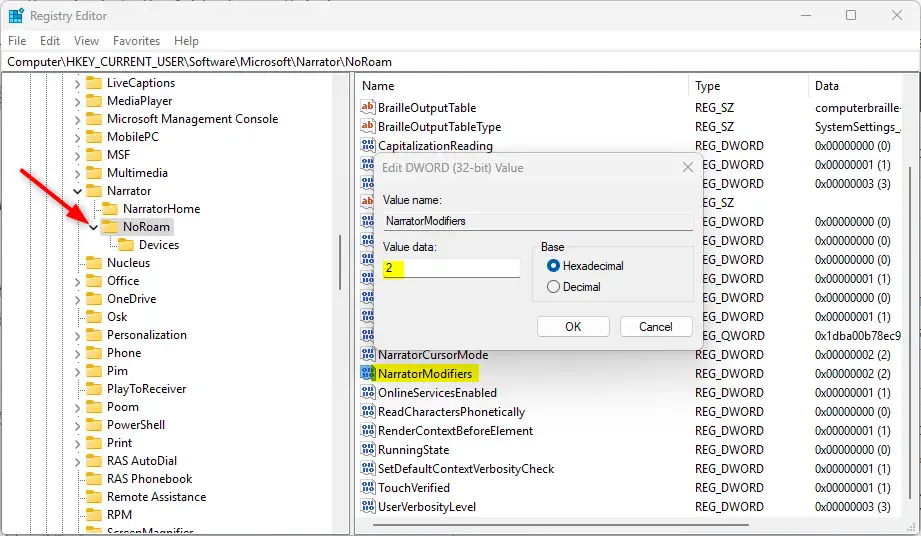
Step 2: Navigate to this folder path:
Computer\HKEY_CURRENT_USER\Software\Microsoft\Narrator\NoRoamStep 3: Right-click on NoRoam. Choose New > DWORD (32-bit) Value.
Step 4: Name the new DWORD NarratorModifiers.
Step 5: Double-click NarratorModifiers and set the value based on what you want:
- Type
1for Caps Lock - Type
2for Insert - Type
3for Caps Lock or Insert
Step 6: You may need to restart your computer for the changes to take effect.
What Happens When You Change Your Modifier Key?
Once you change your modifier key, Narrator will use the new key you selected. This makes running Narrator commands easier and more comfortable for you.
Summary
You can change your Narrator modifier key in two ways. The easiest way is through Settings. Just open Settings, go to Accessibility, find Narrator, and pick your preferred key from the drop-down menu. The second way uses Registry Editor, which requires admin privileges. Both methods let you choose between Caps Lock, Insert, or both keys. Pick whichever works best for you. This small change makes using Narrator much more comfortable.
Reference:


Leave a Reply Cancel reply