How to Change the Magnifier Lens Size in Windows 11
Need to adjust the Magnifier lens size in Windows 11? You can make the zoomed-in area larger or smaller to suit your needs.
Windows 11’s Magnifier tool has a lens view. This presents a resizable magnified area on your screen that moves with your mouse cursor. This is different from the full-screen or docked modes.
Adjusting the lens size lets you customize the magnification area for better visibility. For instance, you can make the lens cover up to 100% of your screen if required.
Open Settings by pressing Windows key + I, then navigate to Accessibility > Magnifier. Under Change lens size, drag the Width and Height sliders to adjust the lens dimensions. These changes apply in real-time when the Magnifier is in Lens view.
What is Magnifier?
Magnifier is a Windows tool that zooms in on your screen to make text and pictures easier to see.
Learn more about it here: Turn On or Off Magnifier in Windows 11
How to Change the Lens Size Using Settings
You can easily change the magnifier lens size in Windows 11 using the Settings app.
- Press Windows key + I to open Settings.
- On the left, click Accessibility. Then, on the right, click Magnifier.
- Click on the View section.
- Under Change lens size, you’ll see two sliders:
- Width (bottom slider)
- Height (right slider)
- Drag the sliders left or right to make the lens smaller or bigger. You’ll see the percentage number as you move the slider (default is 30%). What happens when you adjust it? The lens size changes in real time so you can see the effect right away.
- When you’re happy with the size, just close the Settings window.

Note: These options only work if you have selected the Lens view in Magnifier. To switch views, see: Change Magnifier View in Windows 11.
How to Change Lens Size Using the Registry Editor (Advanced)
For advanced users, changing the magnifier lens size in Windows 11 can also be done by editing the Registry Editor.
- ⚠️ Admin Privileges Required: Press Windows key + R, type
regedit, and press Enter to open Registry Editor. - In Registry Editor, go to:
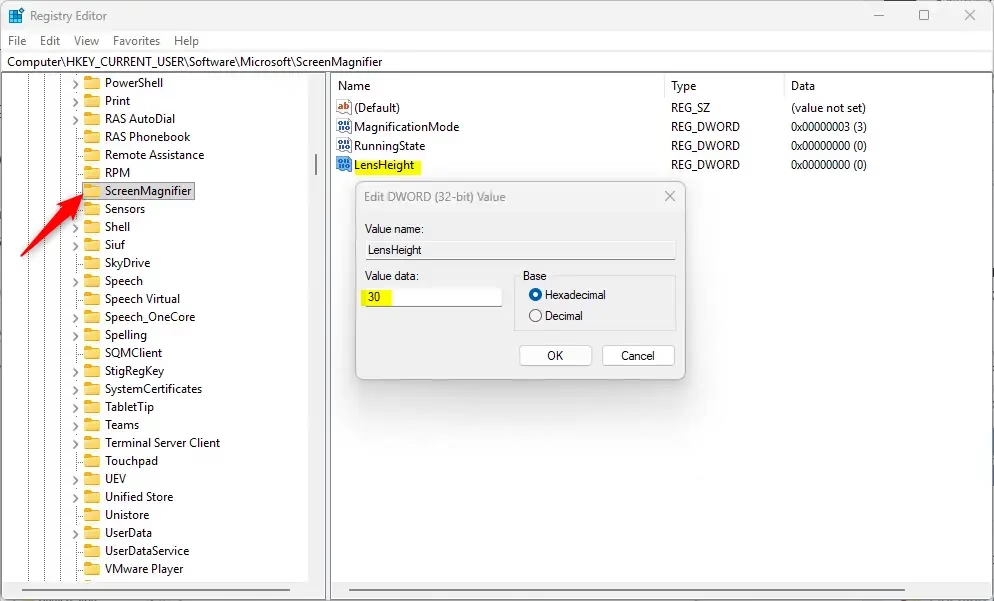
Computer\HKEY_CURRENT_USER\Software\Microsoft\ScreenMagnifier - To change the lens height:
- Double-click on LensHeight in the right pane.
- Select Decimal.
- Enter a number from 10 to 100 (in steps of 10) to set the height percentage you want.
- Click OK.
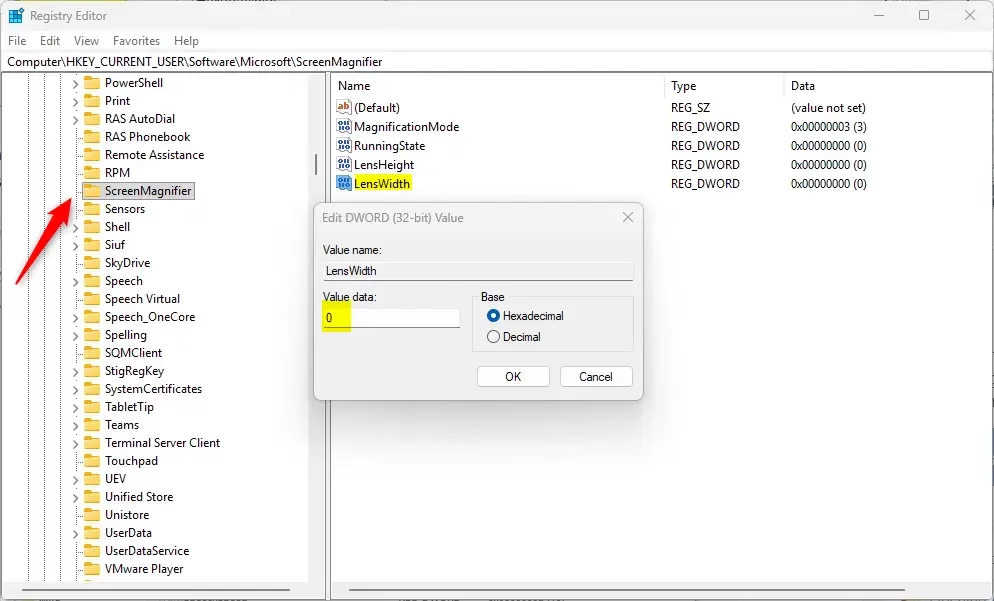
- To change the lens width:
- Double-click on LensWidth in the right pane.
- Select Decimal.
- Enter a number from 10 to 100 (in steps of 10) to set the width percentage you want.
- Click OK.
- Close the Registry Editor when done.
Tip: Adjusting these values lets you customize the size exactly how you want it.
More Help and Info
Want to learn more about Magnifier and other ways to make your screen easier to see? Check out this official Microsoft page: Use Magnifier to make things on the screen easier to see – Microsoft Support

Summary
Changing the magnifier lens size in Windows 11 is simple, letting you adjust the zoom area to fit your needs.
What is a good size magnifying glass?
WHAT IS A GOOD MAGNIFYING GLASS? 2X and 3X Lenses are the most popular choices for an average user as it offers higher magnification without sacrificing the field of vision (diameter of the lens).
Was this guide helpful?

About the Author
Richard
Tech Writer, IT Professional
Richard, a writer for Geek Rewind, is a tech enthusiast who loves breaking down complex IT topics into simple, easy-to-understand ideas. With years of hands-on experience in system administration and enterprise IT operations, he’s developed a knack for offering practical tips and solutions. Richard aims to make technology more accessible and actionable. He's deeply committed to the Geek Rewind community, always ready to answer questions and engage in discussions.


No comments yet — be the first to share your thoughts!