
If you want to control how PowerShell runs scripts on your Windows 11 PC, you need to understand and manage PowerShell Execution Policies. This guide explains what they are and shows easy steps to change them.
What Are PowerShell Execution Policies?
PowerShell Execution Policies are like rules that tell your computer when it’s safe to run scripts (small programs) in PowerShell. These rules help prevent harmful scripts from running by mistake.
You can set these rules for:
- Your whole computer (all users)
- Just your user account
- Only the current PowerShell window you’re using
Note: Execution policies are not full security locks. Someone can still run commands by typing them manually. But these policies help stop accidental or unsafe scripts from running.
Types of Execution Policies
Here are the common policies you can choose from:
AllSigned
- Only runs scripts signed by a trusted publisher.
- You’ll get asked if a script from a new source is allowed.
- Helps avoid running unsigned or unknown scripts.
Bypass
- No restrictions or warnings.
- Used when PowerShell runs inside another app that handles security.
Default
- No restrictions or warnings.
- Similar to Bypass for normal use.
RemoteSigned
- Default for Windows Server computers.
- Scripts you download from the internet must be signed by a trusted publisher.
- Scripts you write on your PC don’t need to be signed.
Restricted
- Default for Windows client computers (like your PC).
- Does not allow any scripts to run, only individual commands.
Undefined
- No policy is set, which usually means Restricted for clients.
Unrestricted
- Runs all scripts, including unsigned ones.
- Warns you before running scripts downloaded from outside your local network.
- Risky if you run scripts from unknown sources.
Where Can You Set These Policies?
You can set policies in these places:
- MachinePolicy: Set by system administrators for all users on your PC.
- UserPolicy: Set for your user account by system administrators.
- Process: Only affects the current PowerShell window (temporary).
- CurrentUser: Affects only your user account.
- LocalMachine: Affects all users on your PC.
Check Your Current Execution Policies
Before changing anything, you can see what your current settings are. Here’s how:
Get-ExecutionPolicy -ListTo run the above, open PowerShell as an administrator. Here’s a quick guide:
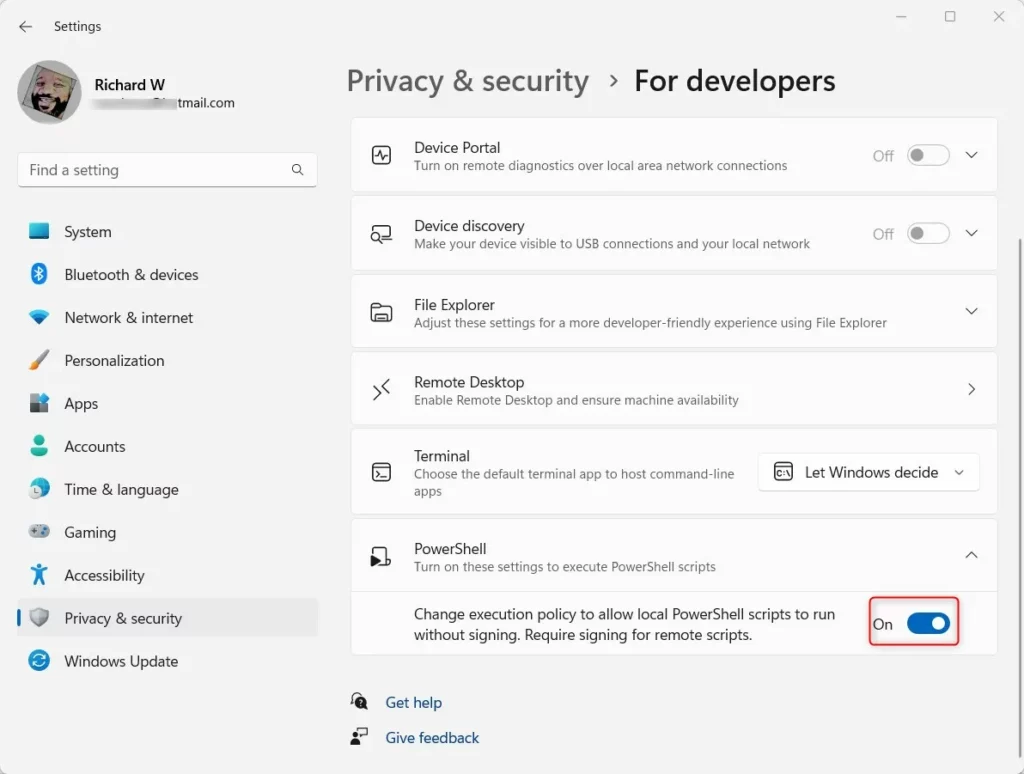
Change Execution Policy Using Windows Settings (Easy Way)
You can turn on or off certain PowerShell policies using the Windows Settings app, especially for your user account.
Steps:
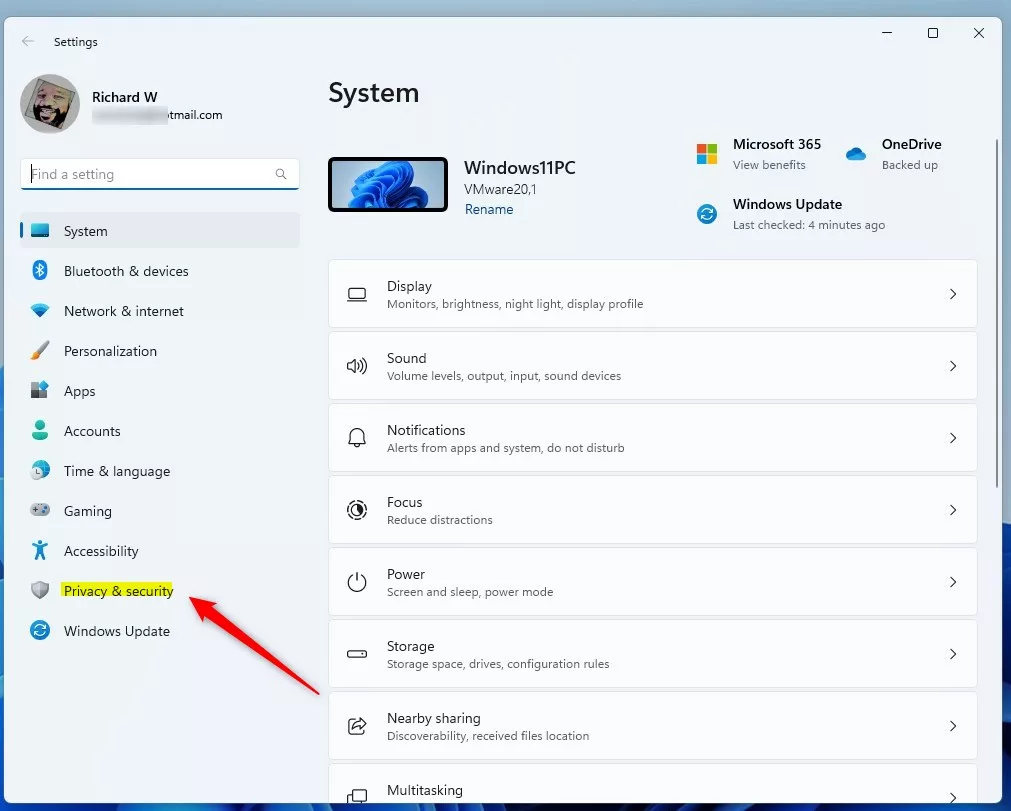
- Open Settings by clicking the Start menu and selecting Settings, or press Windows key + I.
- Click Privacy & security on the left menu.
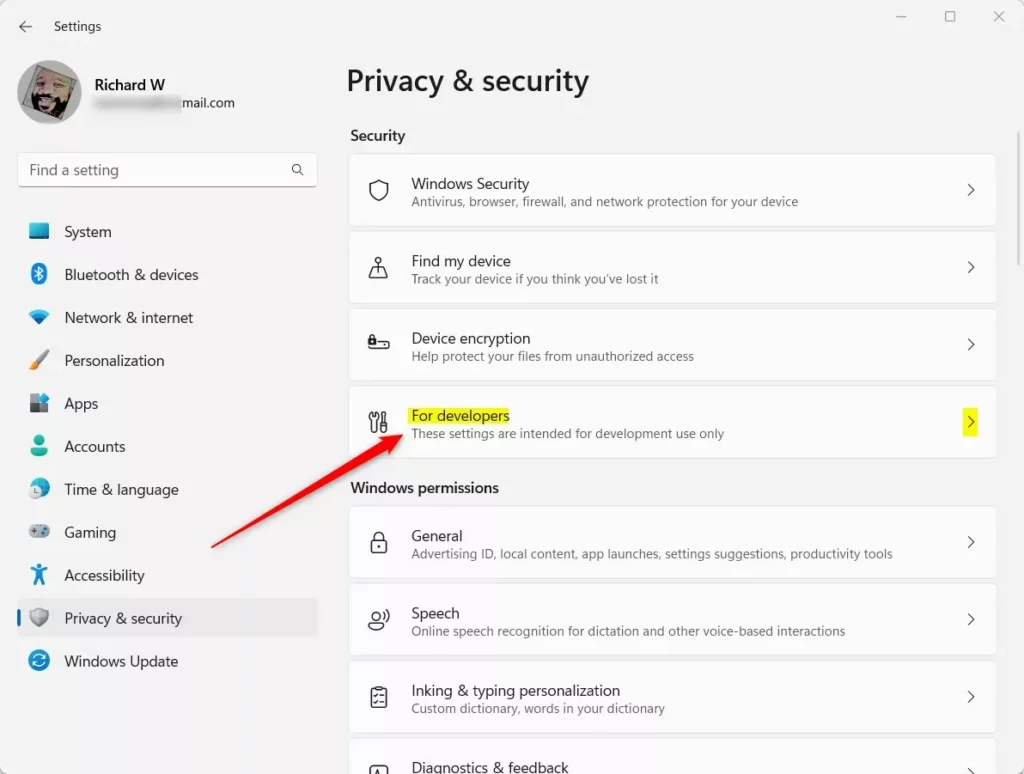
- On the right, find and click For developers.
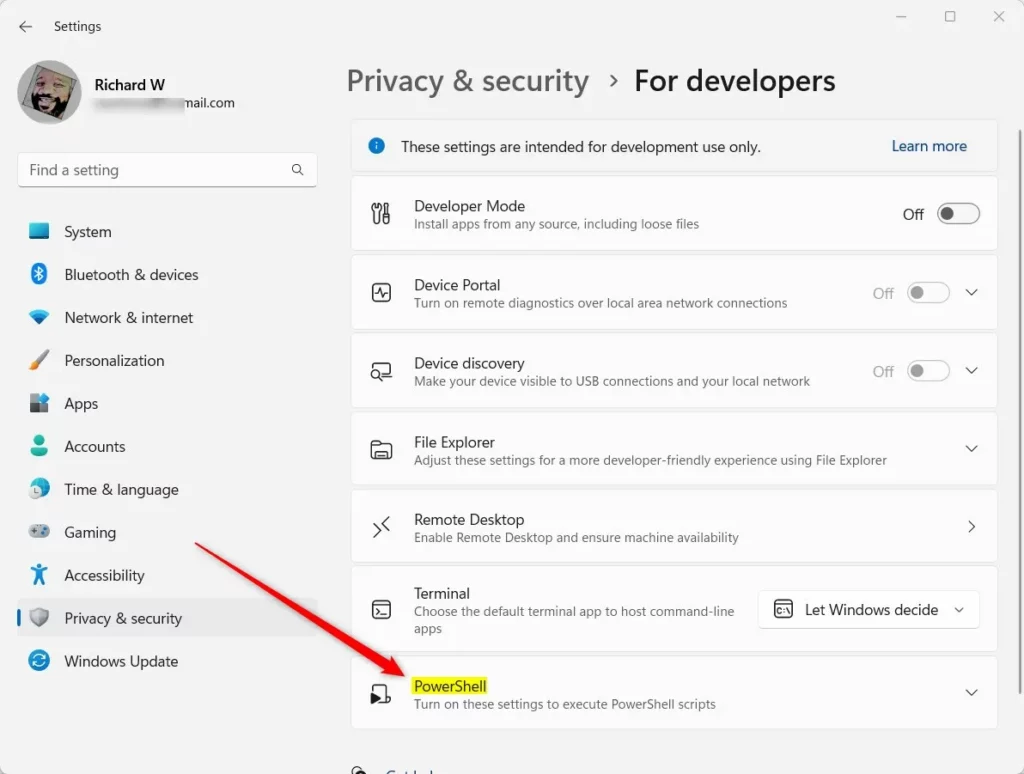
- Scroll down and find the PowerShell section, then click it to expand.
- Toggle the switch to On to enable “RemoteSigned” and “Restricted” policies for your user.
- Toggle it back to Off to disable these policies.
- Close the Settings app.
Change Execution Policy Using PowerShell (Advanced)
If you want more control or need to set policies for all users, you can use PowerShell itself to change the settings.
First, open PowerShell as administrator:
Then, type one of the following commands and press Enter to set the policy. Replace PolicyName with one of: AllSigned, Bypass, Default, RemoteSigned, Restricted, Undefined, or Unrestricted.
Set-ExecutionPolicy PolicyName -Scope CurrentUser -Force
Set-ExecutionPolicy PolicyName -Scope LocalMachine -Force
For example, to set “RemoteSigned” for your user only:
Set-ExecutionPolicy RemoteSigned -Scope CurrentUser -ForceChange Execution Policy Using the Registry Editor (For Experts)
You can also change the policy by editing the Windows Registry. This method should be used carefully.
Steps:
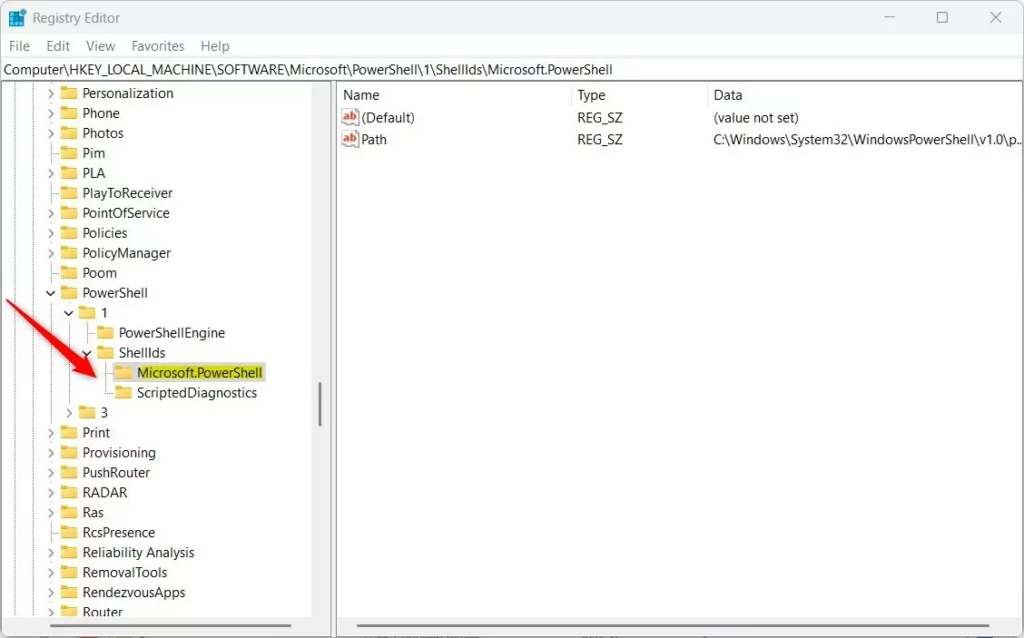
- Open the Registry Editor by typing regedit in the Start menu and pressing Enter.
- Navigate to this path:
HKEY_LOCAL_MACHINE\SOFTWARE\Microsoft\PowerShell\1\ShellIds\Microsoft.PowerShell - If you don’t see the
Microsoft.PowerShellfolder, right-click onShellIds, choose New > Key, and name itMicrosoft.PowerShell. - Click on
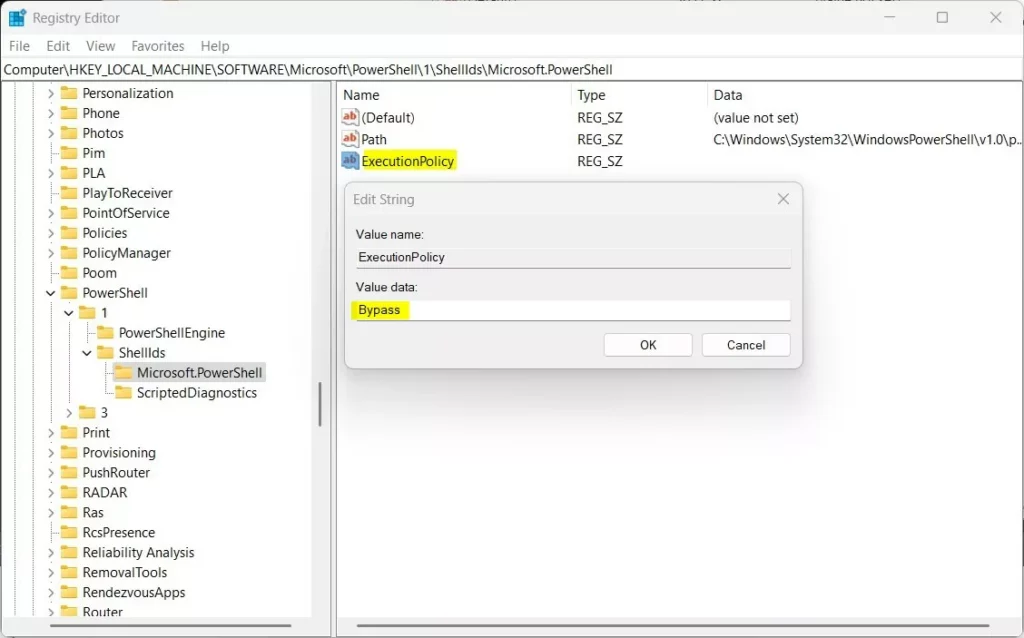
Microsoft.PowerShellfolder, then right-click on the right side and choose New > String Value. - Name the new value
ExecutionPolicy. - Double-click
ExecutionPolicyand enter one of the policy names as the value:- Restricted
- AllSigned
- RemoteSigned
- Unrestricted
- Bypass
- Click OK and close the Registry Editor.
- Restart your computer for the changes to take effect.
Summary
- PowerShell execution policies help control when scripts can run on your computer.
- There are several policy options, from very strict (Restricted) to very open (Bypass).
- You can change policies using the Windows Settings app, PowerShell commands, or the Registry Editor.
- Always be careful when running scripts from unknown sources to keep your PC safe.
For more detailed info, visit the official Microsoft page: Microsoft PowerShell Execution Policies.


Leave a Reply