Automatically Clear Trash in Ubuntu Linux: Step-by-Step Guide


Automatic Trash emptying in Ubuntu Linux deletes old files on a set schedule so your hard drive does not run out of space. You can configure this built-in feature to clear out the Trash folder every 1 day, 7 days, 14 days, or 30 days without needing to remember to do it manually.
Old deleted files pile up fast and waste valuable storage room on your system. Setting up this rule takes less than a minute in your desktop settings and keeps your computer running smoothly.
Automatically clear your trash in Ubuntu Linux by opening System Settings, navigating to Privacy, then File History & Trash. Toggle “Automatically Delete Trash Content” on and set your desired deletion period.
How to automatically delete temporary files in Ubuntu Linux
You can automatically clear trash ubuntu systems by using the built-in Settings app to delete old files on a regular schedule. Open Settings, go to Privacy, and turn on File History & Trash. This tells your computer to empty the trash can and clear out temporary files after a set number of days, so you do not have to do it by hand.
Manual deletion remains an option, or the operating system can handle the cleanup on a schedule. Here is how to configure the system to empty the trash and remove unneeded files.
Open the Settings app to manage your system configurations.
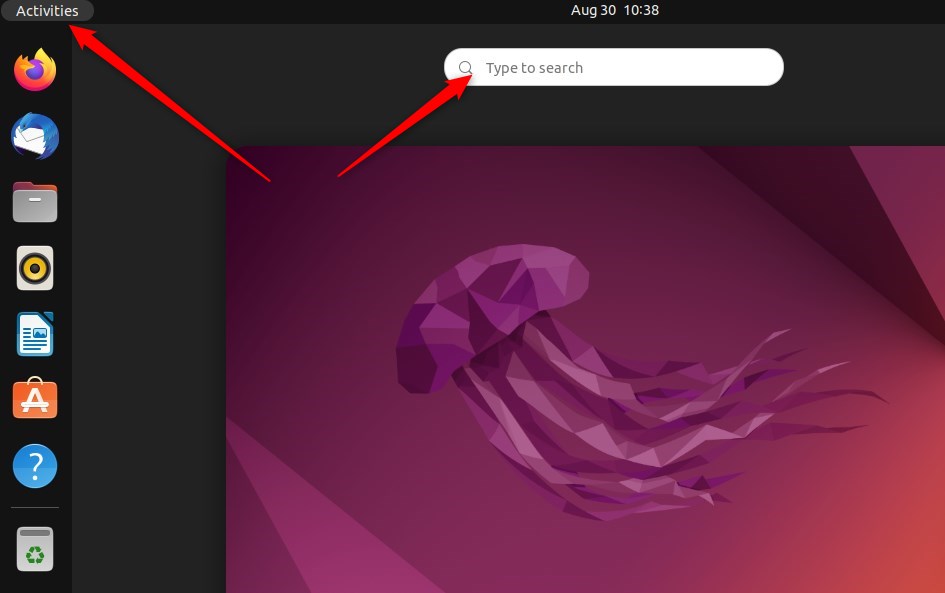
Alternatively, click the System menu in the top-right corner of the desktop’s top bar.
On the System menu, select Settings.
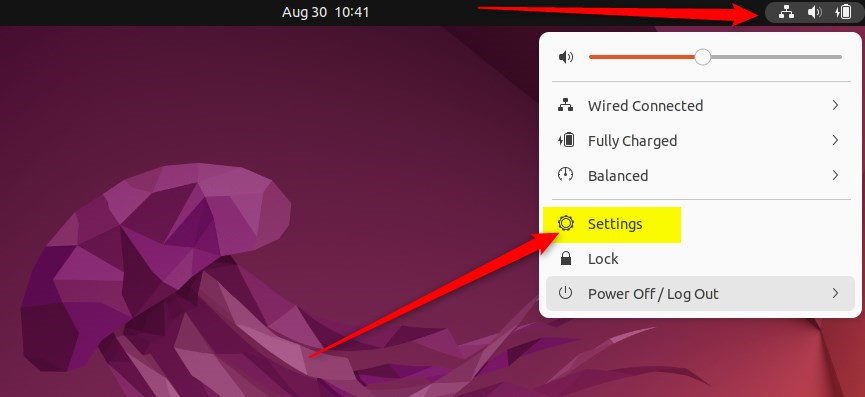
Click the Privacy tile to open the panel in the Settings app.
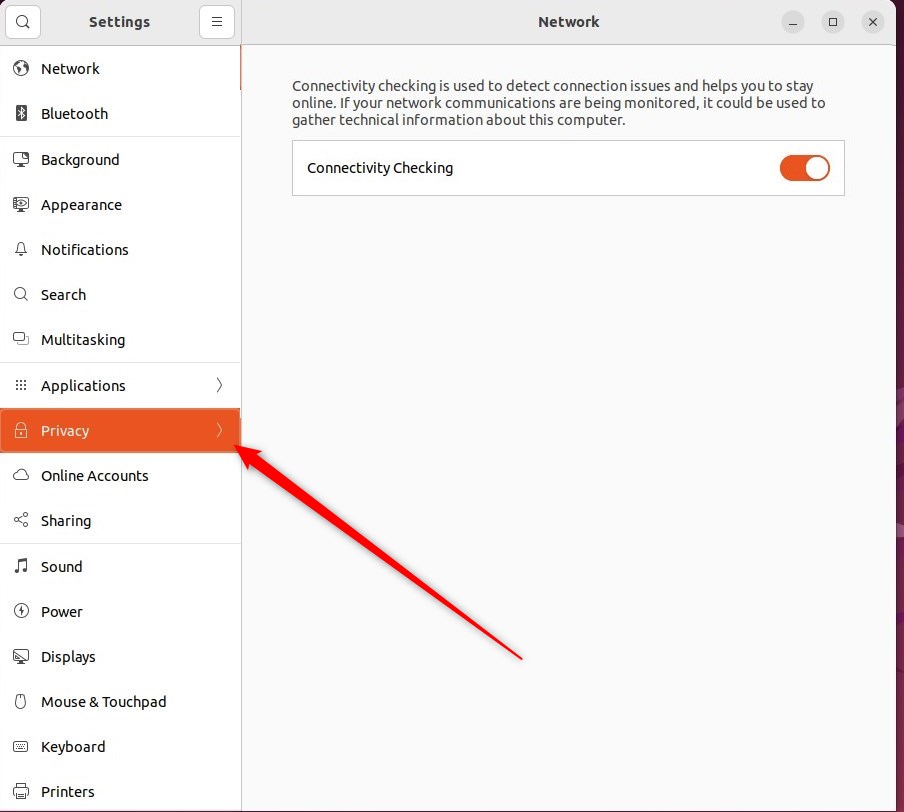
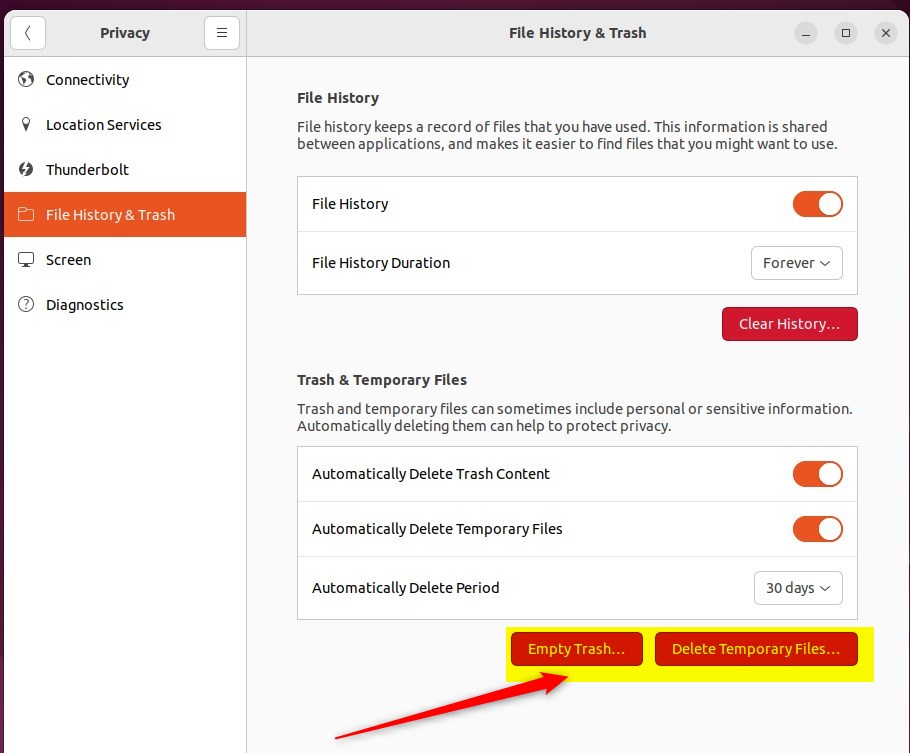
In the System Settings → Privacy settings panel, find and open the panel labeled File History & Trash.
Operating system settings can automatically delete trash content and temporary files, freeing up disk space and preventing the drive from filling up. Toggle the "Automatically Delete Trash Content" and "Automatically Delete Temporary Files" options to manage this function.
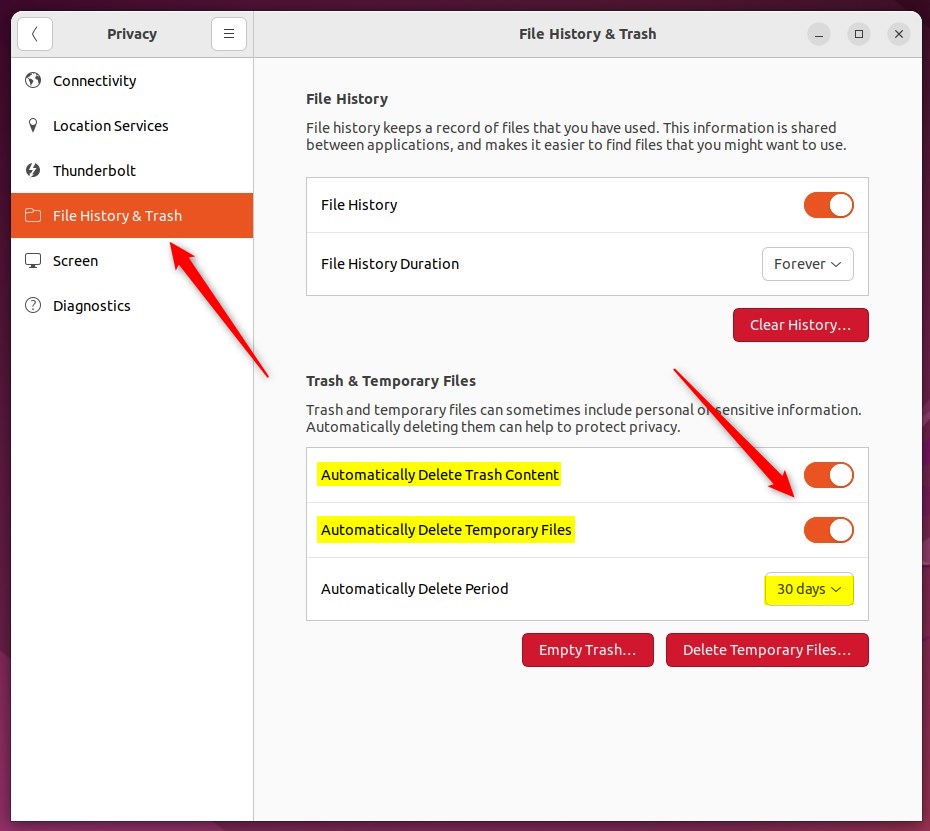
Set how often trash and temporary files undergo purging by changing the Automatically Delete Period value.
The interval ranges from an hour up to 30 days.
Users can also empty the trash and delete temporary files manually from the settings window for immediate cleanup.
Configuration is now complete, and the Settings app can be closed.
Summary:
- Clearing out trash and temporary files is essential for optimizing the performance and freeing up space on your Ubuntu Linux computer.
- Ubuntu Linux allows users to automatically delete trash content and temporary files through the System Settings panel.
- The System Settings panel allows to toggle the automatic deletion of trash content and temporary files and specify the deletion frequency.
- Users can also manually empty the trash and delete temporary files from the screen panel window for immediate cleanup.
How do I permanently delete Trash in Linux?
To bypass the trash bin entirely, the rm command removes files and folders from the system immediately.
Was this guide helpful?

About the Author
Richard
Tech Writer, IT Professional
Richard, a writer for Geek Rewind, is a tech enthusiast who loves breaking down complex IT topics into simple, easy-to-understand ideas. With years of hands-on experience in system administration and enterprise IT operations, he’s developed a knack for offering practical tips and solutions. Richard aims to make technology more accessible and actionable. He's deeply committed to the Geek Rewind community, always ready to answer questions and engage in discussions.

No comments yet — be the first to share your thoughts!