
This article explains how to add or remove voices-in-windows-11-narrator/” class=”sal-link” rel=”noopener” target=”_blank” data-sal-id=”8981″>Natural Voices to or from the Narrator in Windows 11.
The Narrator app is a screen-reading app built into Windows. It helps those with limited vision or who cannot see the text clearly on their screen. It reads and interacts with things on the screen, like text, links, and buttons.
The Narrator has also been improved and integrated into Windows, including sending emails, browsing the web, and writing documents.
Another thing one can do with the Narrator app is add or remove Natural Voices. The Narrator app supports two types of voices: Legacy and Natural.
Natural voices leverage state-of-the-art text-to-speech on devices with Windows. Once set up, the new voices are always available, even without an internet connection.
Legacy voices are not the best when narrating things on the screen.
Add Natural Voices to Narrator
As described above, users can add or remove Natural Voices to or from the Narrator app in Windows.
Here’s how to add additional Natural voices to the Narrator app.
First, open the Windows Settings app.
You can do that by clicking on the Start menu and selecting Settings. Or press the keyboard shortcut (Windows key + I) to launch the Settings app.
When the Setting app opens, click the Accessibility button on the left.
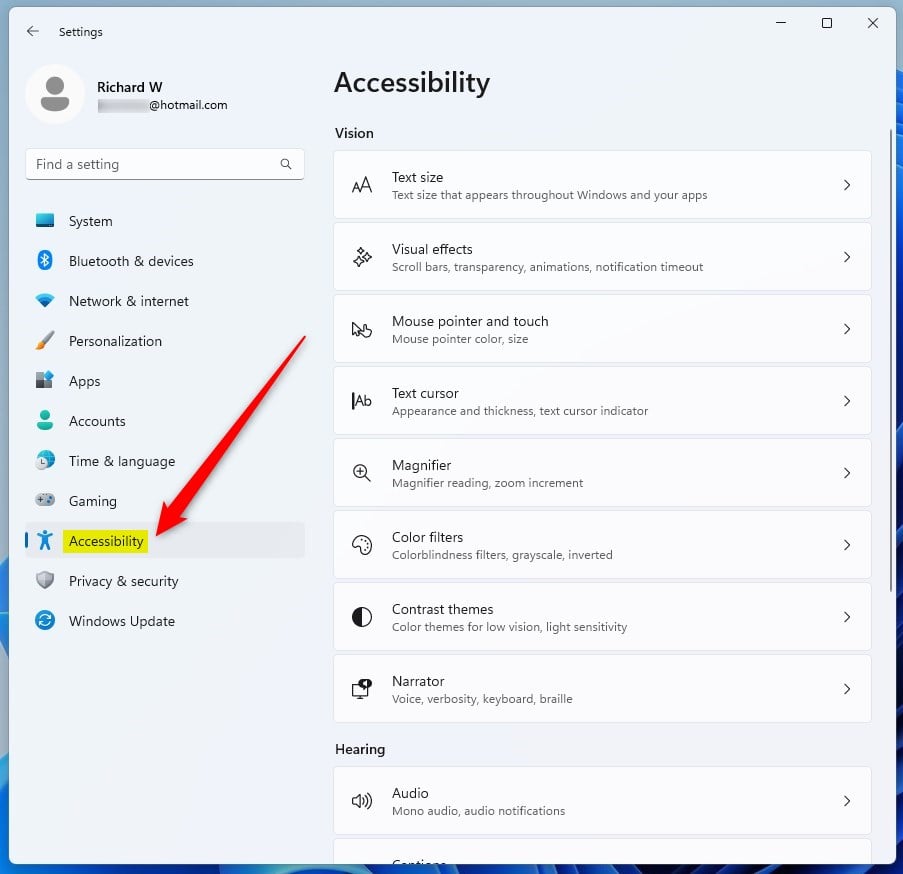
Select the Narrator tile on the right to expand it.

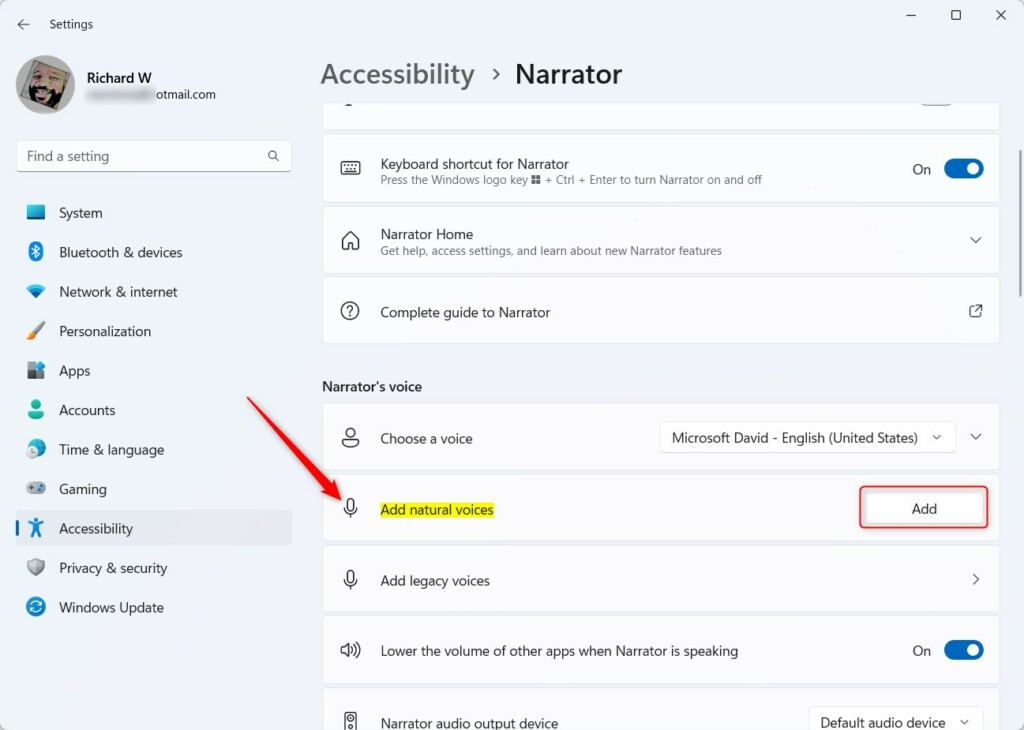
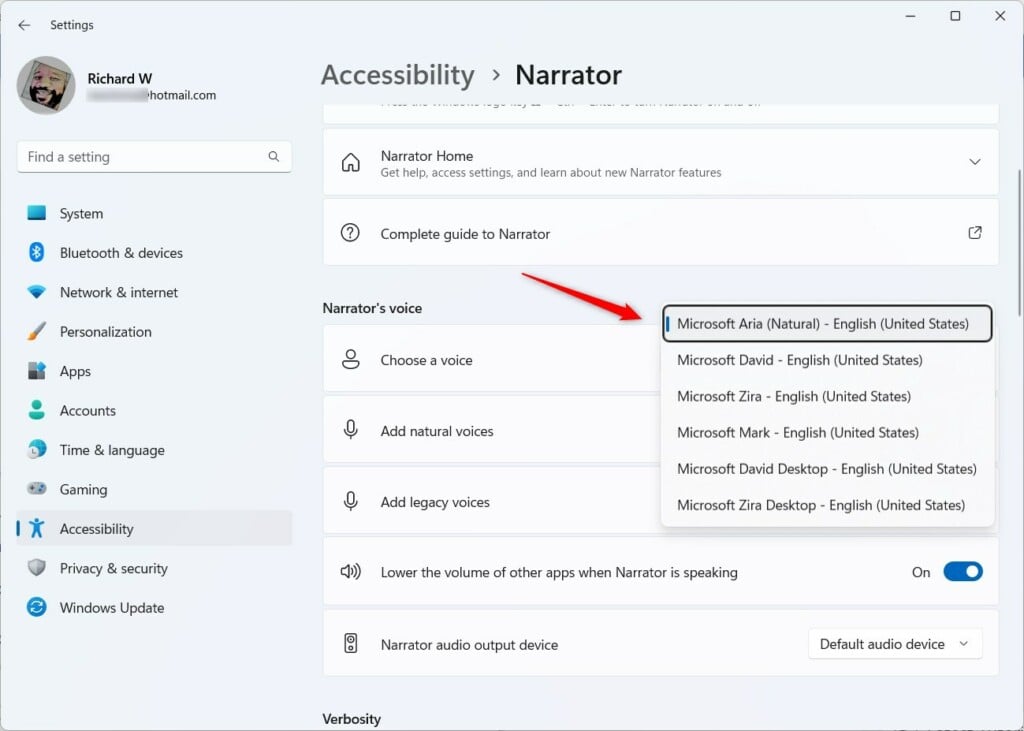
On the Accessibility -> Narrator setting pane, select the “Add natural voices” tile, and click the Add button under “Narrator’s voices.”
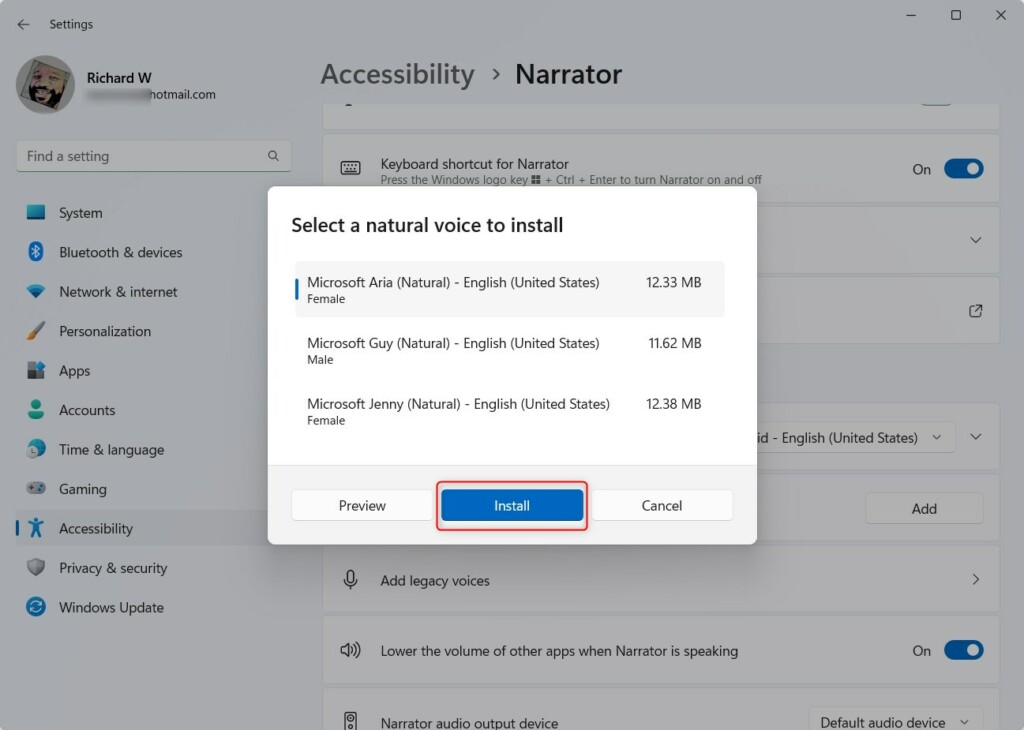
On the pop-up screen, select a natural voice you want to install, then click the Install button.
After a brief moment, a new natural voice should be installed and ready to use. You will see a notification once a new natural voice is installed.
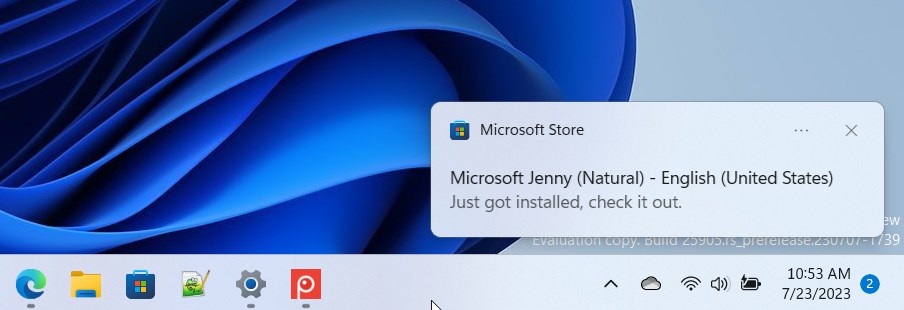
You should be able to select the new natural voice installed on the previous screen.
Remove Natural Voices
After installing a natural voice, uninstall or remove it using the PowerShell app. You can identify the Narrator’s natural voices installed by going to the Narrator’s settings and selecting the drop-down caret to show all the installed voices.
To remove a natural voice, open the PowerShell app.
Then run the command below to list the natural voices installed.
Get-AppxPackage -Name "*Voice*" | Select Name, PackageFullName
You see a similar screen below.
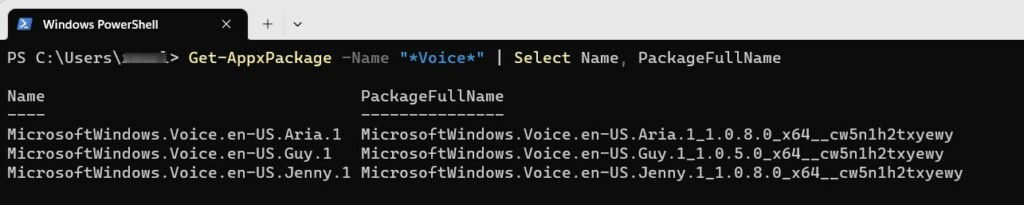
With the list handy, run the command below to uninstall or remove a natural voice package. Ensure to use the package’s full name.
Remove-AppxPackage -Package MicrosoftWindows.Voice.en-US.Aria.1_1.0.8.0_x64__cw5n1h2txyewy
That should do it!
Reference:
Conclusion:
- Adding or removing natural voices to the Narrator app in Windows 11 is a straightforward process that enhances the user experience for individuals with visual impairments.
- The improved integration of the Narrator app into Windows 11 allows for a seamless and versatile experience, including sending emails, browsing the web, and writing documents.
- Natural voices offer superior text-to-speech capabilities, ensuring a high-quality and consistent performance, even without an internet connection.
- In contrast, legacy voices may not provide the same clarity and effectiveness when narrating content on the screen.
- Following the steps outlined in this article, users can easily customize their Narrator app to suit their preferences and accessibility needs.
- For additional information and updates on accessibility features in Windows 11, referring to the Windows Experience Blog can provide valuable insights and resources.
Leave a Reply Cancel reply