How to Add Natural Voices in Windows 11 Narrator
You can add high-quality, natural-sounding voices to Windows 11 Narrator to improve screen reading. Natural Voices use advanced technology to create speech that sounds more human than older text-to-speech options.
Windows 11 Narrator, a screen-reading application built into the operating system, helps you navigate and interact with your PC by reading text and UI elements aloud. This makes your computer easier to use, especially if you have visual impairments.
You can download and install extra natural voices, like “Microsoft Jenny” or “Microsoft David,” right from Windows Settings. This allows you to personalize the Narrator’s voice for a more comfortable and efficient user experience.
Open Settings, go to Accessibility, then Narrator. Click “Add natural voices,” choose a voice from the list, and click Install. You can then select your new voice in Narrator settings.
What is Narrator?
Narrator is a screen reader that comes with Windows. It reads text, buttons, links, and other things aloud so you can use your PC without looking at the screen.
Windows 11 has made Narrator better. Now, it can help you send emails, browse websites, write documents, and more.
What Are Natural Voices?
Narrator offers two types of voices:
- Legacy voices: Older and less clear voices.
- Natural voices: Newer, clearer voices that sound more like real people.
Natural voices use advanced technology to sound better. They work even if you’re not connected to the internet.
How to Add Natural Voices to Narrator
Follow these steps to add Natural Voices to your Narrator:
Step 1Open Windows Settings
Click the Start menu and select Settings, or press Windows key + I on your keyboard to open Settings quickly.
Step 2Go to Accessibility
In the Settings window, click Accessibility on the left sidebar.
Step 3Select Narrator
Find and click on the Narrator option on the right side.

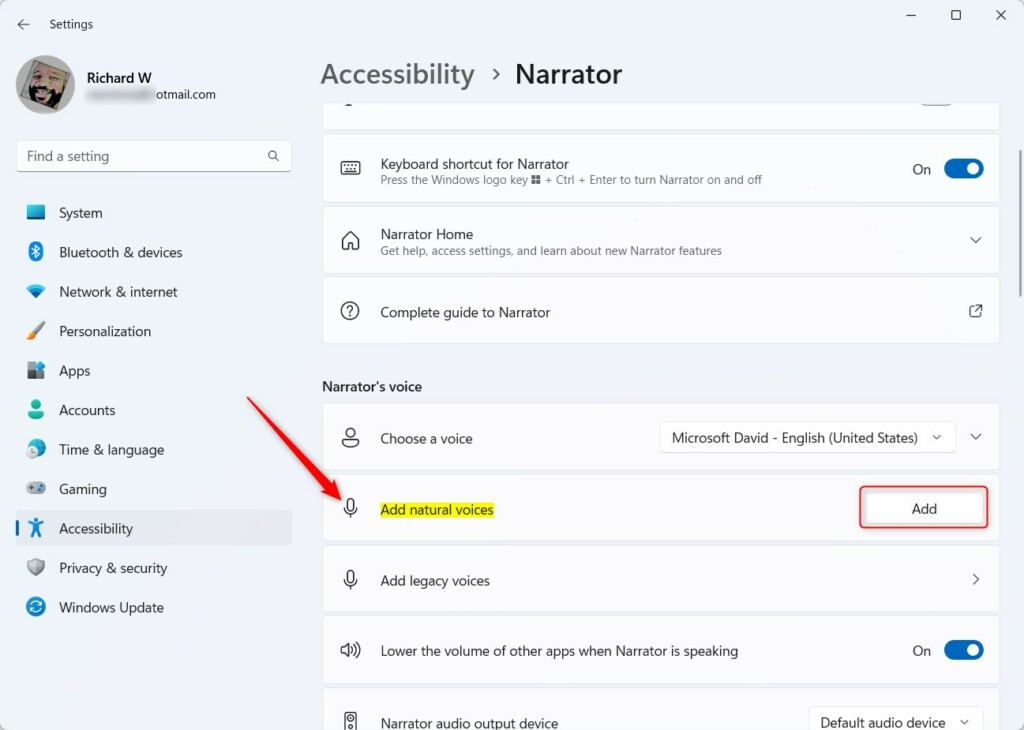
Step 4Add Natural Voices
Look for the tile that says “Add natural voices” and click it.
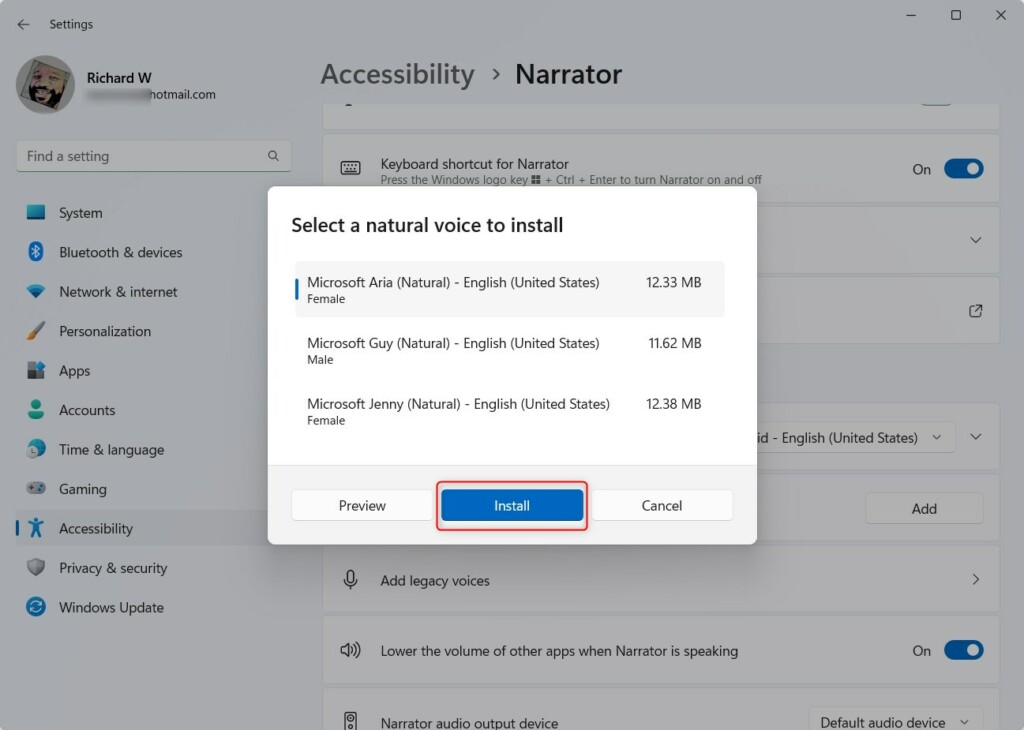
Step 5Choose Your Voice
Choose the natural voice you want from the list, then click the Install button.
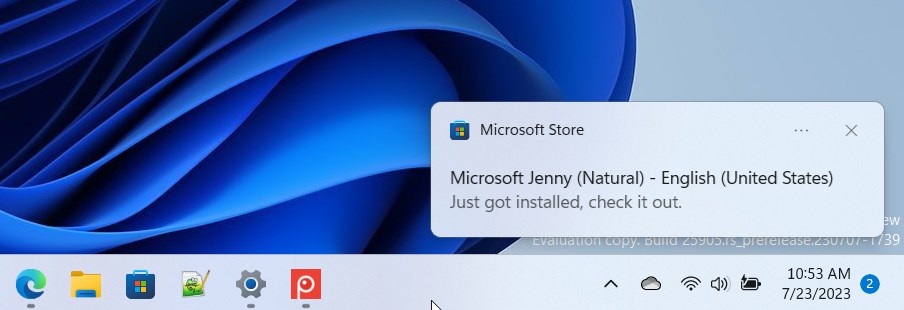
Step 6Wait for Installation
Wait a moment while the voice installs itself. You’ll see a notification when it’s ready.
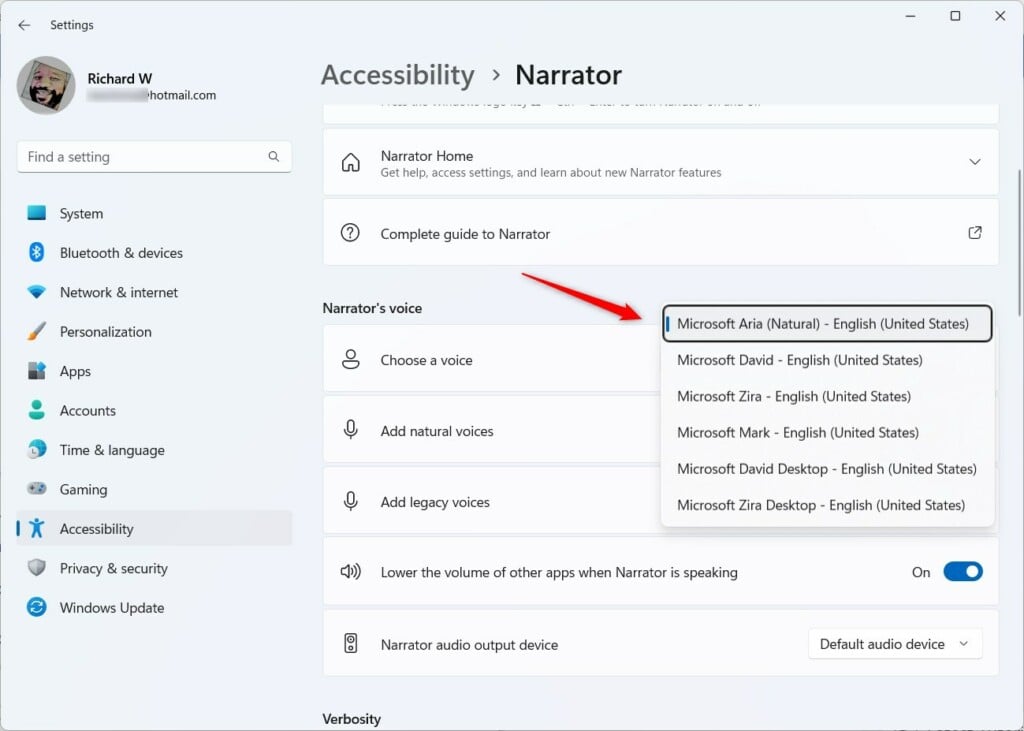
Step 7Use Your New Voice
Go back to the Narrator settings, and you can now select your new natural voice to use.
How to Remove Natural Voices
To remove a natural voice you’ve installed, you’ll need to use Windows PowerShell:
Step 1Open Windows PowerShell
⚠ Admin privileges required
Open PowerShell by searching for it in the Start menu. Right-click it and select Run as administrator.
Step 2List All Natural Voices
Type this command and press Enter to see all installed natural voices:
Get-AppxPackage -Name "*Voice*" | Select Name, PackageFullName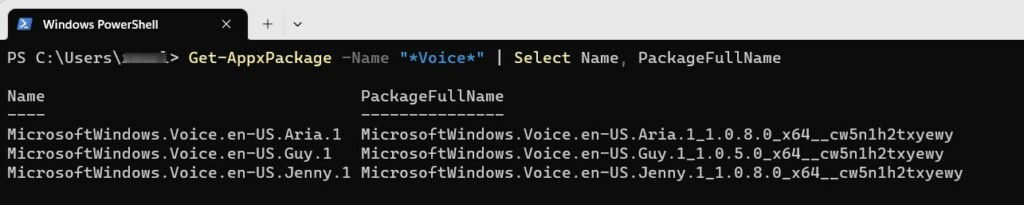
Step 3Find the Voice You Want to Remove
Find the voice you want to remove and copy its full package name.
Step 4Uninstall the Voice
Use this command to uninstall the voice. Replace PackageFullName with the full name you copied:
Remove-AppxPackage -Package PackageFullNameThat’s it! The voice will be removed from your computer.
More Information
Learn about new accessibility features in Windows 11 from the Windows Experience Blog.
Summary
- Adding or removing natural voices in Narrator is simple and makes the voice sound much better.
- Narrator helps you use your PC by reading things aloud, even helping with emails and browsing.
- Natural voices sound clearer and work even offline.
- Legacy voices are not as clear or natural sounding.
- You can customize Narrator voices anytime to fit your needs.
How to change Narrator voice in 🪟 Windows 11?
To personalize the narrator’s voice on Windows 11, go to the Narrator’s Voice section. Use the drop-down menu next to Choose a voice to select a voice that suits your preference.
How do I reset Narrator settings?
Select Restore all defaults to return all commands back to their default settings. To find this setting, press Alt+Tab after Narrator launches, select the Narrator Settings window, and choose Commands.
Was this guide helpful?

About the Author
Richard
Tech Writer, IT Professional
Richard, a writer for Geek Rewind, is a tech enthusiast who loves breaking down complex IT topics into simple, easy-to-understand ideas. With years of hands-on experience in system administration and enterprise IT operations, he’s developed a knack for offering practical tips and solutions. Richard aims to make technology more accessible and actionable. He's deeply committed to the Geek Rewind community, always ready to answer questions and engage in discussions.

No comments yet — be the first to share your thoughts!