

Windows 11 has a helpful feature called Live Captions. It shows words on your screen as people speak in videos or audio. This makes it easier to follow what’s being said. It’s especially useful if you have trouble hearing or you’re in a noisy place.
Good news: You can add different languages to Live Captions. This means you can understand audio in other languages better. You can also get captions in your preferred language.
What is Live Captions?
Live Captions is a feature that came with Windows 11 build 22557. It shows real-time text of spoken words on your screen.
You can turn Live Captions on by pressing WINDOWS + CTRL + L on your keyboard. You can also go to the Accessibility settings in Quick Settings. Quick Settings is the menu you open by clicking the speaker, Wi-Fi, or battery icons at the bottom right of your screen. Learn more about turning it on and off here.
Why Add More Languages to Live Captions?
- It helps people who don’t speak the language in the audio understand better.
- It supports people who are deaf or hard of hearing and speak different languages.
- It can make captions more accurate. Windows gets more language options to recognize what’s being said.
How to Add Other Languages to Live Captions
Follow these simple steps to add new languages for Live Captions in Windows 11:
- Turn on Live Captions by pressing
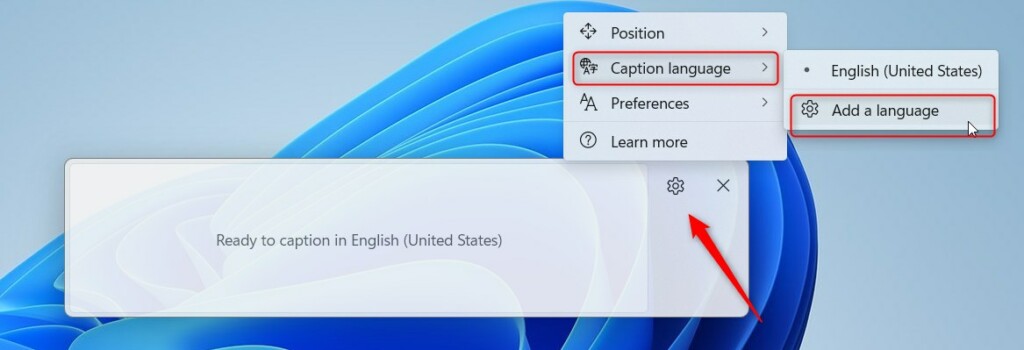
WINDOWS + CTRL + Lor through Quick Settings. - In the Live Captions bar that appears on your screen, click the Settings button. It usually looks like a gear icon.
- Click on Caption language. Then choose Add a language.
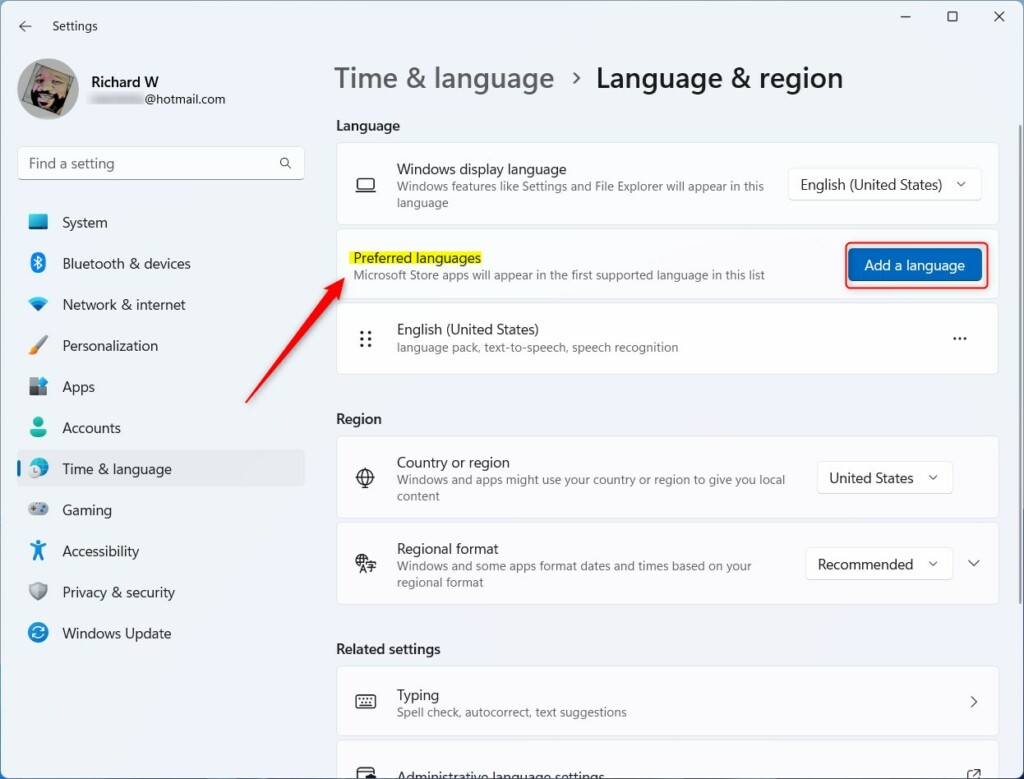
- This opens the Language & region settings page.
- Under Preferred languages, click Add a language.
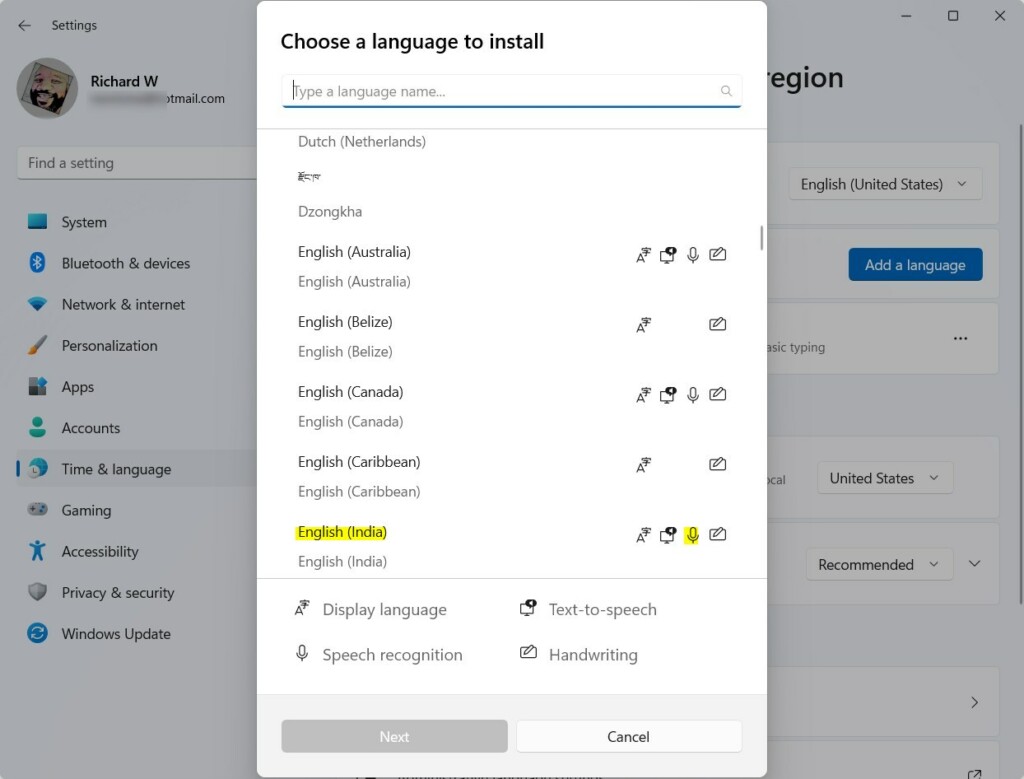
- Search for the language you want to add. Make sure the language supports Speech recognition.
- Click Next to continue.
- In the next window, check that Enhanced speech recognition is selected. You can also choose other language features if you want.
- [Requires admin privileges] Click Install to add the language.
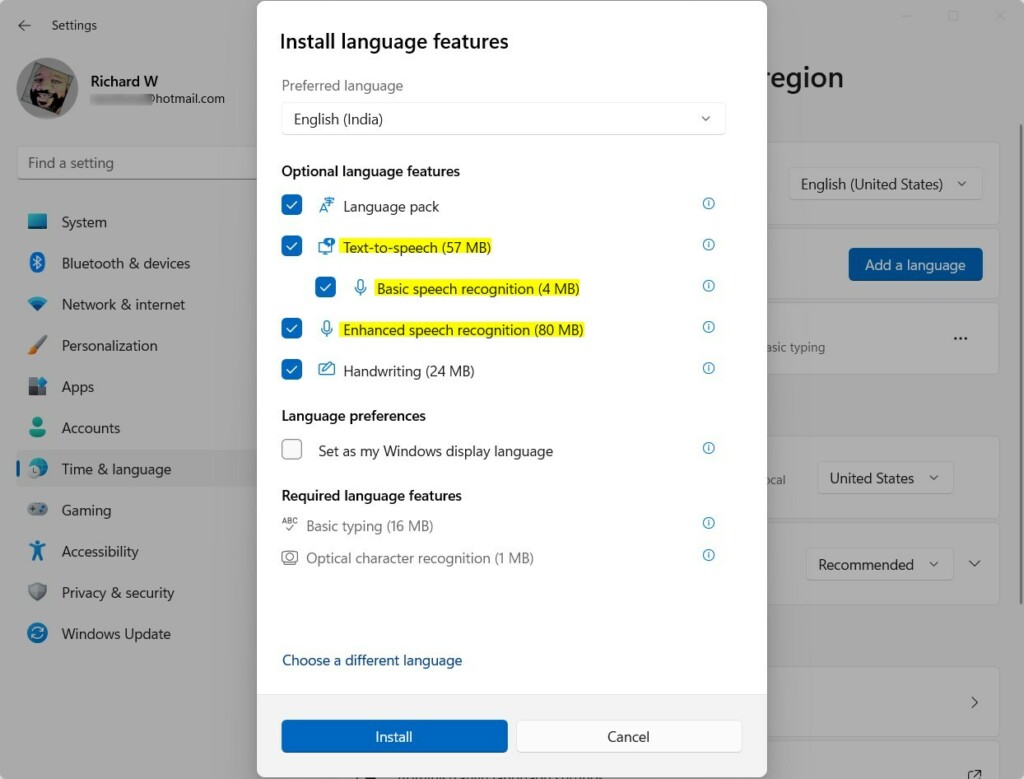
- Once installation finishes, your new language shows up in the Live Captions’ Caption language menu. Now you can select it anytime you want captions in that language!
Summary
- Adding languages makes Live Captions more useful for people who speak different languages or have hearing difficulties.
- It helps you understand audio content better if it’s in a language you don’t know well.
- It improves caption accuracy by giving Windows more language options.
- The process involves adding the language through Windows’ Language settings and making sure speech recognition is installed.
Need more info? Check out the official Microsoft guide here: Use Live Captions in Windows 11 (Microsoft Support).


Leave a Reply