
This article explains how to share a local printer and make it accessible to other devices on a network in Windows 11.
Windows lets you share a local printer installed on a PC and make it accessible to other devices, even if it isn’t directly connected to the network.
This means you can print documents from any device connected to the network without a physical connection to the printer. With printer sharing, you can save money on buying multiple printers for each device, making printing more convenient and efficient for everyone in your network.
This money-saving technique works only if the PC the printer is connected to is on and available. While your computer is turned off (shut down) or goes into standby (sleep/hibernate), the shared printer connected to your computer will be unavailable to other computers.
You must be an administrator to share a printer. File and printer sharing must also be enabled on the device sharing the printer.
Share a printer in the Windows Settings app
There are multiple ways to share a local printer in Windows. The Settings app in Windows 11 makes it easy.
Here’s how to do that.
First, open the Windows Settings app.
You can do that by clicking on the Start menu and selecting Settings. Or press the keyboard shortcut (Windows key + I) to launch the Settings app.
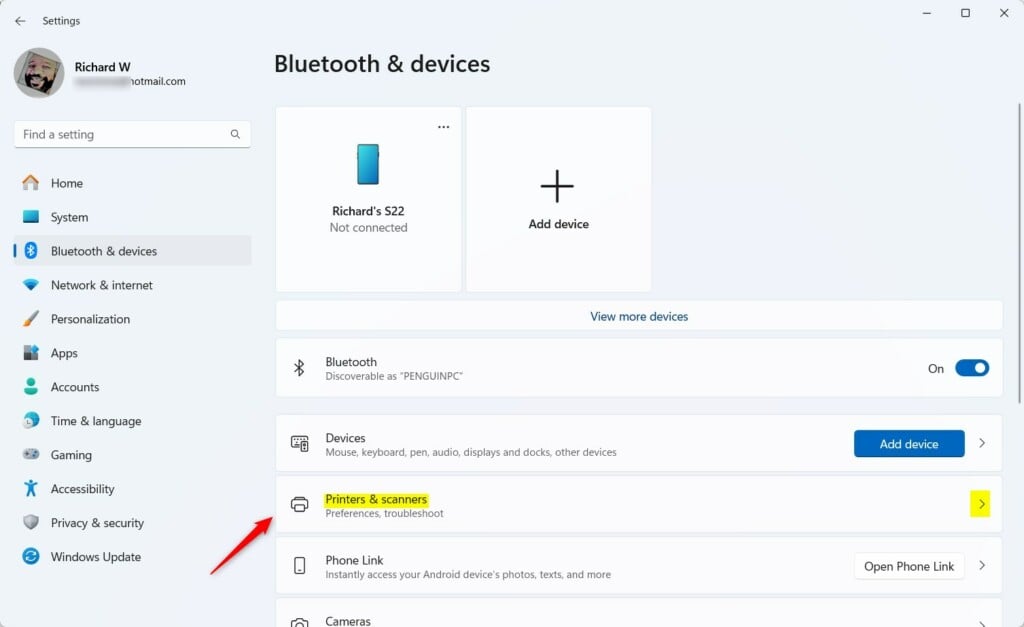
When the Setting app opens, click the Bluetooth & devices button on the left.

Select the Printers & scanners tile under ‘Bluetooth & devices ‘on the right to expand it.
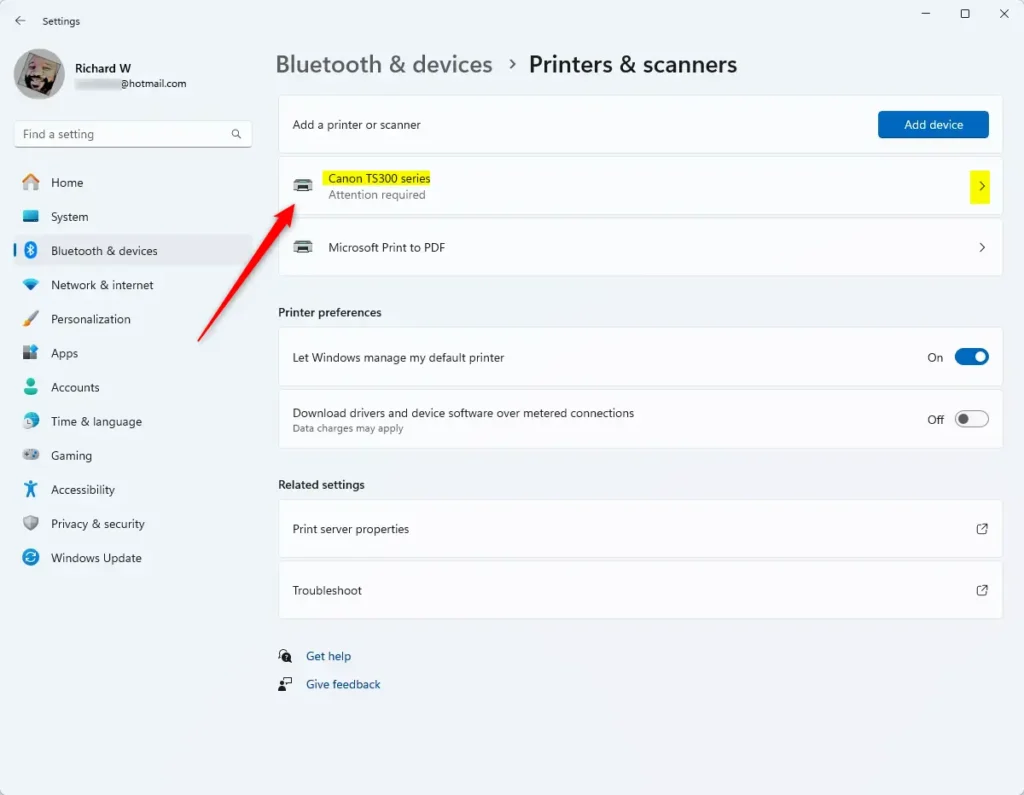
Next, select the printer you want to share with others on your network to open its properties page.
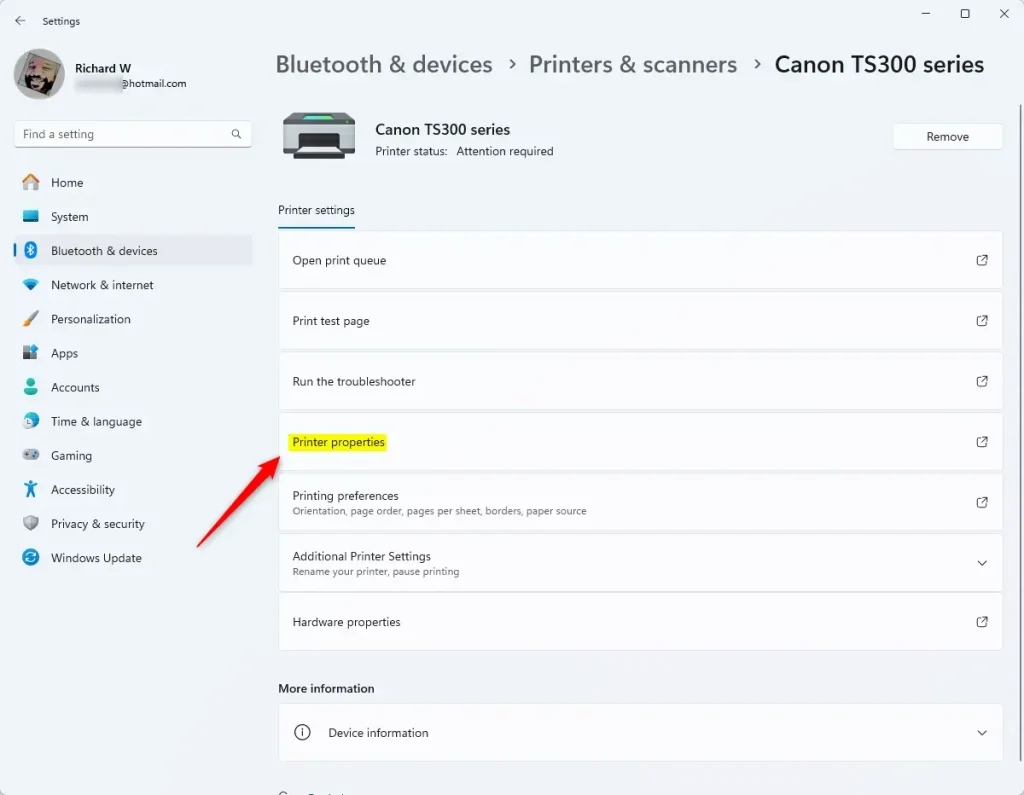
Then, select the ‘Printer properties‘ tile to expand it.
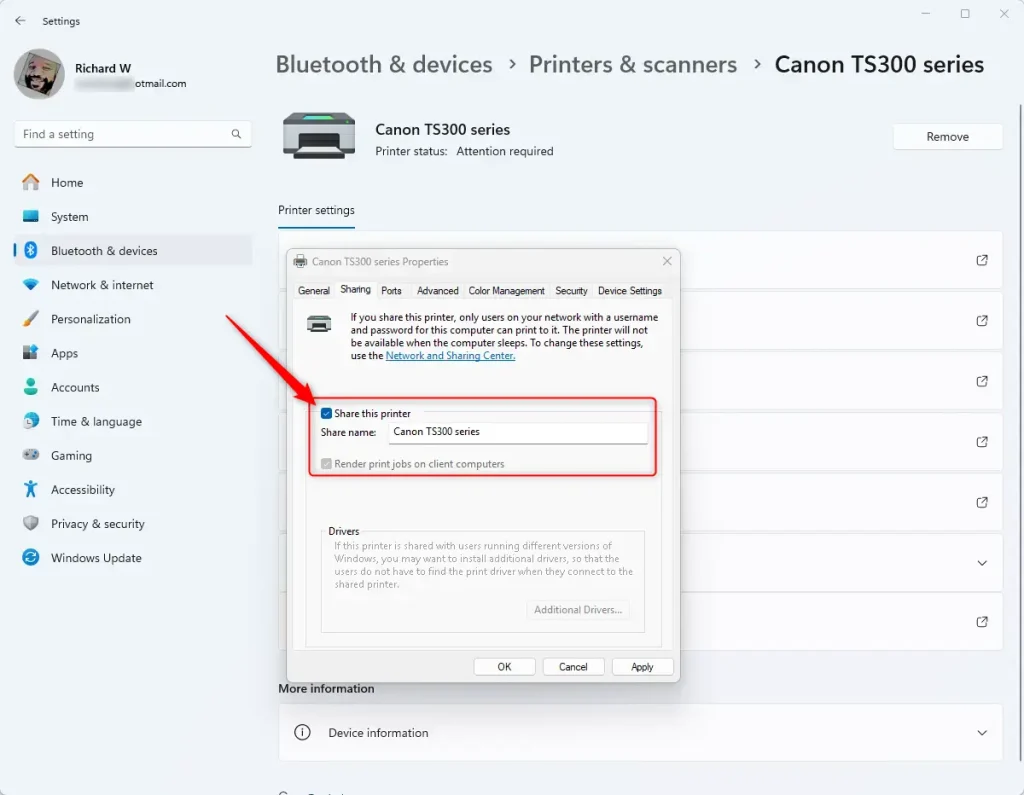
Select the “Sharing” tab on the Printer properties window, then click the “Change Sharing Options” button.

Next, check the box “Share this printer.” You can change the printer’s name in the “Share name” field.
Click the OK button when you’re done and save your change.
The printer should be available to others on your network. Close the Settings app when you’re done.
Sharing printer using the Devices and Printers folder
Another way to share your printer with others is to use the Devices and Printers folder.
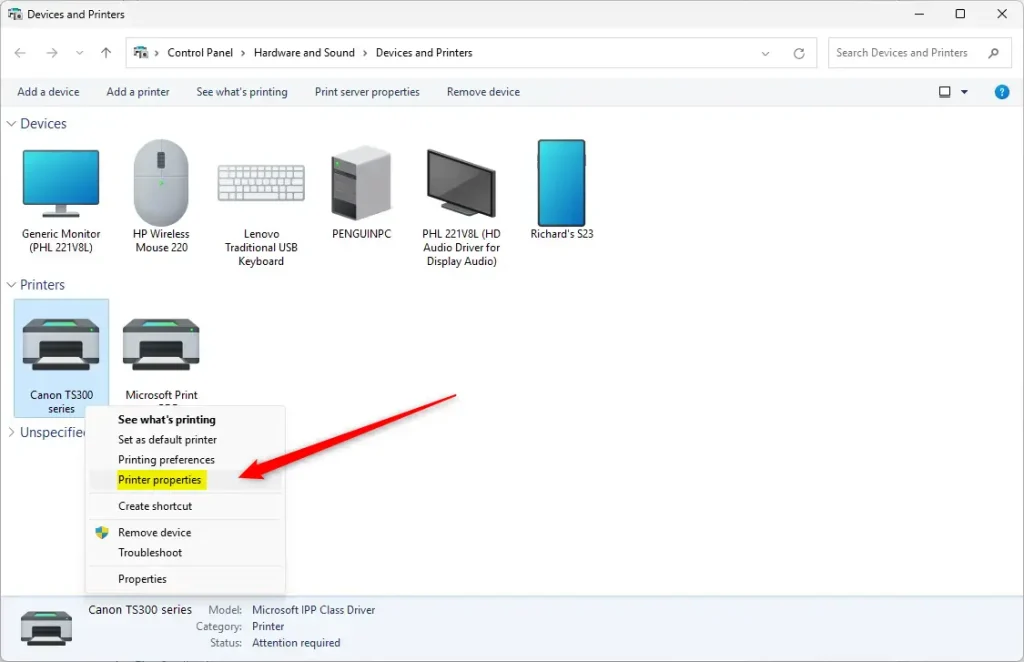
First, open the Devices and Printers folder.
Then, right-click on the printer you want to share and select “Printer properties” on the context menu.
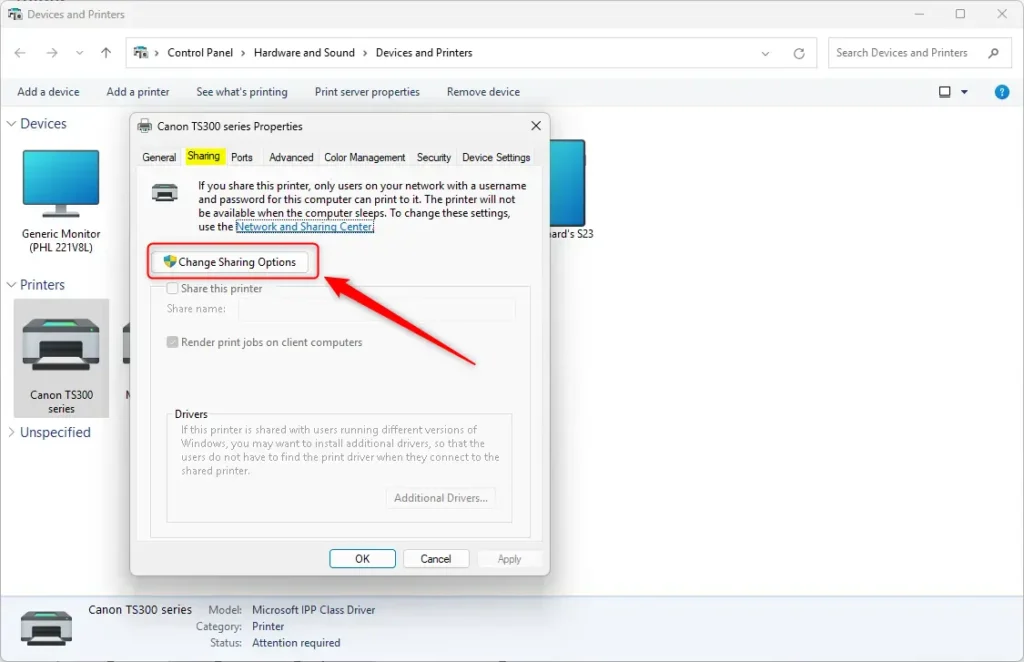
Next, change the “Change Sharing Options” on the Sharing tab
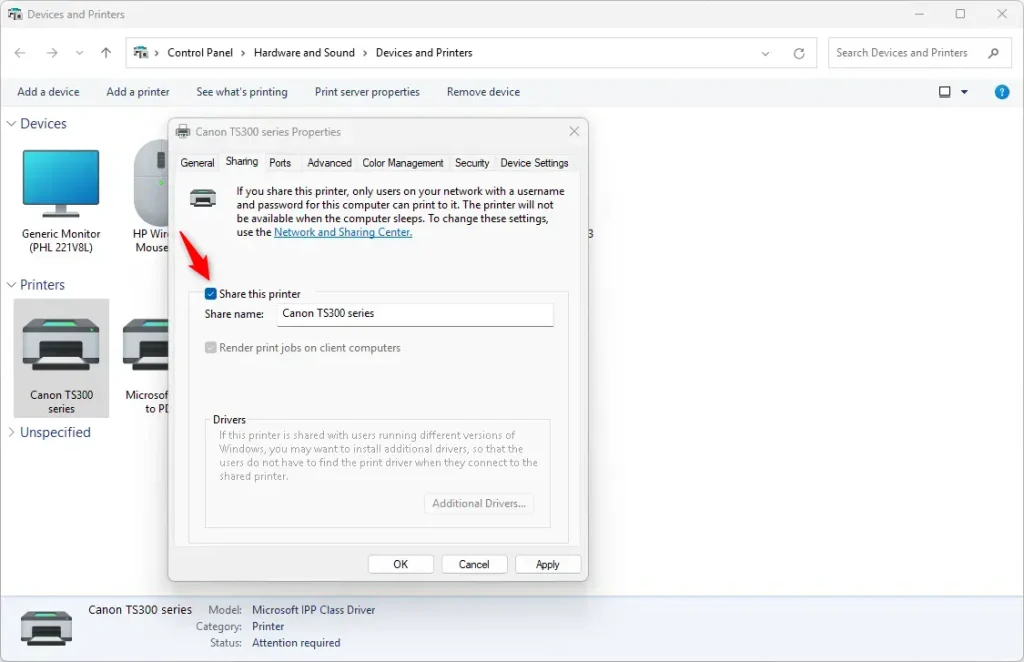
Check the box next to “Share this printer” to share the printer with others on your network.
Click the OK button when you’re done.
Share a local printer via PowerShell
Users can also use Windows PowerShell to share a local printer with others on a network.
First, open the Windows Terminal app as administrator and select the PowerShell tab.
Then, run the command below to list available printers on your device.
Get-Printer | Format-List Name,ShareName,Shared
The command should output the lines below.
Name      : Canon TS300 series
ShareName :
Shared    : False

Name      : Microsoft Print to PDF
ShareName :
Shared    : False
Using the printer name, run the command below to share the printer.
Set-Printer -Name "Printer name" -Shared $True
Substitute the “Printer name” with the name of your printer on your Windows device.
Example:
Set-Printer -Name "Canon TS300 series" -Shared $True
Run the command below to share a printer and specify a shared name.
Set-Printer -Name "Canon TS300 series" -Shared $True -ShareName "New Shard Name"
That should do it!
Conclusion:
- Sharing a local printer in Windows 11 can significantly improve convenience and efficiency within a network.
- By enabling printer sharing, you can reduce the costs of having multiple physical printers for different devices.
- It’s important to ensure that the PC connected to the printer is always on and available so other network devices can access the shared printer.
- To share a printer, you must have administrator privileges, and file and printer sharing must be enabled on the shared device.
- The process can be performed through the Windows Settings app, Devices and Printers folder, or Windows PowerShell, providing users multiple options for accomplishing this task.


Leave a Reply