How to Enable Expanded Start Menu in Windows 11
This article explains how to enable the expanded Start menu that displays all pins in Windows 11.
Enable the expanded Start menu by first using ViVeTool with the command vivetool /enable /id:49402389,49221331,47205210,48433719 and restarting your PC. Then, open Settings, go to Personalization > Start Settings, and toggle on “Show all pins by default.
What is the Expanded Start Menu?
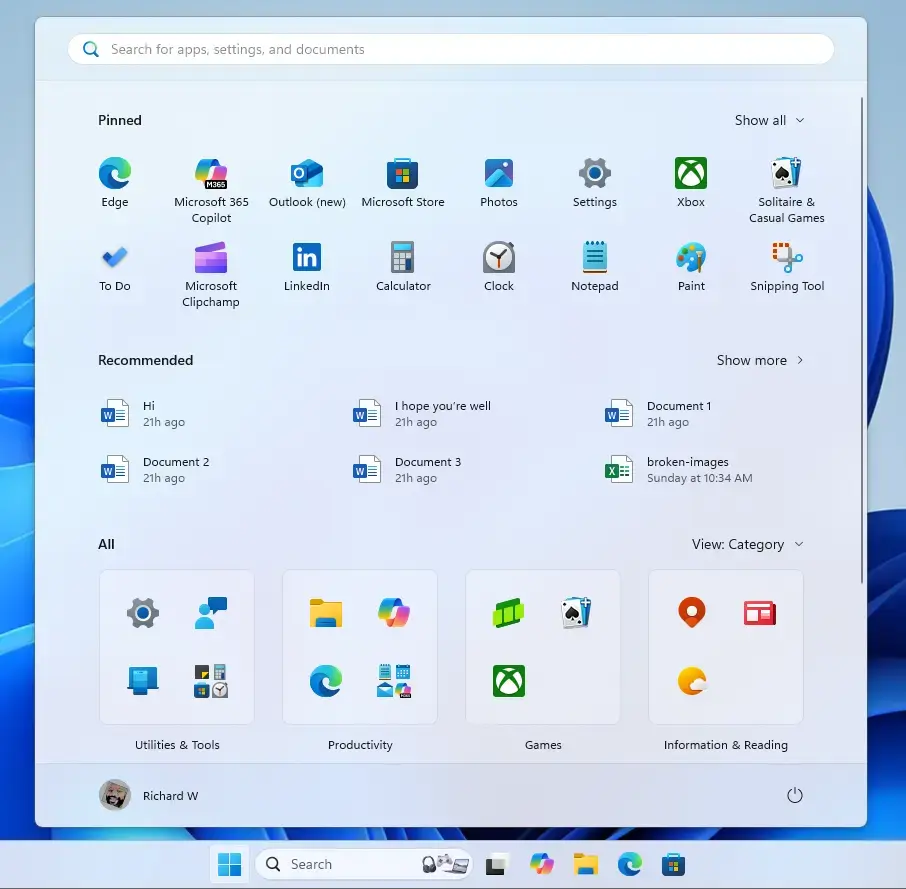
The Windows 11 expanded Start menu is a bigger version of the usual Start screen that shows all your pinned apps at once, without needing to scroll through different sections.
Why would you want this? The expanded menu lets you see everything pinned without scrolling through multiple sections.
How to Enable the Expanded Start Menu
You can turn on the Windows 11 expanded Start menu by using a free tool called ViVeTool to activate a hidden feature.
Step 1: Get ViVeTool
First, learn how to download and use ViVeTool in Windows. Windows Settings
Step 2: Open Command Prompt or Terminal
Next, open Command Prompt or Windows Terminal on your computer.
Step 3: Run the Command
Copy and paste this command, then press Enter:
vivetool /enable /id:49402389,49221331,47205210,48433719
Step 4: Restart Your Computer
Restart your computer for the changes to take effect.
Turning On “Show All Pins by Default”
After you make your Start menu bigger, you can change a setting in Windows 11 to show all your pinned apps automatically.
Click on the Start menu and select Settings. Or press Windows key + I to open Settings app directly.
Step 2: Go to Personalization
In the Settings app, click Personalization on the left side.
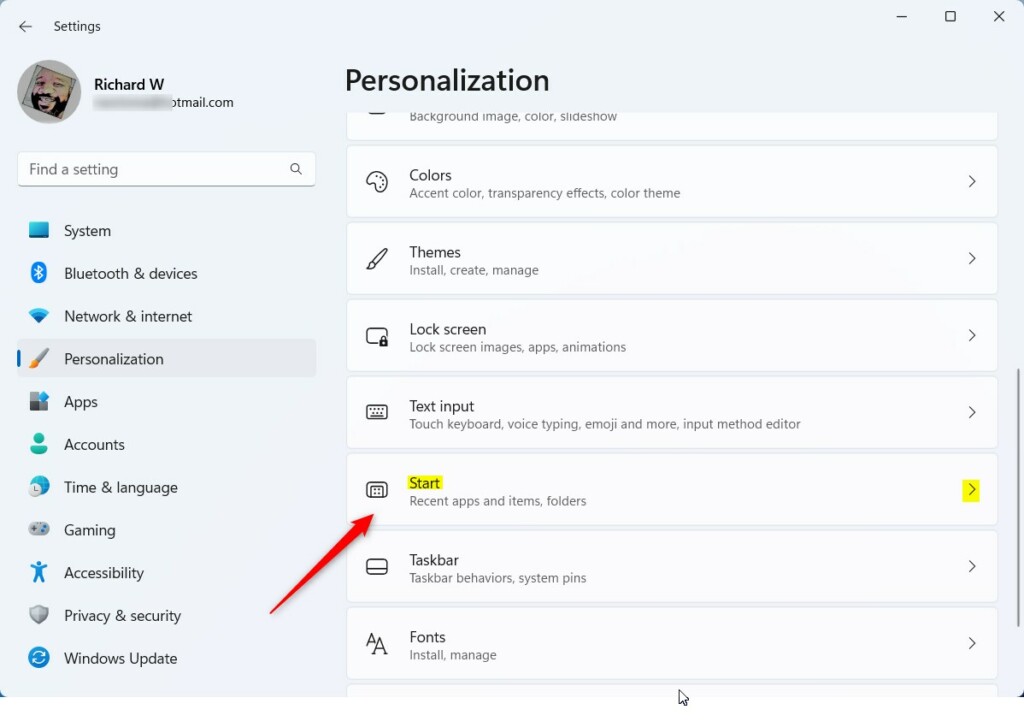
Step 3: Click Start Settings
On the right side, click the Start tile to open its settings.
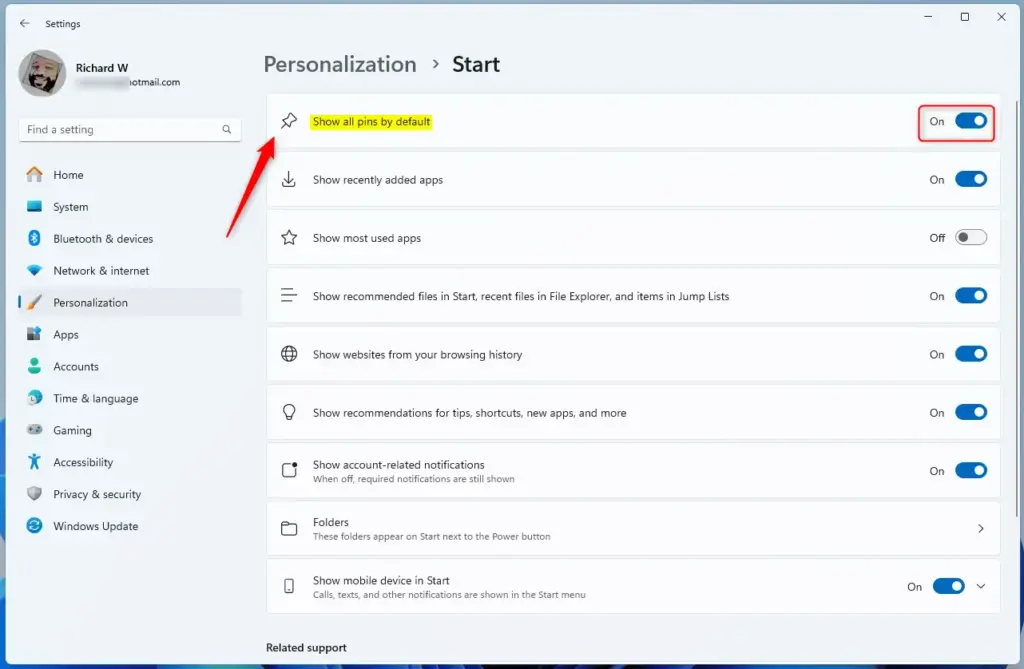
Step 4: Enable “Show All Pins by Default”
Toggle “Show all pins by default” on or off. When it’s on, your new larger Start menu will display all your pinned apps at once.
Step 5: Close Settings
You’re all set! Now, close the Settings app.
What Happens When You Enable It?
Once enabled, your Start menu becomes bigger and shows all your pinned applications at the same time. No more scrolling to find apps. Everything appears in one expanded view.
Want to Switch Back?
Don’t like the bigger menu? Go back to Settings and toggle “Show all pins by default” off. Your Start menu will return to its original layout.
Summary
The Windows 11 expanded Start menu lets you see all your pinned apps without scrolling, and you can turn it on using ViVeTool and then the Settings app.
Was this guide helpful?

About the Author
Richard
Tech Writer, IT Professional
Richard, a writer for Geek Rewind, is a tech enthusiast who loves breaking down complex IT topics into simple, easy-to-understand ideas. With years of hands-on experience in system administration and enterprise IT operations, he’s developed a knack for offering practical tips and solutions. Richard aims to make technology more accessible and actionable. He's deeply committed to the Geek Rewind community, always ready to answer questions and engage in discussions.


No comments yet — be the first to share your thoughts!