How to Add or Remove the Navigation Pane in Windows 11
The navigation pane in Windows 11 File Explorer is the side bar on the left that shows quick links to folders like your Desktop and Downloads.
You can easily add or remove this navigation pane to change how you see your files.
For example, hiding the navigation pane can give you more space on your screen. Adding it back is useful if you accidentally hide it, or if you want to quickly access important folders after a Windows update, like version 23H2.
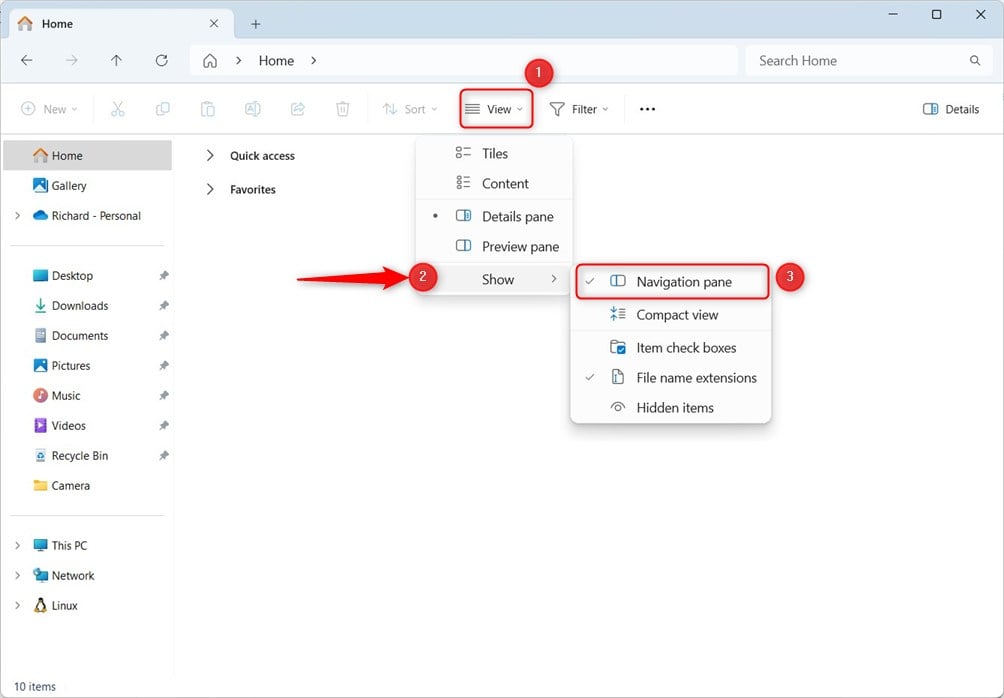
Open File Explorer, click View on the Command Bar, then select Show and toggle Navigation pane. This action will add or remove the left-hand navigation panel.
What is the Navigation Pane?
The navigation pane in Windows 11 File Explorer is that handy sidebar that shows all your folders and drives, helping you get to your files faster.
How to Show or Hide the Navigation Pane Using File Explorer
Here’s the approach using File Explorer:
- Open File Explorer. Press
Win + Eon your keyboard to open it quickly. - Look at the top menu (called the Command Bar) and click on View.
- In the dropdown, click on Show and then choose Navigation pane to show or hide it.
How to Show or Hide the Navigation Pane Using Windows Registry (Advanced)
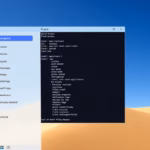
You can show or hide the navigation pane in Windows 11 using the Registry Editor. This advanced method involves opening Windows Terminal and changing a specific registry setting. Be very careful when making registry changes, as mistakes can cause problems with your PC.
Here’s how:
- Open the Windows Terminal app. Search for it in the Start menu.
- The setting is saved in the registry here:
HKEY_CURRENT_USER\SOFTWARE\Microsoft\Windows\CurrentVersion\Explorer\Modules\GlobalSettings\Sizer - The value to change is called
PageSpaceControlSizer. It is a binary value (REG_BINARY).
To Show the Navigation Pane
Run this command in Windows Terminal:
REG ADD HKCU\SOFTWARE\Microsoft\Windows\CurrentVersion\Explorer\Modules\GlobalSettings\Sizer /v PageSpaceControlSizer /t REG_BINARY /d a00000000100000000000000ec030000 /f
To Hide the Navigation Pane
Run this command instead:
REG ADD HKCU\SOFTWARE\Microsoft\Windows\CurrentVersion\Explorer\Modules\GlobalSettings\Sizer /v PageSpaceControlSizer /t REG_BINARY /d a00000000000000000000000ec030000 /fWhat Each Part of the Command Means
/vspecifies the name of the value to change./t REG_BINARYmeans the data type is binary./dis the data to set./fforces the change without asking for confirmation.
When you use commands in Windows Terminal to change settings like the navigation pane, each part plays a specific role. The /v tells the system which setting you want to change, /t specifies the data type, /d is the actual data you are setting, and /f forces the change without asking for confirmation.
Summary
You can easily show or hide the navigation pane in Windows 11 File Explorer using the View menu, which is the simplest option for most users. For more control, you can use Windows Terminal and registry commands, but this is recommended for advanced users. Remember to restart your PC after making registry changes.
- Use the File Explorer’s View menu for the easiest way.
- Use Windows Terminal and registry commands if you want more control (advanced users only).
- Remember to restart your PC if you use the registry method.
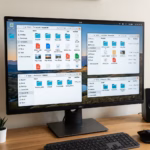
File Explorer customization lets you tailor the program to your needs. For instance, adding or removing the Navigation Pane is a popular way to personalize the interface in Windows 11. This direct control helps you manage files more efficiently.
How do I get the navigation pane back?
Open File Explorer. Click on the View tab. Click on Show, then click on Navigation pane. Job done! Thanks for reading! If you found this helpful, consider subscribing to the channel and giving it a like.
Was this guide helpful?

About the Author
Richard
Tech Writer, IT Professional
Richard, a writer for Geek Rewind, is a tech enthusiast who loves breaking down complex IT topics into simple, easy-to-understand ideas. With years of hands-on experience in system administration and enterprise IT operations, he’s developed a knack for offering practical tips and solutions. Richard aims to make technology more accessible and actionable. He's deeply committed to the Geek Rewind community, always ready to answer questions and engage in discussions.

No comments yet — be the first to share your thoughts!