How to Show or Hide the Ubuntu Folder in Windows 11 File Explorer
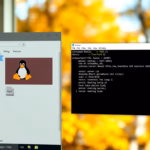
If you use Ubuntu Linux on Windows (WSL), you might see an Ubuntu folder in the File Explorer’s side menu (called the navigation pane) in Windows 11. This folder makes it easy to access your Ubuntu files right from Windows.
But sometimes, you might want to hide this Ubuntu folder if you don’t use it often or find it distracting. Or maybe you want to show it again if it disappeared. This guide will show you simple steps to do both — show or hide the Ubuntu folder in Windows 11 File Explorer.
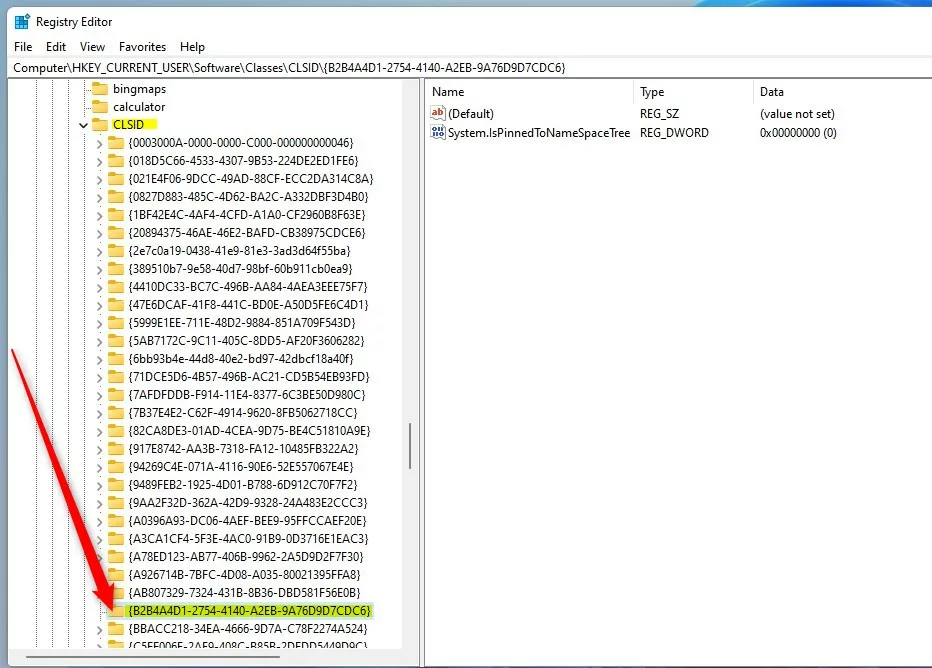
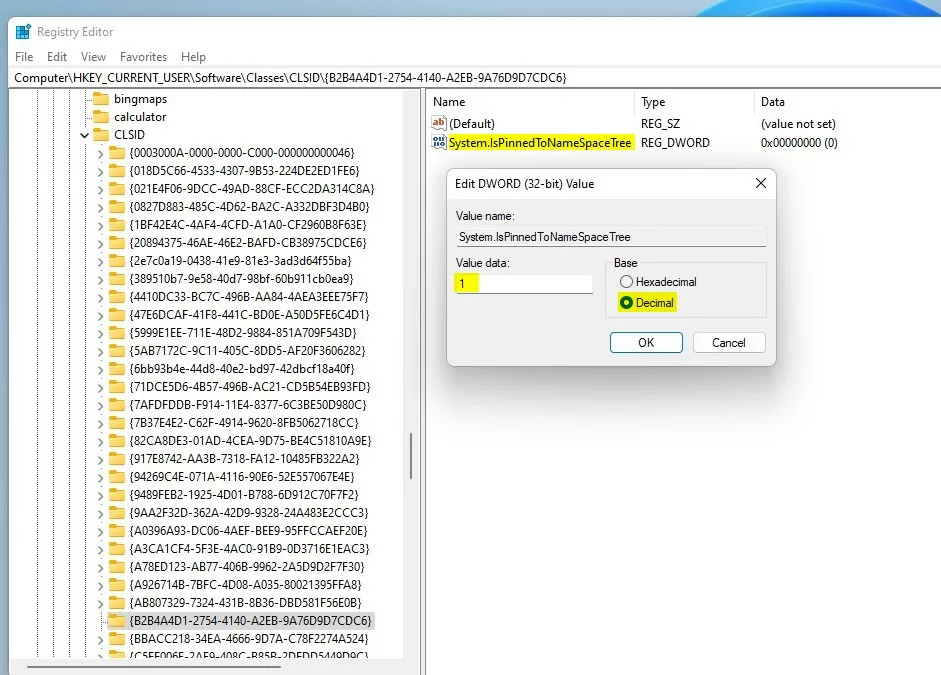
You can show or hide the Ubuntu folder in File Explorer by modifying the Windows Registry. Navigate to 🗝️HKEY_CURRENT_USERSoftwareClassesCLSID{B2B4A4D1-2754-4140-A2EB-9A76D9D7CDC6}, create a DWORD value named System.IsPinnedToNameSpaceTree, and set its data to 1 to show or 0 to hide.
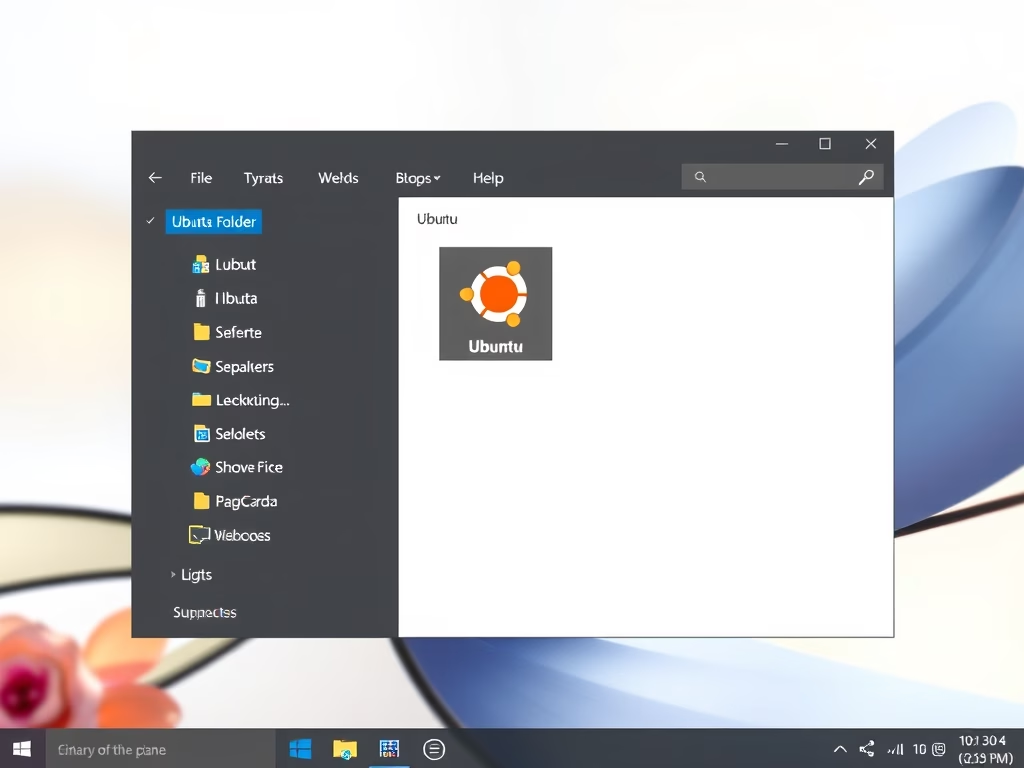
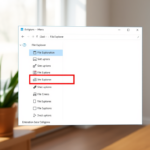
What Does the Ubuntu Folder in File Explorer Look Like?
When Ubuntu is installed on Windows Subsystem for Linux (WSL), you see the Ubuntu folder like this in your File Explorer:
How to Show or Hide the Ubuntu Folder
Step 1Open the Windows Registry Editor
- Press Windows key + R on your keyboard.
- Type
regeditand press Enter. - If a security box pops up, click Yes to allow it.
For more help opening Registry Editor, see this guide.
Step 2Find the Ubuntu Folder Setting
In Registry Editor, use the left sidebar to go to this path:
HKEY_CURRENT_USER\Software\ClassesCLSID{B2B4A4D1-2754-4140-A2EB-9A76D9D7CDC6}If you don’t see the {B2B4A4D1-2754-4140-A2EB-9A76D9D7CDC6} folder, do this:
- Right-click on CLSID and choose New > Key.
- Name the new key exactly
{B2B4A4D1-2754-4140-A2EB-9A76D9D7CDC6}.
Step 3Create or Edit the Value to Show or Hide Ubuntu Folder
- Click the
{B2B4A4D1-2754-4140-A2EB-9A76D9D7CDC6}folder on the left. - On the right side, right-click in the empty space and select New > DWORD (32-bit) Value.
- Name this new value
System.IsPinnedToNameSpaceTree. - Double-click on
System.IsPinnedToNameSpaceTree. - In the box for Value data, do the following:
1 = Show the Ubuntu folder
0 = Hide the Ubuntu folder - Click OK to save.
Step 4 Restart Your Computer
Close Registry Editor and restart your PC. After restarting, open File Explorer to see your changes.
Summary
- The Ubuntu folder helps you access Linux files easily from Windows 11.
- You can show or hide this folder by changing a setting in the Windows Registry.
- Setting the
System.IsPinnedToNameSpaceTreevalue to 1 shows the folder; setting it to 0 hides it. - Always be careful when using the Registry Editor and back up your data if needed.
If you have any questions or want to share tips, feel free to leave a comment below!
Was this guide helpful?

About the Author
Richard
Tech Writer, IT Professional
Richard, a writer for Geek Rewind, is a tech enthusiast who loves breaking down complex IT topics into simple, easy-to-understand ideas. With years of hands-on experience in system administration and enterprise IT operations, he’s developed a knack for offering practical tips and solutions. Richard aims to make technology more accessible and actionable. He's deeply committed to the Geek Rewind community, always ready to answer questions and engage in discussions.

No comments yet — be the first to share your thoughts!