How to Configure Startup Applications from File Explorer in Windows 11
Configuring startup applications from File Explorer in Windows 11 lets you manage programs that launch when you sign in, even if they don’t appear in typical locations like Settings or Task Manager.
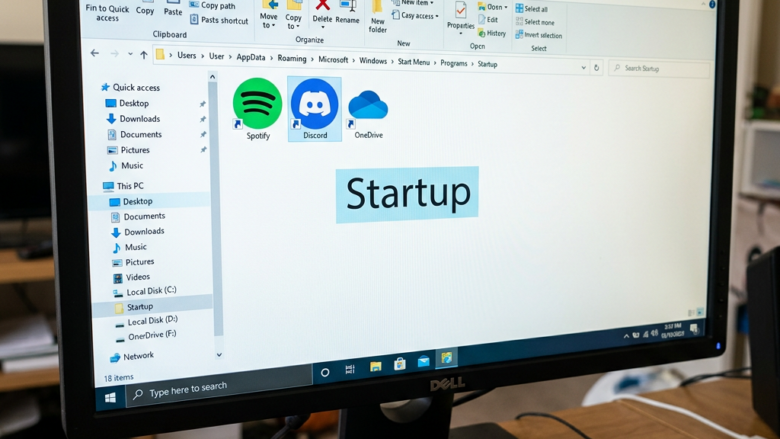
This method works by placing a shortcut file (.lnk) into a special Windows folder that the operating system checks every time you start your PC.
For instance, an application installed in a non-standard way might add itself to this startup folder automatically.
By manually adding or removing shortcuts here, you gain direct control over what starts with Windows.
What are Startup Folders?
Windows uses special folders to decide which apps should start when you log in.
- The Current User’s Startup Folder: Apps in this folder only start when your account logs in. Consider it your personal startup app list.
- The All Users Startup Folder: Apps in this folder start for anyone who logs into the computer. This is good if multiple people use the PC and you want certain programs ready for everyone.
You can find these folders in File Explorer. But Windows has a quicker way. You can type special commands, called “shell commands,” into the Run box. This takes you straight to these folders. It’s like a secret map to your PC’s startup system!
How to Add Startup Apps Using File Explorer
Want to take control of your startup apps? Here’s how to add or remove them using File Explorer, step-by-step.
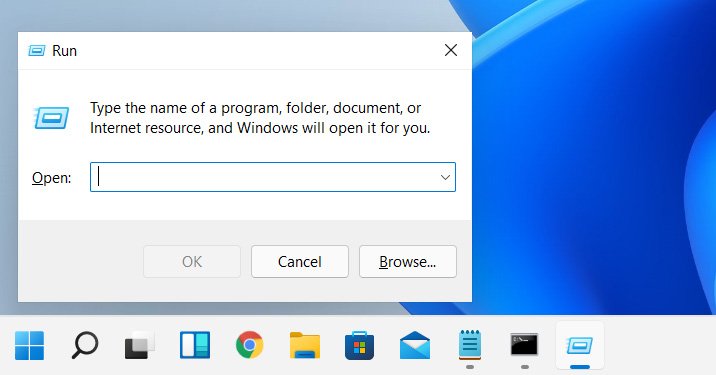
Open the Run Box
First, open the Run command. Press the Windows key and the R key on your keyboard together. A small window will pop up with a text box.Find All Applications
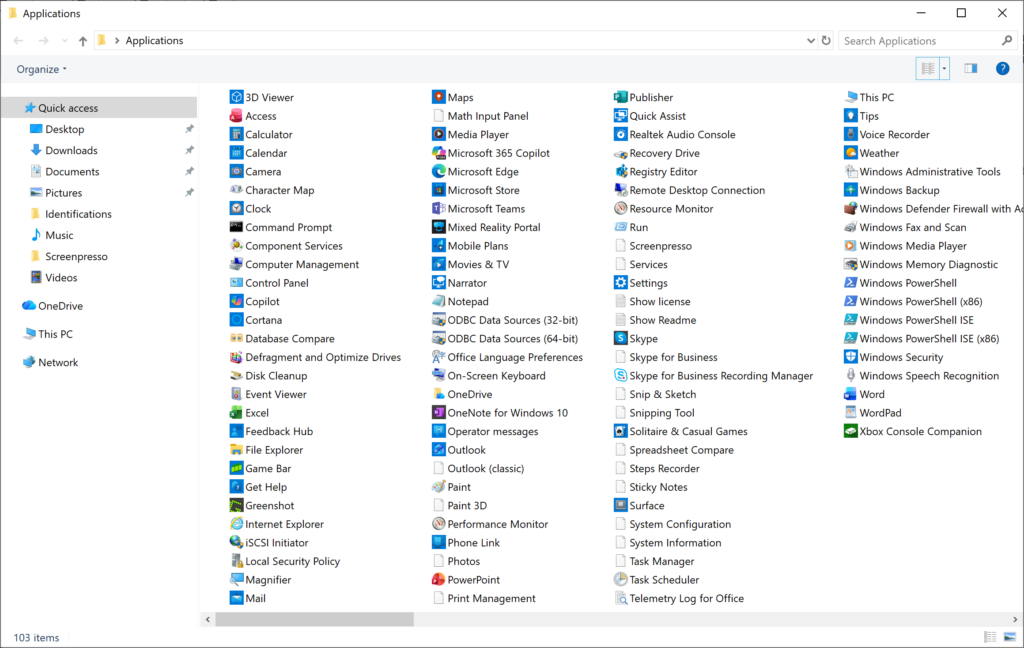
In the Run box, typeshell:AppsFolderand press Enter or click OK. This opens a File Explorer window showing a list of almost all applications on your computer. Keep this window open. It’s like your app library!Open the Startup Folder
Now, you need to open the specific startup folder you want to change. Press Windows key + R again to open the Run box. This time, you have a choice:You can open the startup folder in Windows 11 by using the Run box and typing a simple command.
Tip: If you are not sure which folder to use, start withshell:startup. It’s the most common for personal apps.- To change startup apps for your account only, type
shell:startupand press Enter. - To change startup apps for all users on the computer, type
shell:common startupand press Enter.
- To change startup apps for your account only, type
Remove Apps from Startup
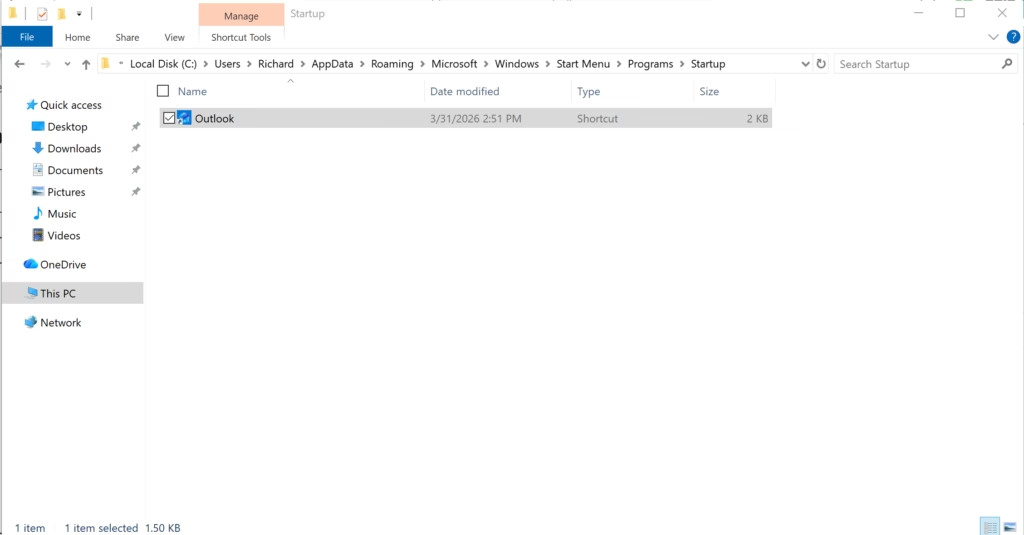
To stop an app from starting automatically, go to the startup folder window (the second one you opened). Find the shortcut for the app you want to remove. Right-click on it and select Delete. Confirm if asked.Removing an app from starting automatically in Windows 11 involves deleting its shortcut from the startup folder.
Reference:
Summary
You can easily manage which apps start automatically when you log into Windows 11 by using File Explorer and its startup folders.
Was this guide helpful?

About the Author
Richard
Tech Writer, IT Professional
Richard, a writer for Geek Rewind, is a tech enthusiast who loves breaking down complex IT topics into simple, easy-to-understand ideas. With years of hands-on experience in system administration and enterprise IT operations, he’s developed a knack for offering practical tips and solutions. Richard aims to make technology more accessible and actionable. He's deeply committed to the Geek Rewind community, always ready to answer questions and engage in discussions.

No comments yet — be the first to share your thoughts!