How to Set Priority Notifications for Do Not Disturb in Windows 11
You set priority notifications for Do Not Disturb in Windows 11 by configuring the feature to allow specific apps or contacts to bypass the silence.
Do Not Disturb, also known as Focus Assist in Windows 10 and earlier, silences most incoming alerts so you can concentrate on your work or gaming.
Windows 11 allows you to create custom priority lists, ensuring that critical notifications from, for example, your calendar or a specific communication app, still appear even when Do Not Disturb is active.
You can select apps and people to add to your priority list, giving you complete control over what breaks through the silence.
What Are Notifications?
Notifications are pop-up messages from your apps, the system, or other programs. They tell you about things like new messages, reminders, or calls.
What’s New in 🪟 Windows 11?
Microsoft made Do Not Disturb easier to use with recent updates. It’s part of the new Focus tools. These tools help you stay focused by hiding distractions. But they still let important alerts come through.
When Do Not Disturb is on, you won’t see most notification pop-ups. But you can still find all your notifications later in the Notification Center. Just press ⊞ Win+N.
Why Set Priority Notifications?
Sometimes you want to hear calls, reminders, or alerts from certain apps. You want these even when Do Not Disturb is on. Setting priority notifications lets you pick which ones are allowed to “break through” and show up right away.
Important things like alarms will always come through no matter what.
Example of Privacy Feature for Important Notifications
Starting with the Windows 11 update version 22H2, urgent notifications have a new feature. When you’re using full-screen apps, urgent notifications will show a “View Notification” button. This helps keep your information private until you choose to see it.
How to Set Priority Notifications
Option 1Allow Calls and Reminders
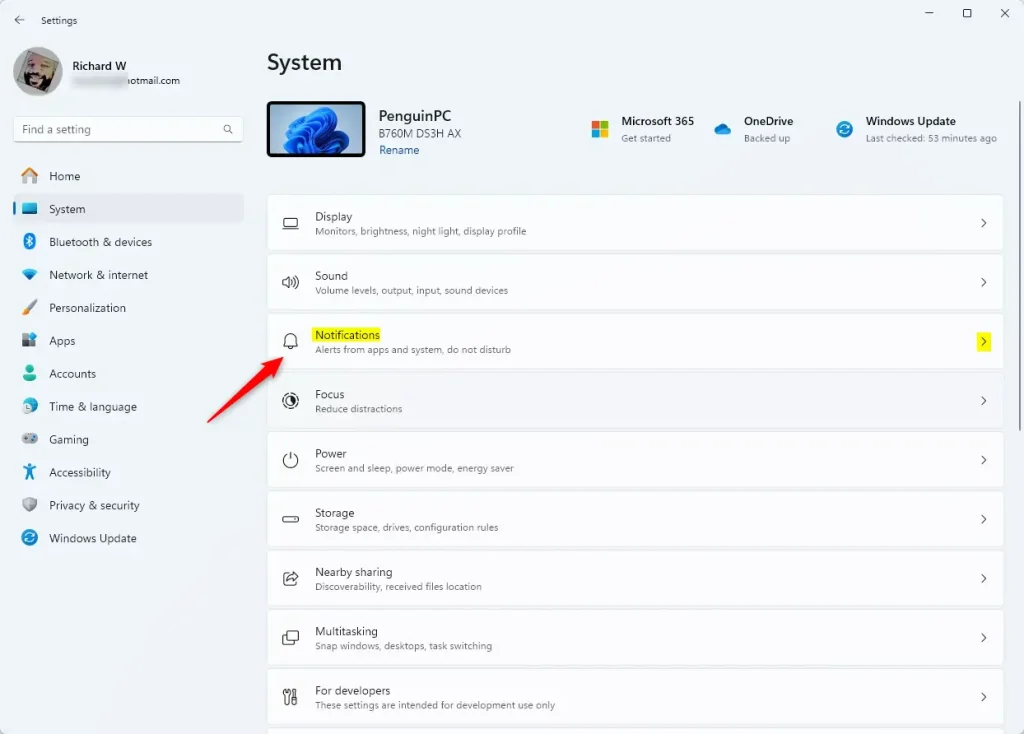
- Open Settings by pressing ⊞ Win+I.
- Click System on the left. Then select Notifications on the right. Open Notifications Settings
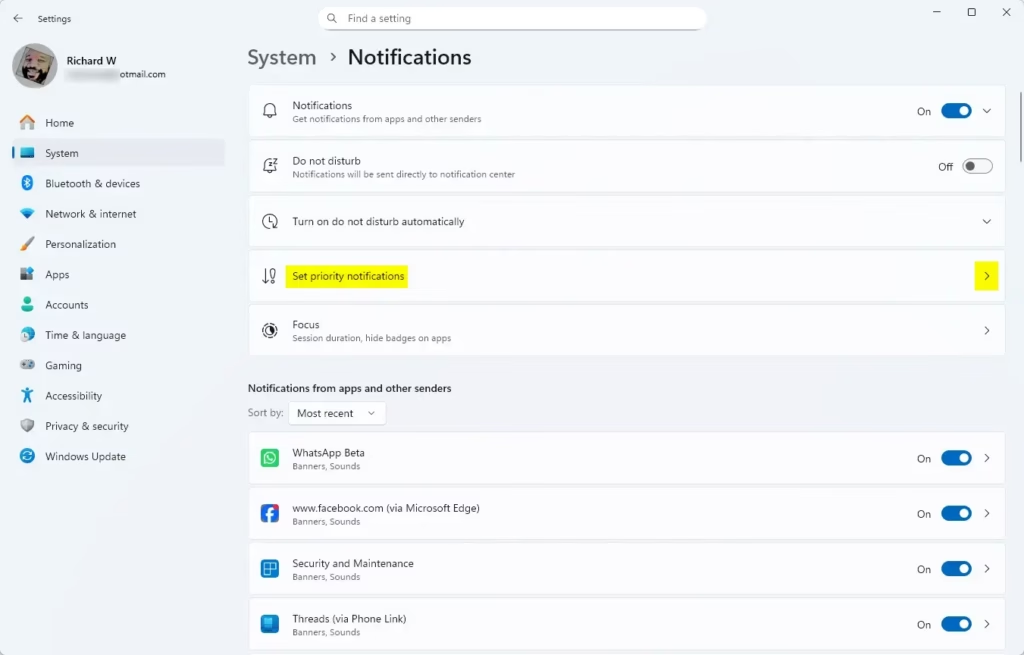
- Click Set priority notifications.
- Under Calls and reminders, check or uncheck these options:
- Show incoming calls, including VoIP
- Show reminders, regardless of app used
- Close Settings when done.

Option 2Add Apps to Priority Notifications
- Open Settings (⊞ Win+I). Then go to System > Notifications. (Open Notifications Settings)
- Click Set priority notifications.
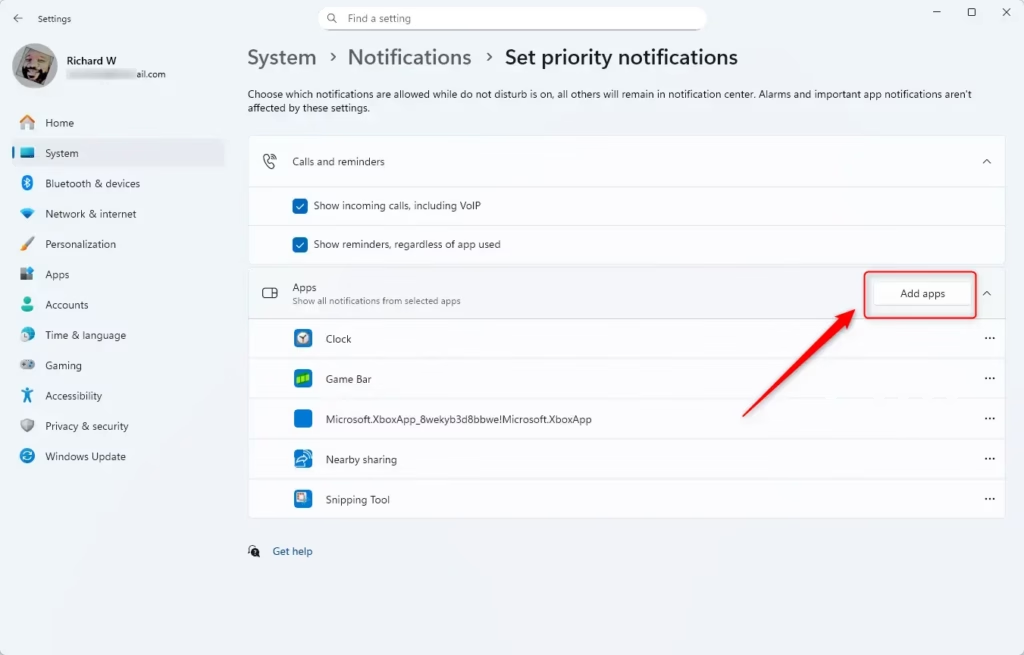
- Under Apps, click the Add apps button.
- Select the app(s) you want to allow to send notifications during Do Not Disturb.
- Close Settings when finished.
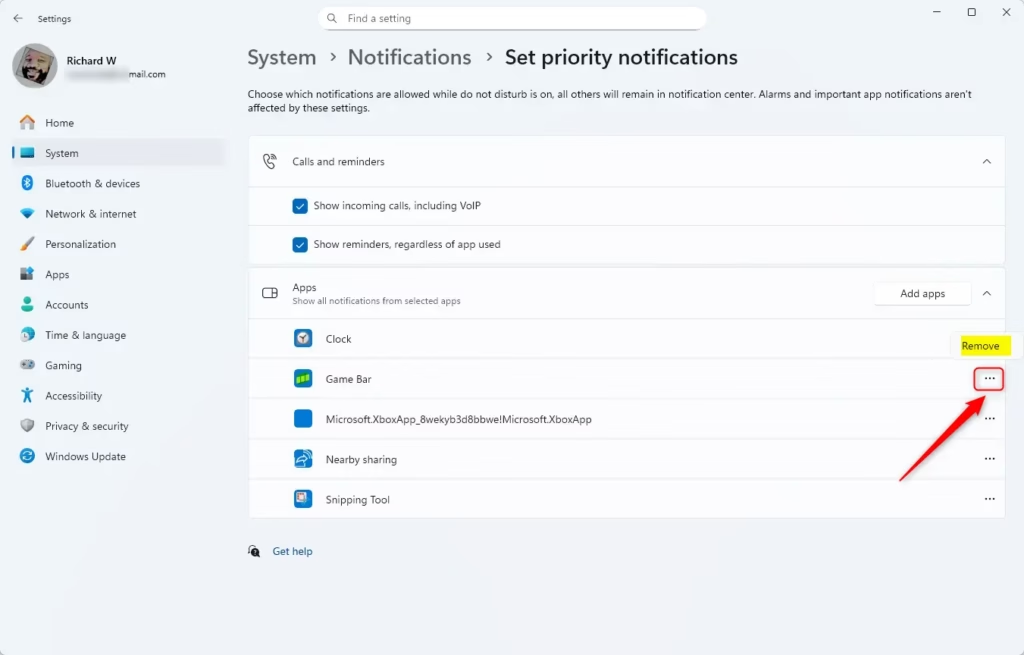
Option 3Remove Apps from Priority Notifications
- Open Settings (⊞ Win+I). Then go to System > Notifications. (Open Notifications Settings)
- Click Set priority notifications.
- Under Apps, find the app you want to remove.
- Click the three dots (More options) next to the app and select Remove.
- Close Settings when done.
Summary
Here’s what you gain by setting priority notifications for Do Not Disturb:
- Better Focus: Limit interruptions while working or relaxing.
- Custom Rules: Automatically turn on Do Not Disturb based on your schedule.
- Choose What’s Important: Let calls, reminders, and apps you pick get through.
- Privacy: Important notifications show a “view” button in full-screen mode.
- Easy to Manage: Add or remove apps anytime in Settings.
By following these simple steps, you can customize your notifications to fit your day. Stay focused without missing what really matters.
Learn More
For more details about app notifications, check out this official Microsoft article: App notification content – Windows apps
Was this guide helpful?

About the Author
Richard
Tech Writer, IT Professional
Richard, a writer for Geek Rewind, is a tech enthusiast who loves breaking down complex IT topics into simple, easy-to-understand ideas. With years of hands-on experience in system administration and enterprise IT operations, he’s developed a knack for offering practical tips and solutions. Richard aims to make technology more accessible and actionable. He's deeply committed to the Geek Rewind community, always ready to answer questions and engage in discussions.
[…] How to Set Priority Notifications for Do Not Disturb in Windows 11 How to Enable or Disable Clipboard History in Windows 11 […]