How to Schedule Microsoft Defender Scans in Windows 11
Scheduling Microsoft Defender scans in Windows 11 lets you set up automatic antivirus checks for your PC.
Microsoft Defender is the free antivirus software built into Windows 11. It protects your computer from viruses and other harmful software.
While Defender already scans automatically when your PC is not in use, you can create your own schedule. This gives you more control over when these important security checks happen, ensuring they don’t slow down your computer when you’re busy.
For example, you might want to schedule a full scan to run every Friday at 2:00 AM.
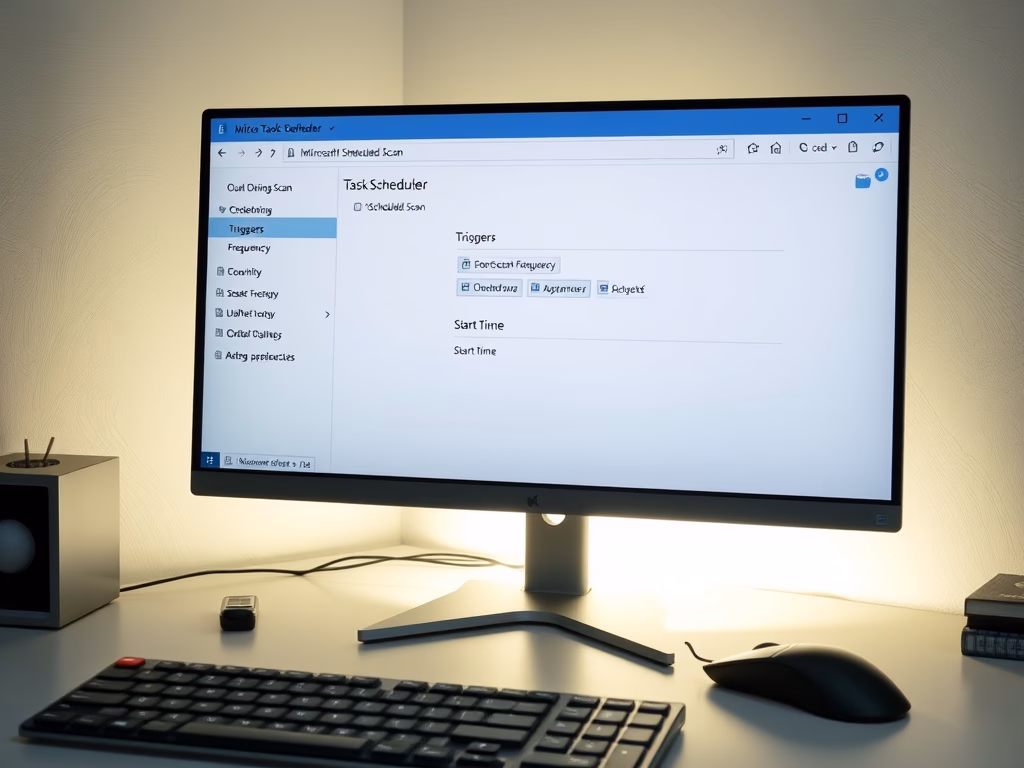
Schedule Microsoft Defender scans by opening Task Scheduler, navigating to the Windows Defender folder, and modifying the “Windows Defender Scheduled Scan” task’s triggers to set your desired frequency and start time. Ensure your computer is on and awake for the scan to run.
Steps to Schedule Microsoft Defender Scans
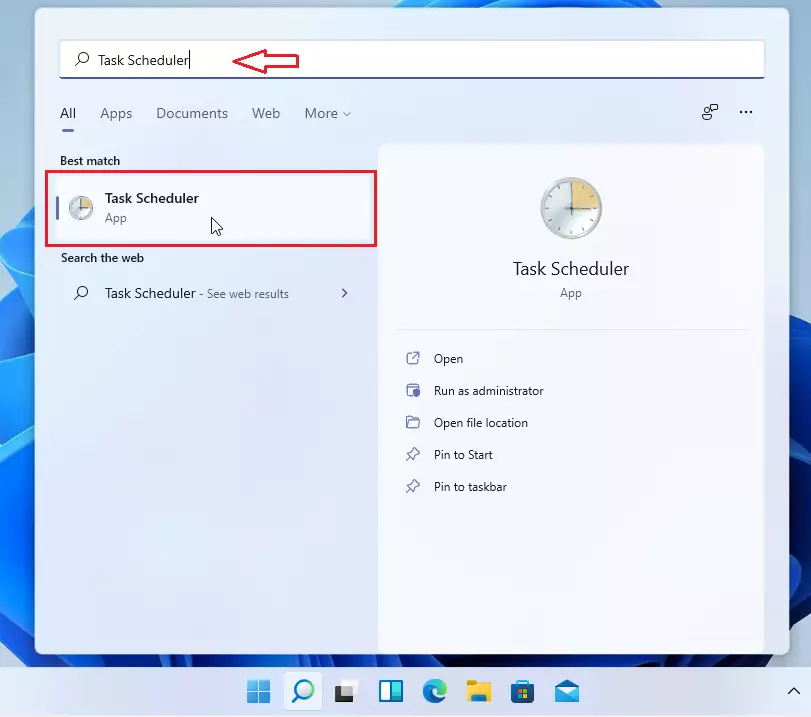
Step 1Open Task Scheduler
- Click the Start button (the Windows icon at the bottom left of your screen).
- Type
Task Schedulerin the search box and press Enter. - Or, click the search box on the taskbar and type
Task Scheduler, then click the app when it appears.
Step 2Find the Windows Defender Scan Task
- In the Task Scheduler window, look to the left side panel.
- Click the arrow next to Task Scheduler Library to open it.
- Then open Microsoft > Windows.
- Scroll down and click the Windows Defender folder.
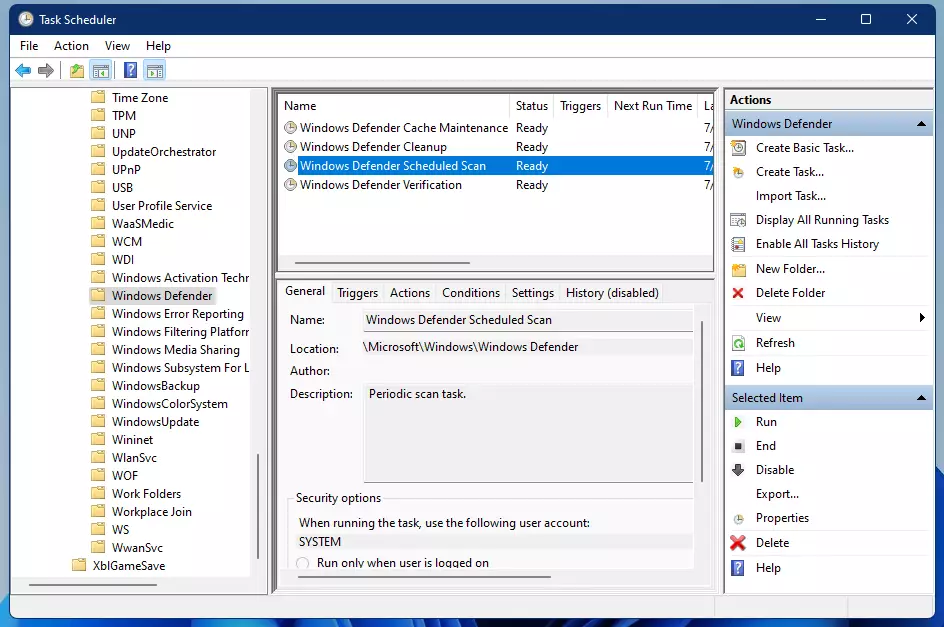
Step 3Open the Scheduled Scan Settings
- In the middle panel, find and double-click on
Windows Defender Scheduled Scan.
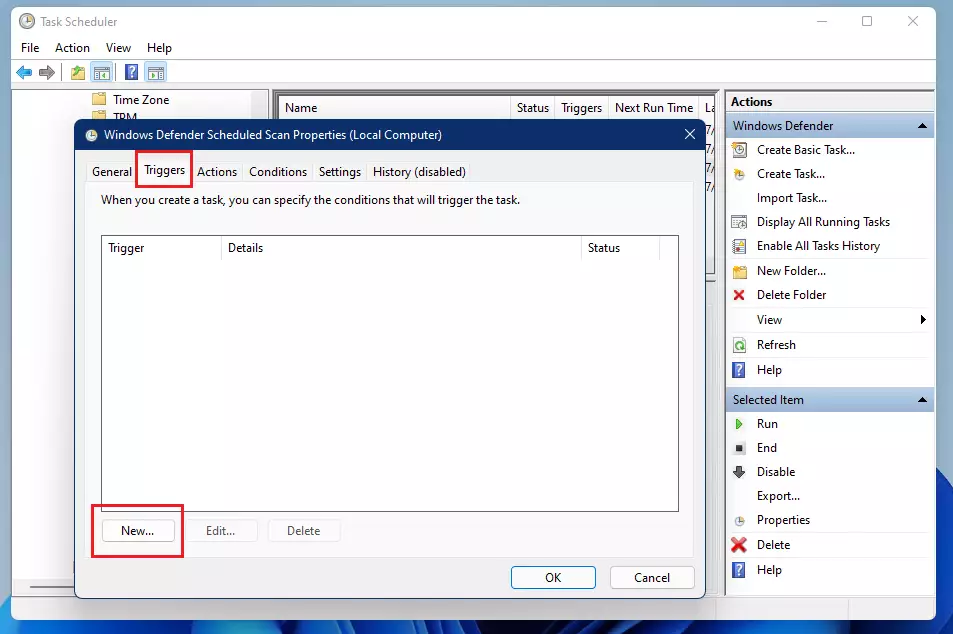
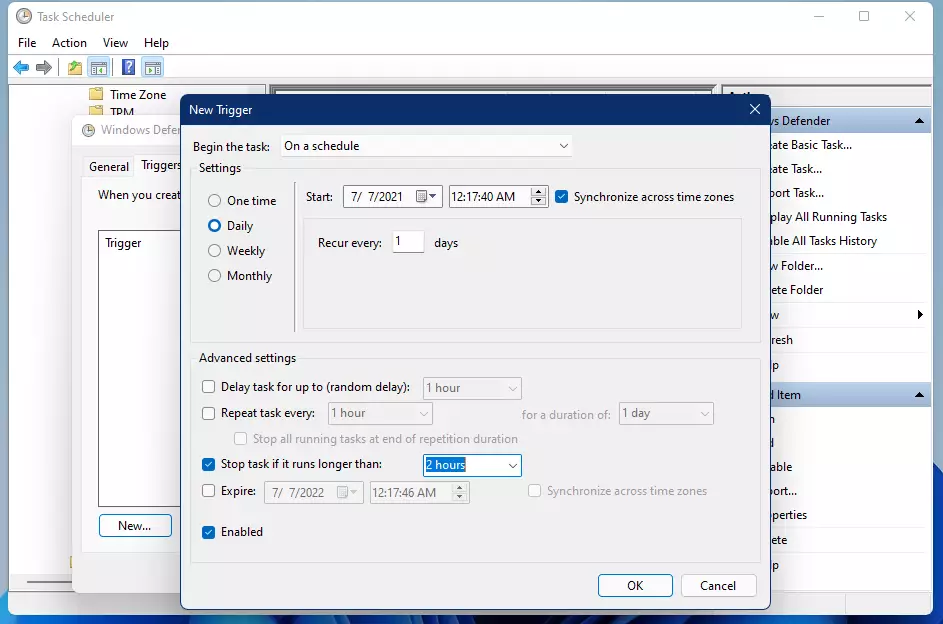
Step 4Set When the Scan Runs
- In the new window, click the Triggers tab at the top.
- Click the New… button at the bottom.
- Choose how often you want the scan to run (daily, weekly, etc.) and the time you want it to start.
- Make sure your computer is turned on and awake at the scheduled time. If it is off, the scan won’t start.
Scheduling scans involves telling Windows when you want them to run. You can choose daily or weekly recurrence and pick a specific start time. Your computer needs to be on and awake for the scan to begin automatically.
Scheduling scans involves telling Windows when you want them to run. You can choose daily or weekly recurrence and pick a specific start time. Your computer needs to be on and awake for the scan to begin automatically.
Step 5Finish and Save
- Click OK to save your new schedule.
- Click OK on the previous window to close it.
That’s it! Your Microsoft Defender will now scan your computer at the times you set, helping to keep your PC safe without interrupting your work.
Why Schedule Defender Scans?
Scheduling Microsoft Defender scans keeps your computer safe automatically, without interrupting you. You can set scans to run when you’re not using your PC, so it won’t slow down your work or games. This ensures your computer is regularly checked for threats, keeping you protected.- It helps keep your computer safe by regularly checking for viruses and malware.
- You can pick a time when the scan won’t disturb your work or gaming.
- It’s easy to set up using Windows’ built-in Task Scheduler — no extra software needed.
- Regular scans help keep your PC running smoothly and securely.
- By scheduling scans, you take control of your computer’s security in a simple way.
Summary
Scheduling Microsoft Defender scans in Windows 11 keeps your PC safe by running automatic checks at times that don’t interrupt you. This ensures your computer is protected from viruses and malware without getting in the way of your work or entertainment. This offers a way to manage your computer’s security on your own schedule.
If you want to learn more about Microsoft Defender or Windows Security, you can visit the official Microsoft support page here: Windows Security – Microsoft Support.
Can I schedule Windows Defender scans?
Yes, you can schedule Microsoft Defender scans to run automatically at a time and frequency that you choose using the built-in Task Scheduler.
How to create a maintenance schedule for antivirus scan?
For automatic scans, you might see an option like ‘Auto continue smart scan.’ Make sure that’s checked. Then, you can change how often the scan runs. You can do this weekly, monthly, or daily, and you can change the start time.
What are the three types of scans that can be scheduled in Windows Security?
You can choose from three types of scans in Windows Security: a quick scan, a full scan, or a custom scan, with a quick scan being the most common choice.
Was this guide helpful?

About the Author
Richard
Tech Writer, IT Professional
Richard, a writer for Geek Rewind, is a tech enthusiast who loves breaking down complex IT topics into simple, easy-to-understand ideas. With years of hands-on experience in system administration and enterprise IT operations, he’s developed a knack for offering practical tips and solutions. Richard aims to make technology more accessible and actionable. He's deeply committed to the Geek Rewind community, always ready to answer questions and engage in discussions.


No comments yet — be the first to share your thoughts!