How to Create Desktop Shortcuts for Microsoft Store Apps
You create desktop shortcuts for Microsoft Store apps by dragging their icons from the Start Menu directly onto your desktop.
Microsoft Store apps are software titles downloaded from Microsoft’s official digital marketplace, accessible on both Windows 10 and Windows 11. These applications reside within your Start Menu after installation.
This simple drag-and-drop technique provides instant access to your most-used Store applications. You bypass the need to open the Start Menu each time you want to launch an app.
Drag the app’s icon from the Start menu’s All apps list directly onto your desktop. You can also open the apps folder by typing shell:appsfolder in File Explorer, then drag the app icon to your desktop.
Why Create Desktop Shortcuts for Microsoft Store Apps?
Creating desktop shortcuts for your Microsoft Store apps makes it much faster to open programs you use a lot. Instead of searching the Microsoft Store each time, you can just click an icon on your desktop. This saves you time and makes using your computer a better experience.
This saves you time and makes using your computer a better experience and helps you get more done.
Create Desktop Shortcuts from the Start Menu
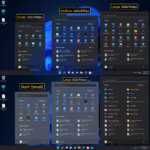
You can easily create desktop shortcuts for Microsoft Store apps right from your Start menu. Just open the Start menu, find the app under ‘All apps’, and then drag its icon directly onto your desktop. This simple method gives you quick access to your favorite programs.
- Open the Start menu and click on All apps.
- Select the app’s icon and drag it from All apps to your Desktop until you see the Link option. Then drop the app on the Desktop.
Create Desktop Shortcuts from the Apps Folder
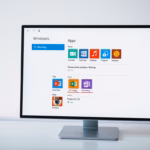
Another simple way to make desktop shortcuts for Microsoft Store apps is by using the special ‘apps folder’. Open File Explorer, type ‘shell:appsfolder’ into the address bar, and then drag the app’s icon from that folder onto your desktop. This creates a handy shortcut for quick access.
- Open File Explorer (⊞ Win+E).
- Type the following command into the address bar of File Explorer, and press Enter to open the Applications folder.
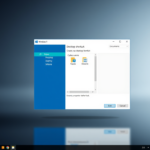
shell:appsfolder- Drag the app’s icon from the apps folder to the Desktop until you see the Create link option on the Desktop. Then drop the app on the Desktop.
Alternatively, right-click the app’s icon and select Create shortcut.
That’s it!
Summary
Creating desktop shortcuts for your Microsoft Store apps saves you time and makes your computer use more efficient. You get quick access to the programs you use most often without needing to search. This simple step makes your workflow smoother and your computer experience more convenient.
Efficient workflow: Desktop shortcuts streamline your workflow and let you access specific apps without navigating the Microsoft Store or the Start menu.
Convenience: Desktop shortcuts offer convenience, allowing you to launch your desired apps with a simple click. This makes using your computer a better experience and helps you get more done.
Was this guide helpful?

About the Author
Richard
Tech Writer, IT Professional
Richard, a writer for Geek Rewind, is a tech enthusiast who loves breaking down complex IT topics into simple, easy-to-understand ideas. With years of hands-on experience in system administration and enterprise IT operations, he’s developed a knack for offering practical tips and solutions. Richard aims to make technology more accessible and actionable. He's deeply committed to the Geek Rewind community, always ready to answer questions and engage in discussions.

[…] are multiple ways to install the app. You can get it from the Microsoft Store, download its executable and install or use the winget […]
[…] the command line or shortcut, you can open Edge InPrivate browsing window. Below are the commands to do […]